In our previous article, we discussed how to manage serial numbers (S/N) in Odoo 9/10 using the Ventor (formerly mERP Warehouse) application. Now it’s time to discuss how to receive and deliver items by lot number in Odoo 9/10.
Lot numbers are used for additional information, such as tracking manufactured dates, expiry dates, and other information that usually combines products by defined parameters. For example, a milk company could make 100 boxes of milk in a 12-hour shift. Each box contains 10 bottles of milk, and all the boxes made within that shift can be labeled with the same lot number to track the milk’s expiration date.
Receiving Goods with Lot Numbers
Technically, receiving items by lot number is very similar to S/N. The main differences are that you can apply one lot number to many quantities of one product. Meanwhile, each S/N is unique, and one S/N is related to only one item.
Prerequisites
- Make sure receiving products are set with “Tracking by Lot”
– The shipping order should be created in Odoo (manually or based on PO) before delivery
User case
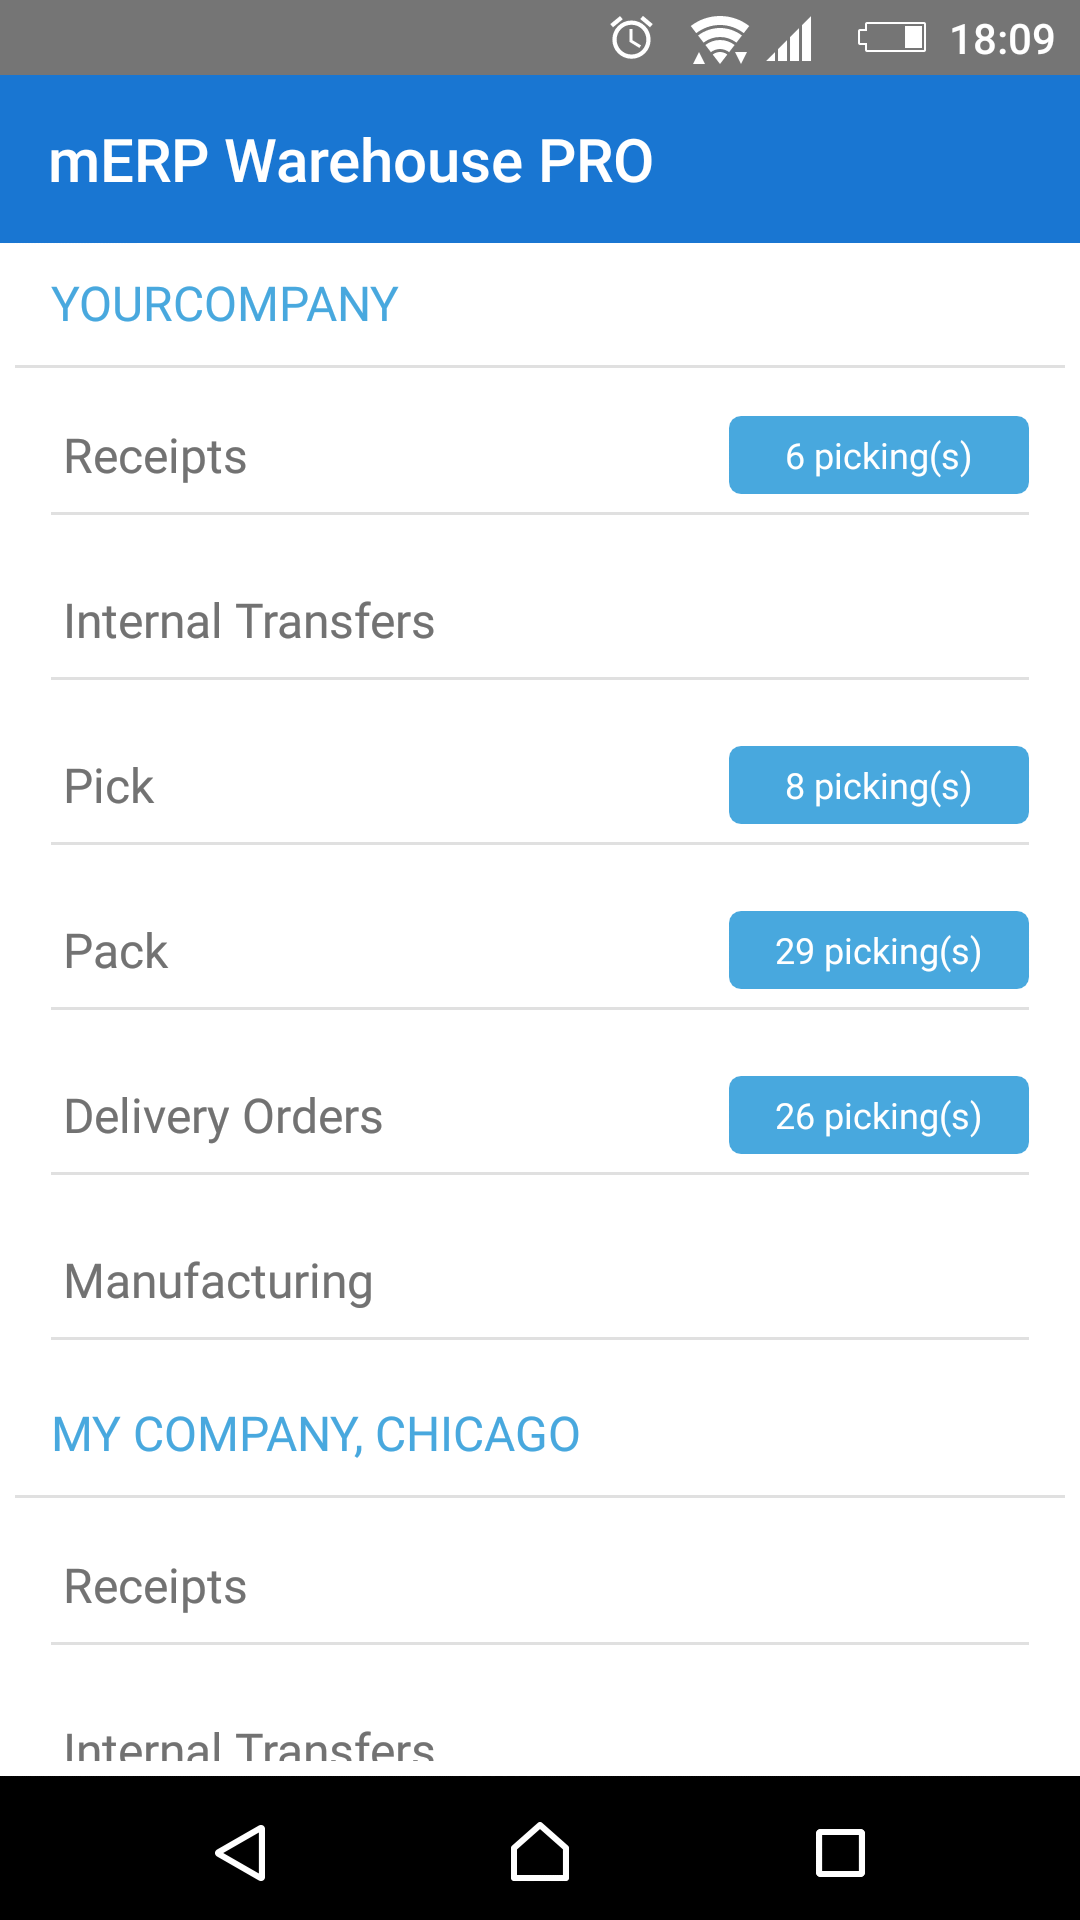
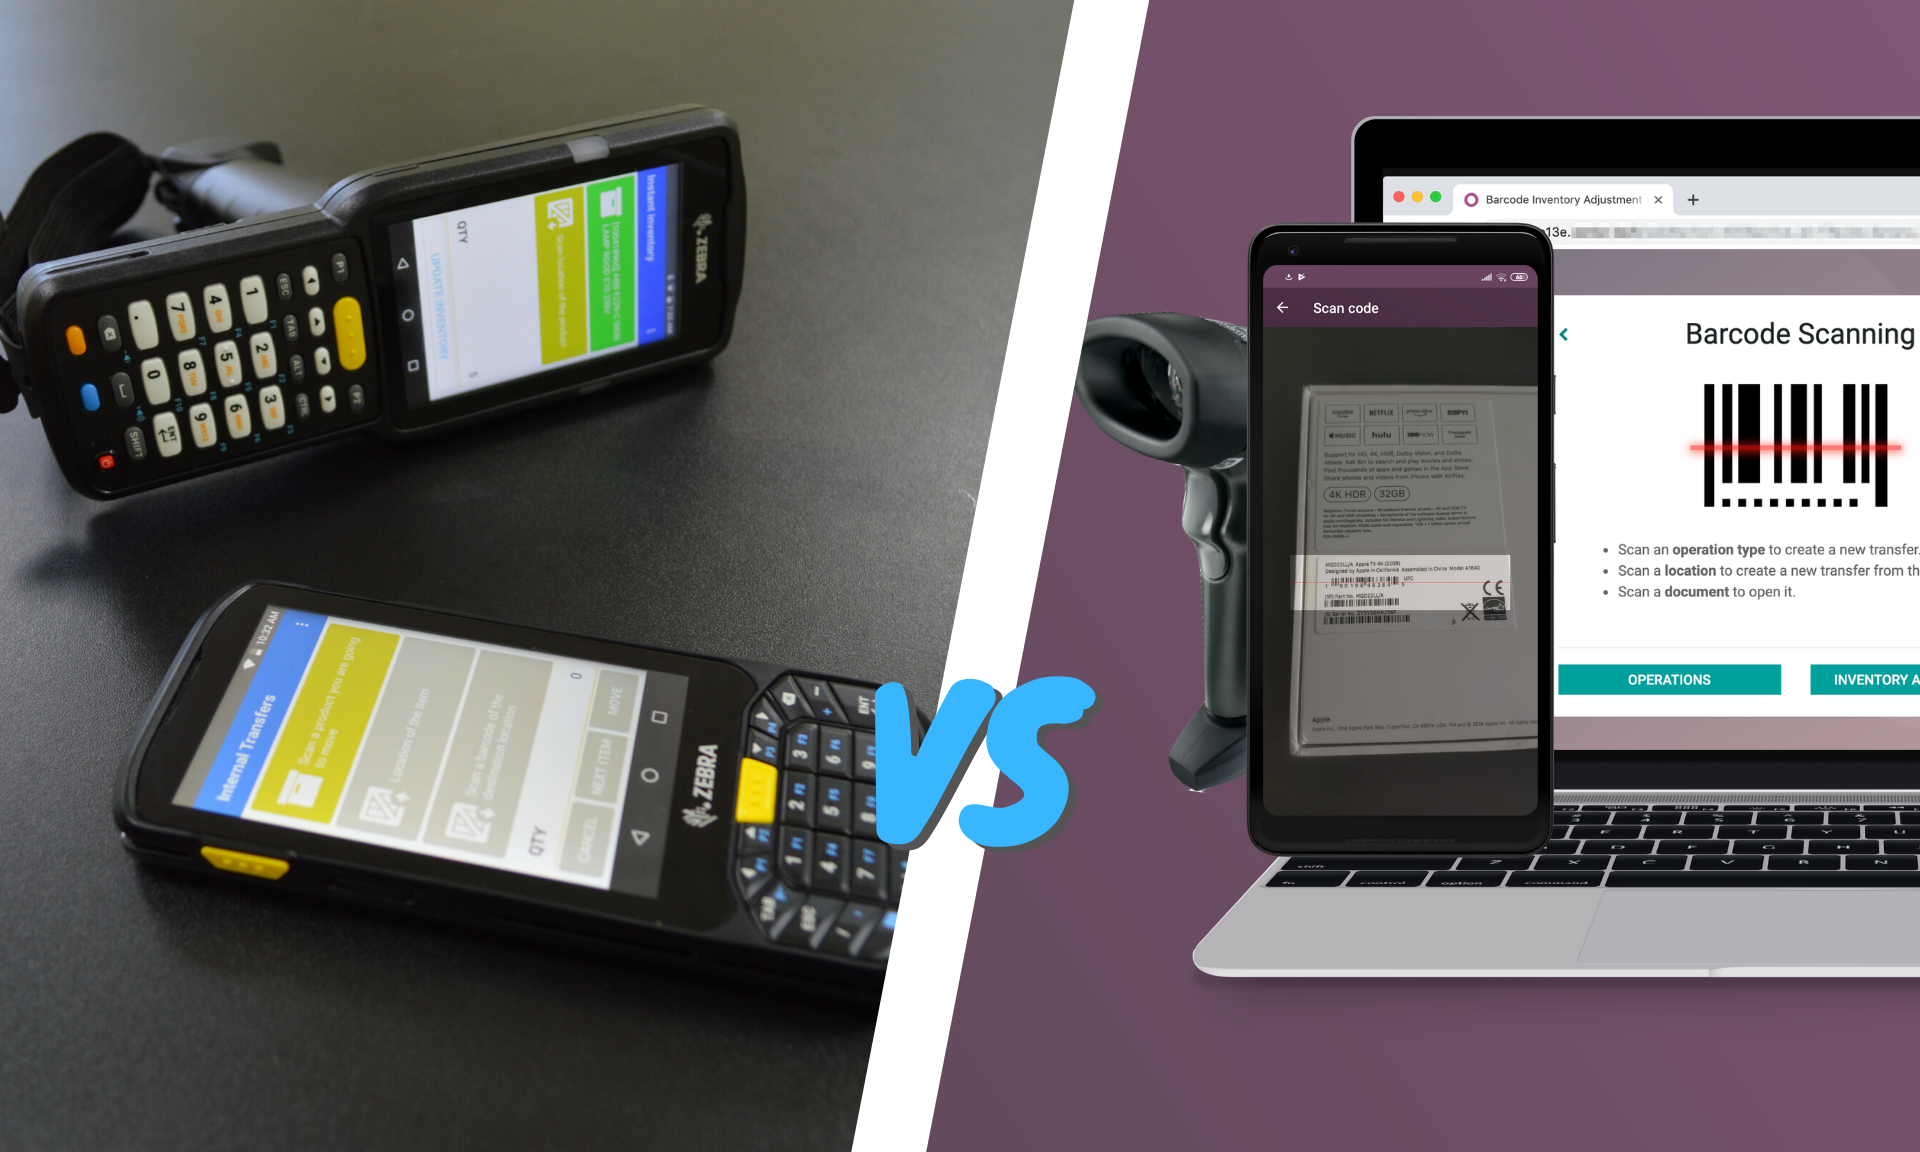
1. The user takes a scanner (or mobile phone) and goes to a truck to receive products
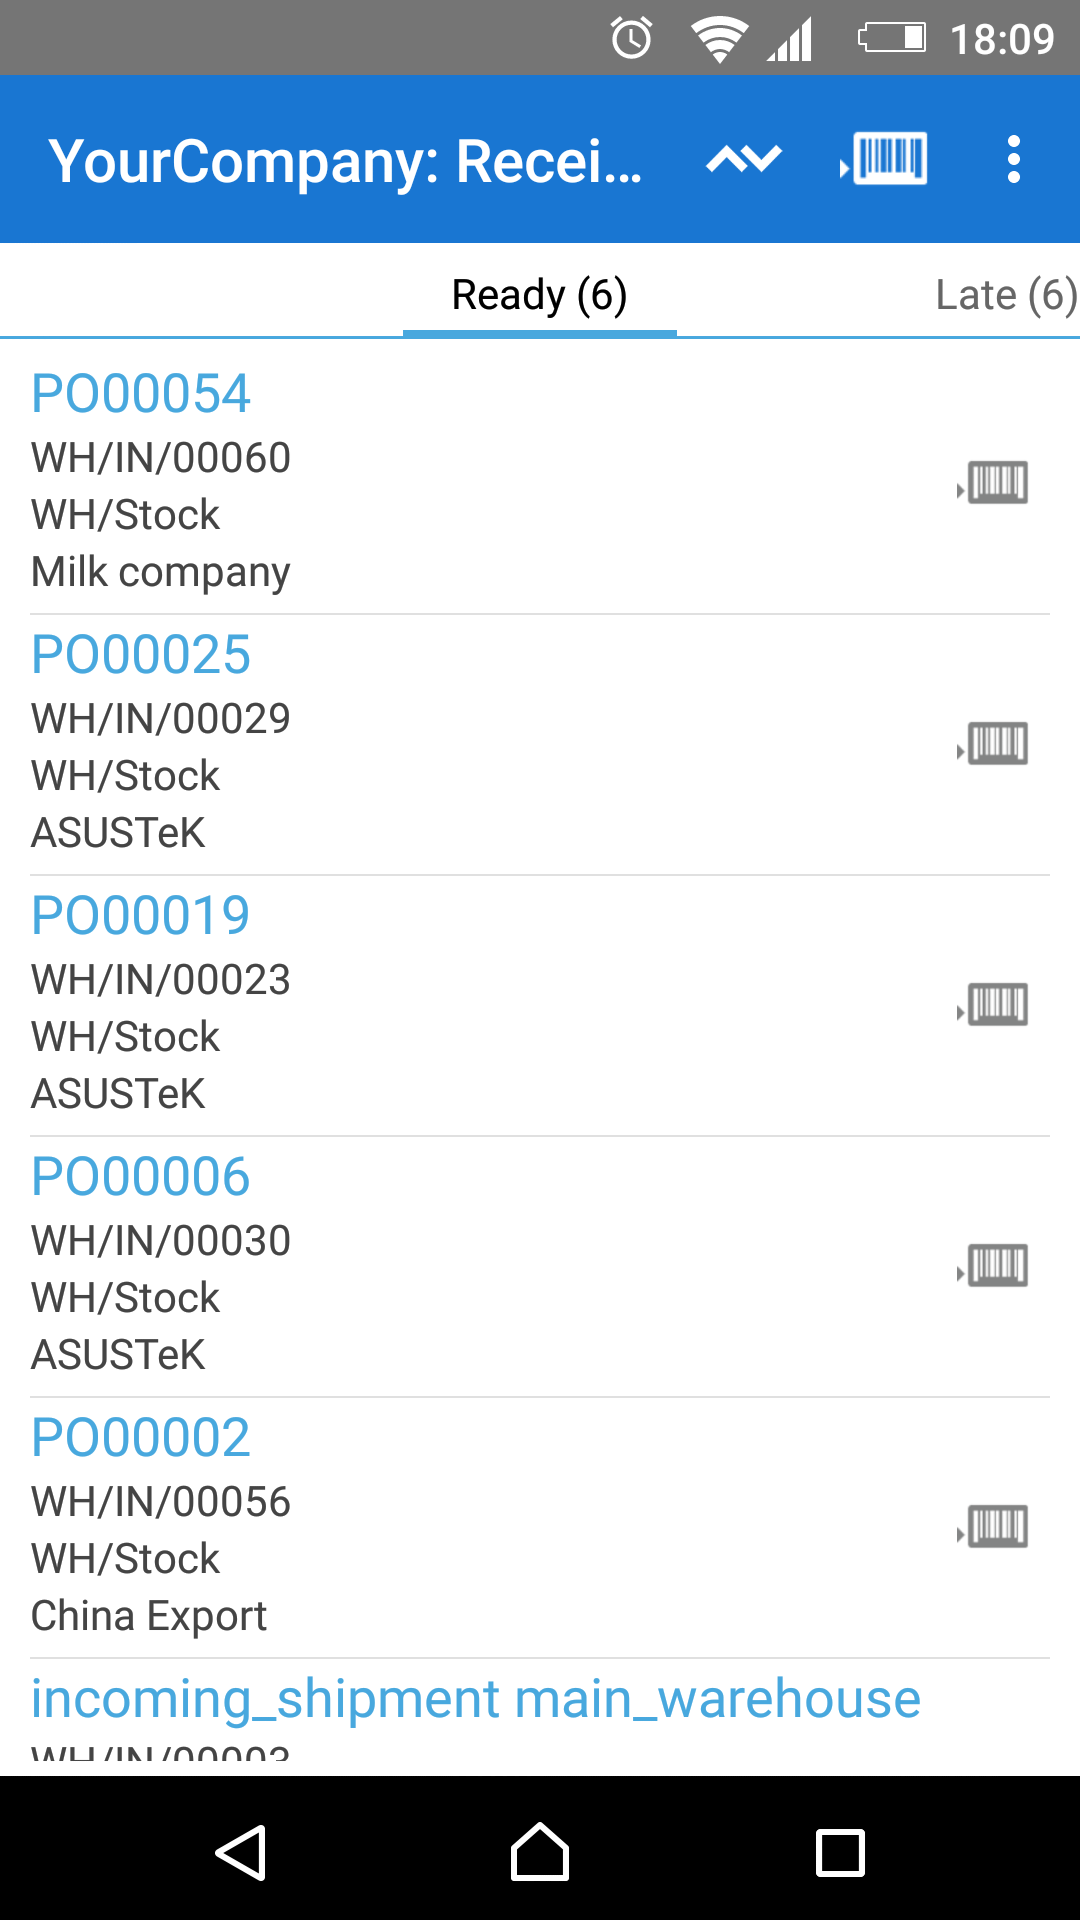
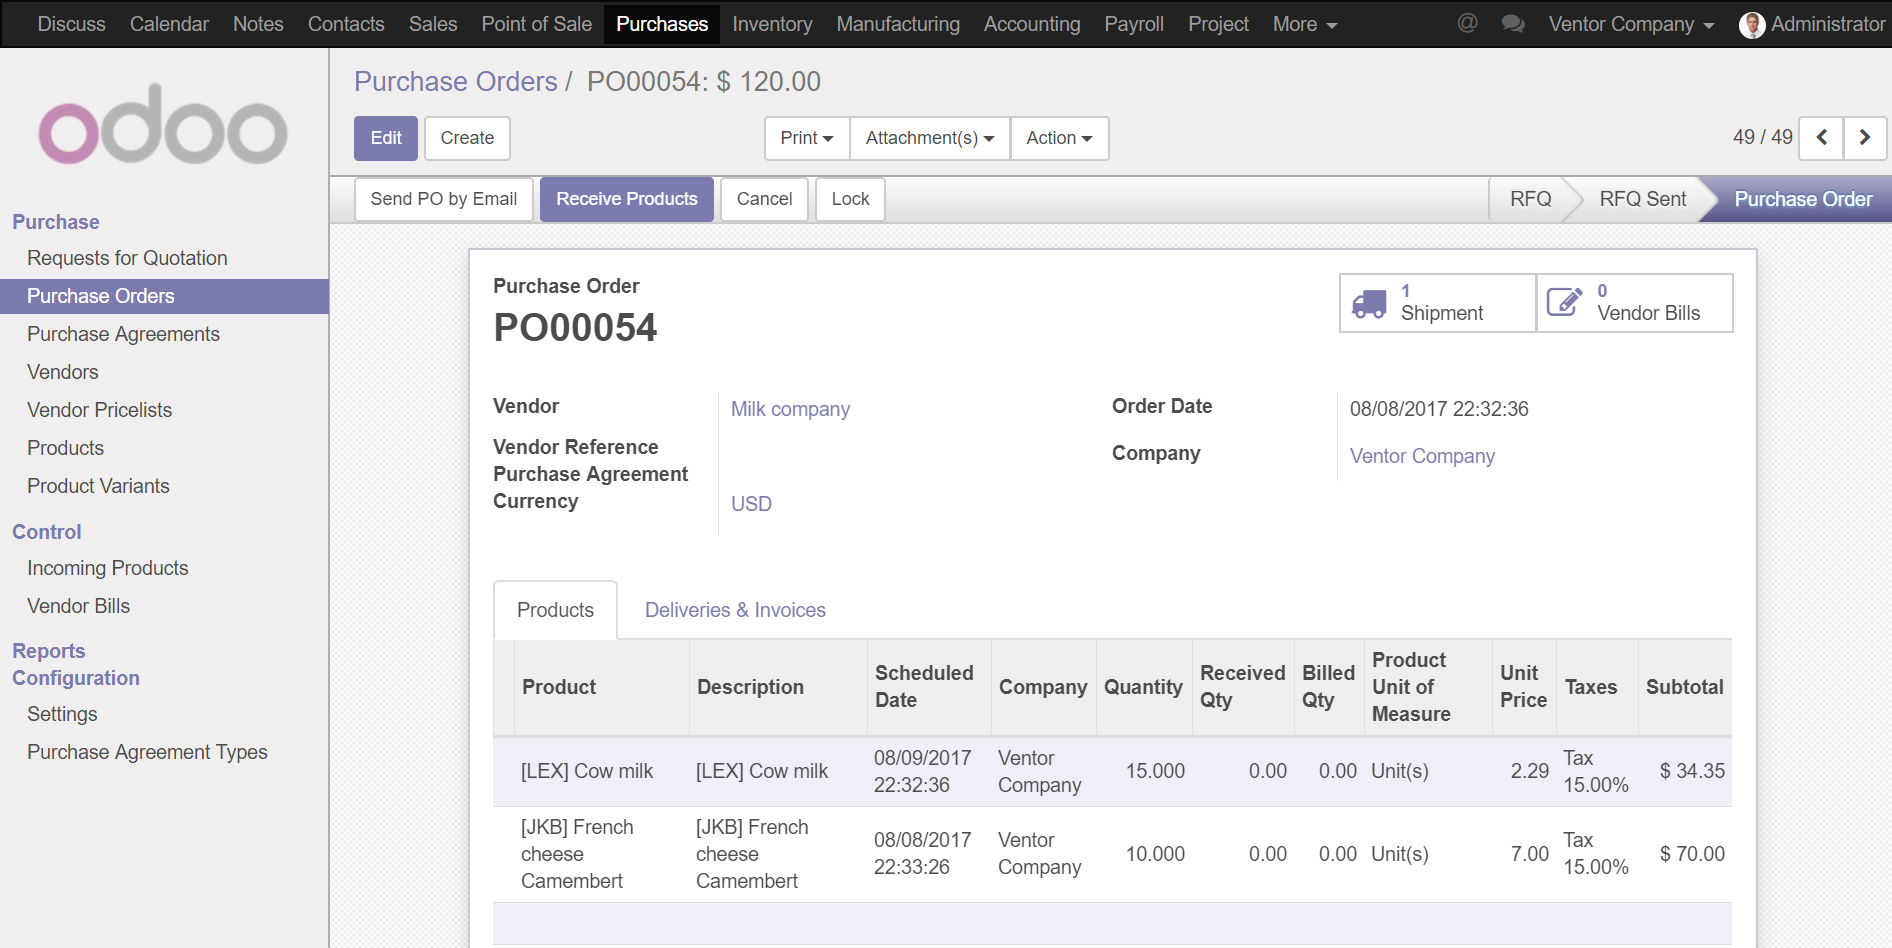
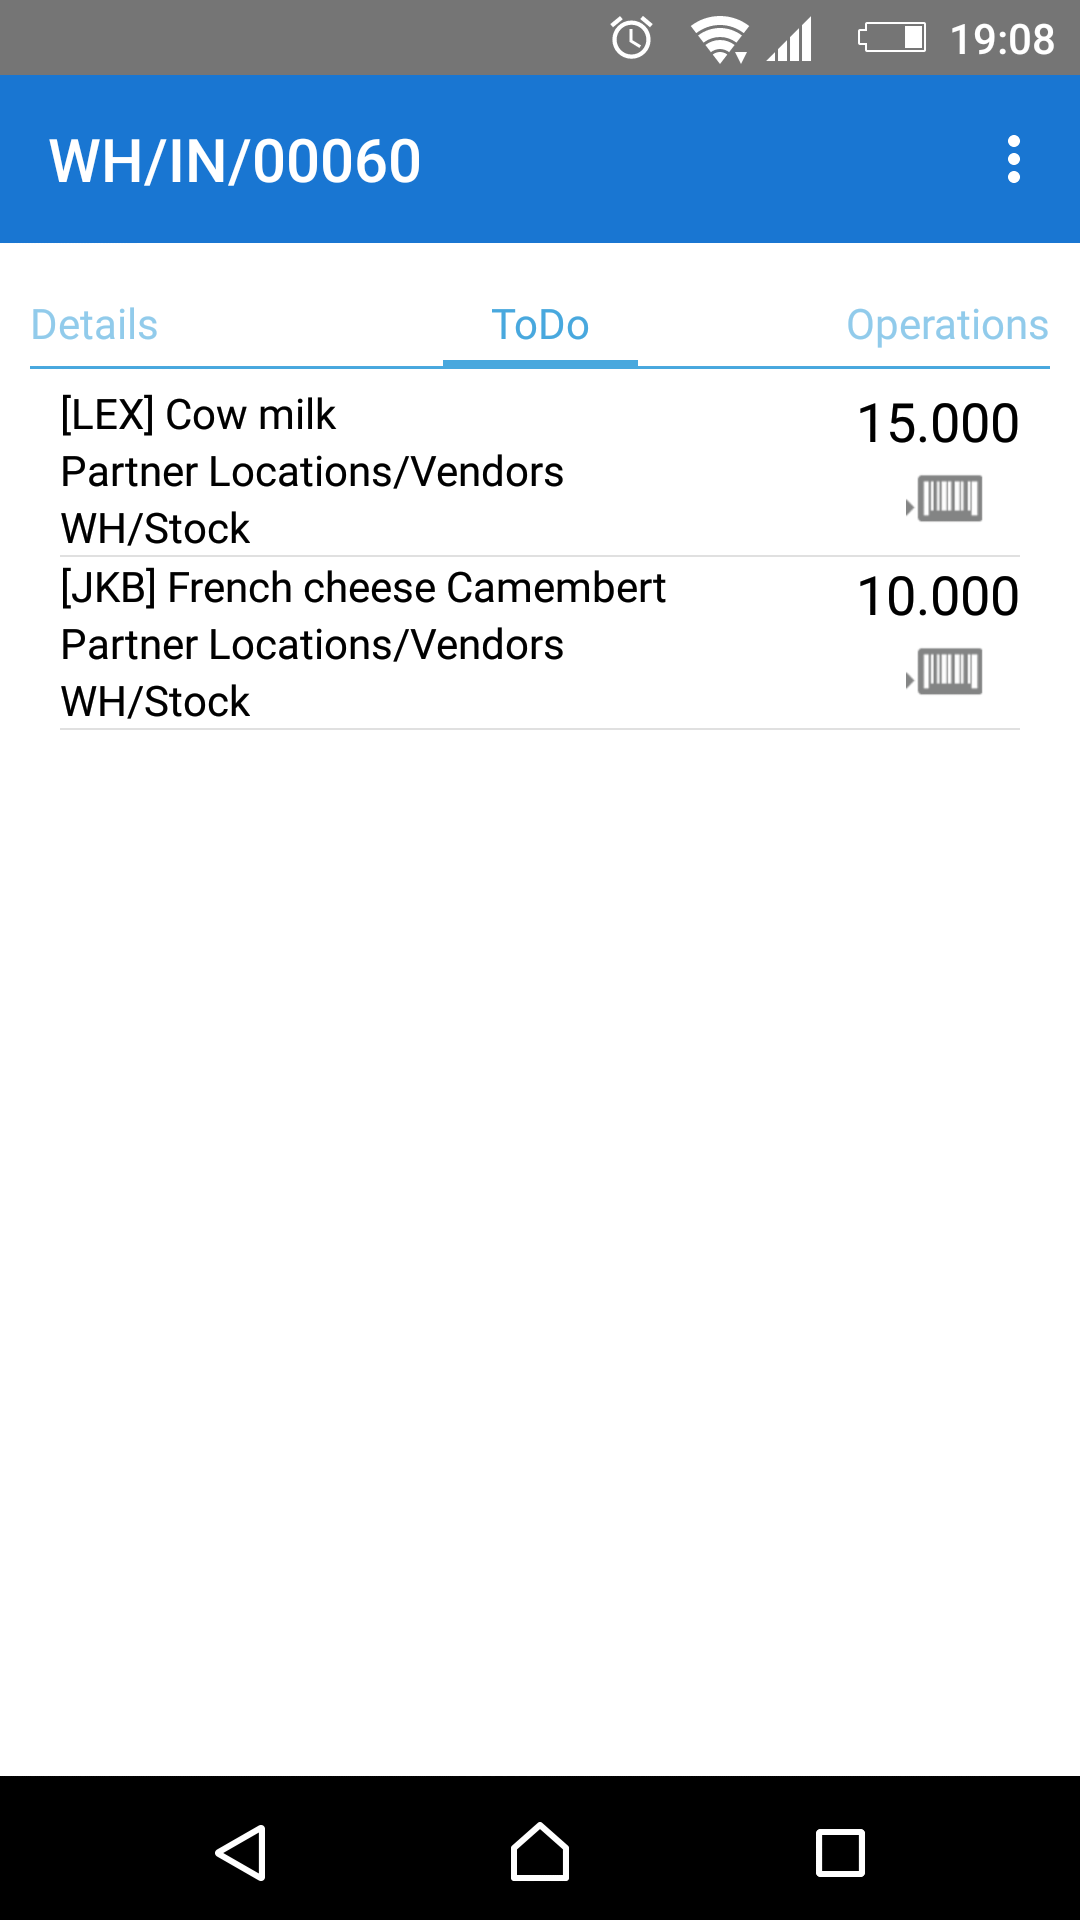
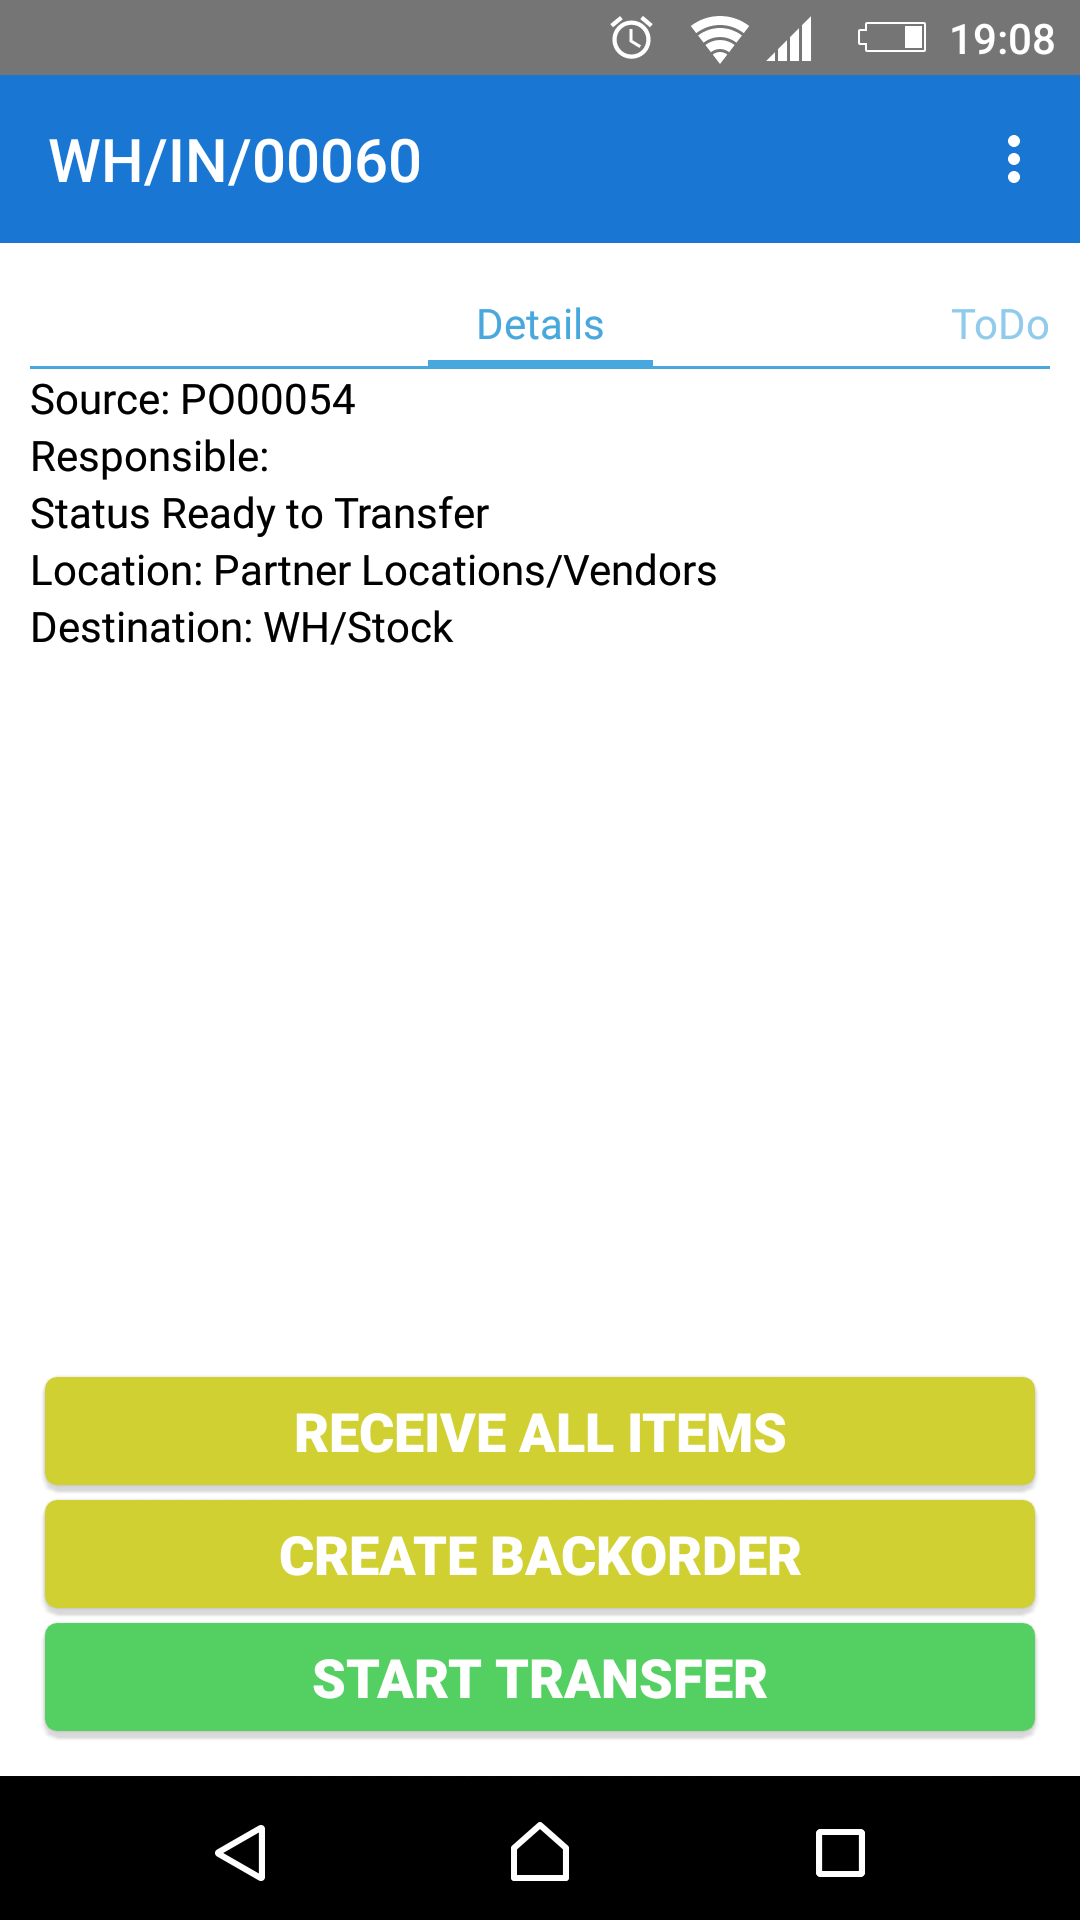
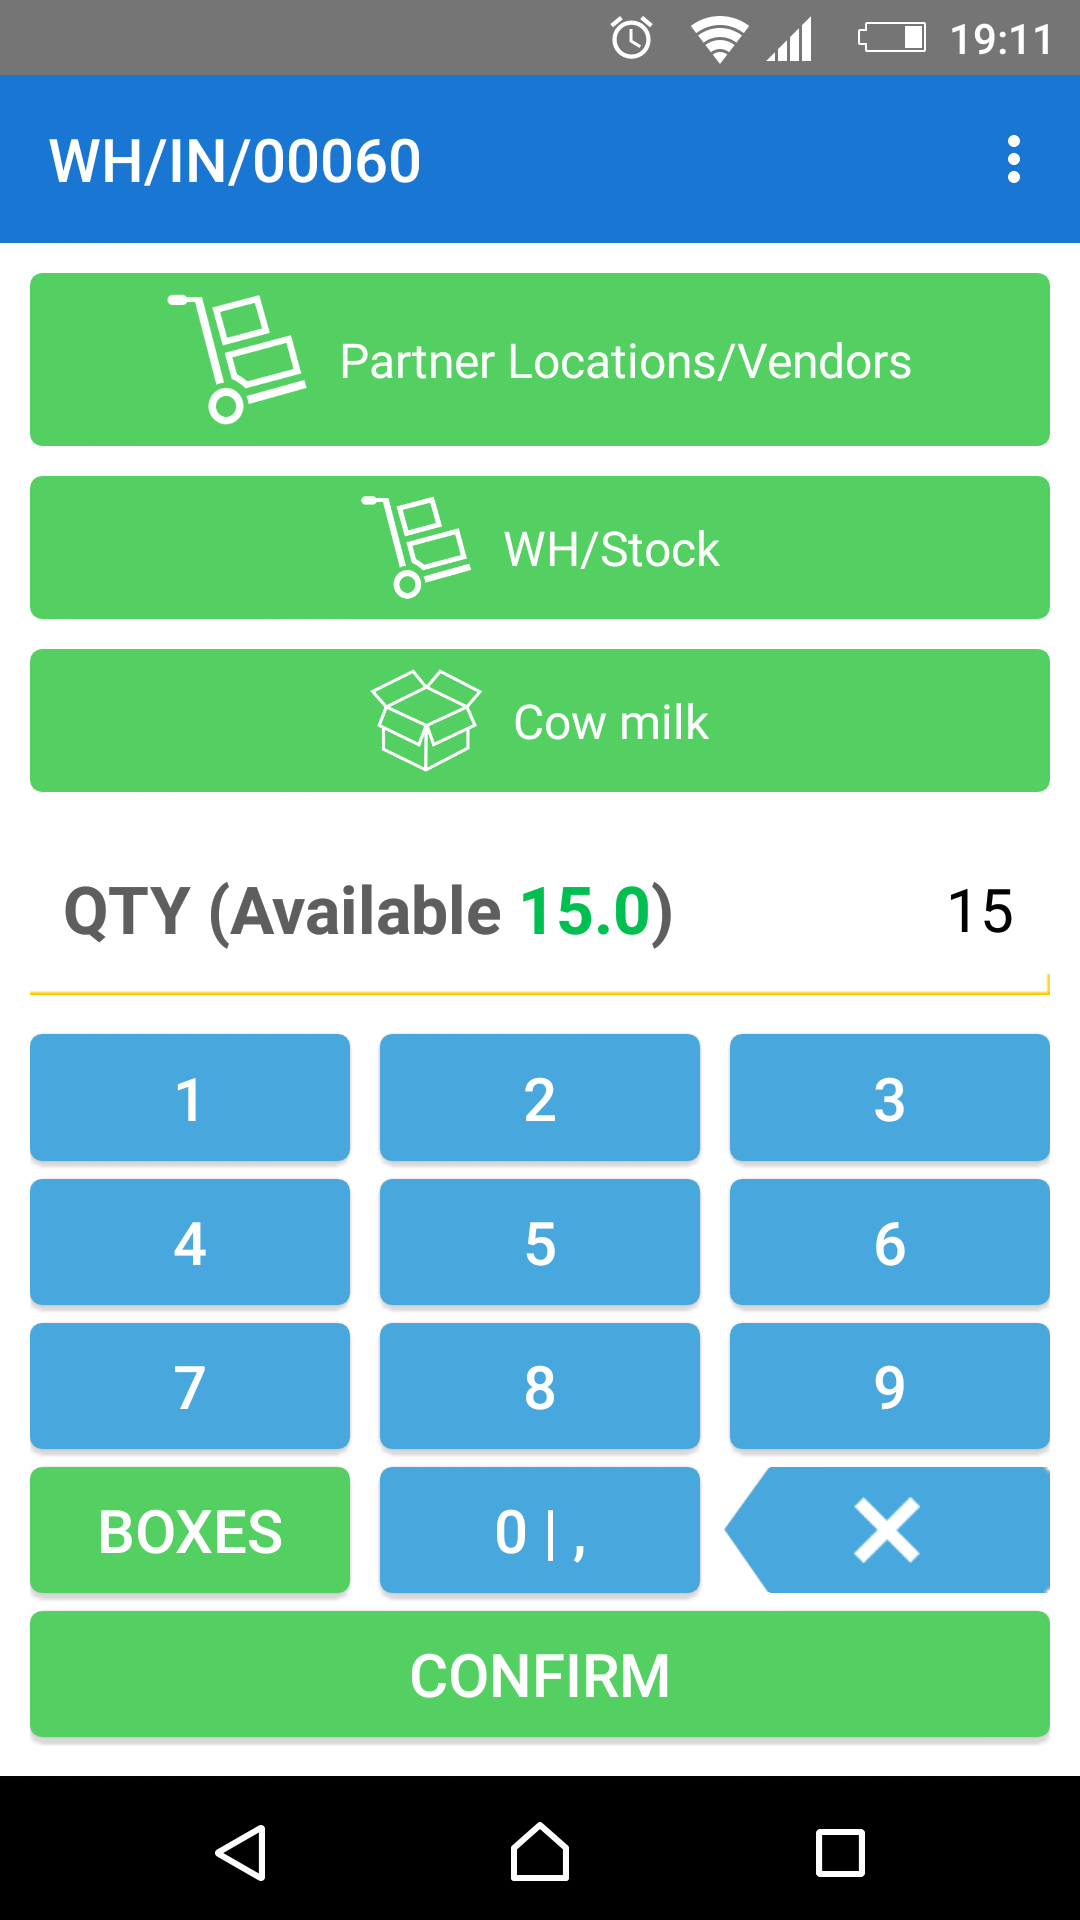
2. He opens the appropriate transfers that were created by PO00054 (Warehouse operations > Receipts > WH/IN/00060) and clicks “Start Transfer”. In this example, we have two items: French cheese and cow milk
3. If the item has been set as “Tracking by Lot,” the user does the following:
a. Scan the barcode of the first item from the truck (in our example case, we have only one product)
b. The user goes to the additional menu (accessed by clicking on the three dots at the top right corner) and clicks on “Manage Serials/Lots” to create a new “lot number” for the product. Usually, you will need to create a new lot for incoming goods. However, it is possible to choose from existing lot numbers if you have appropriate settings selected in Odoo
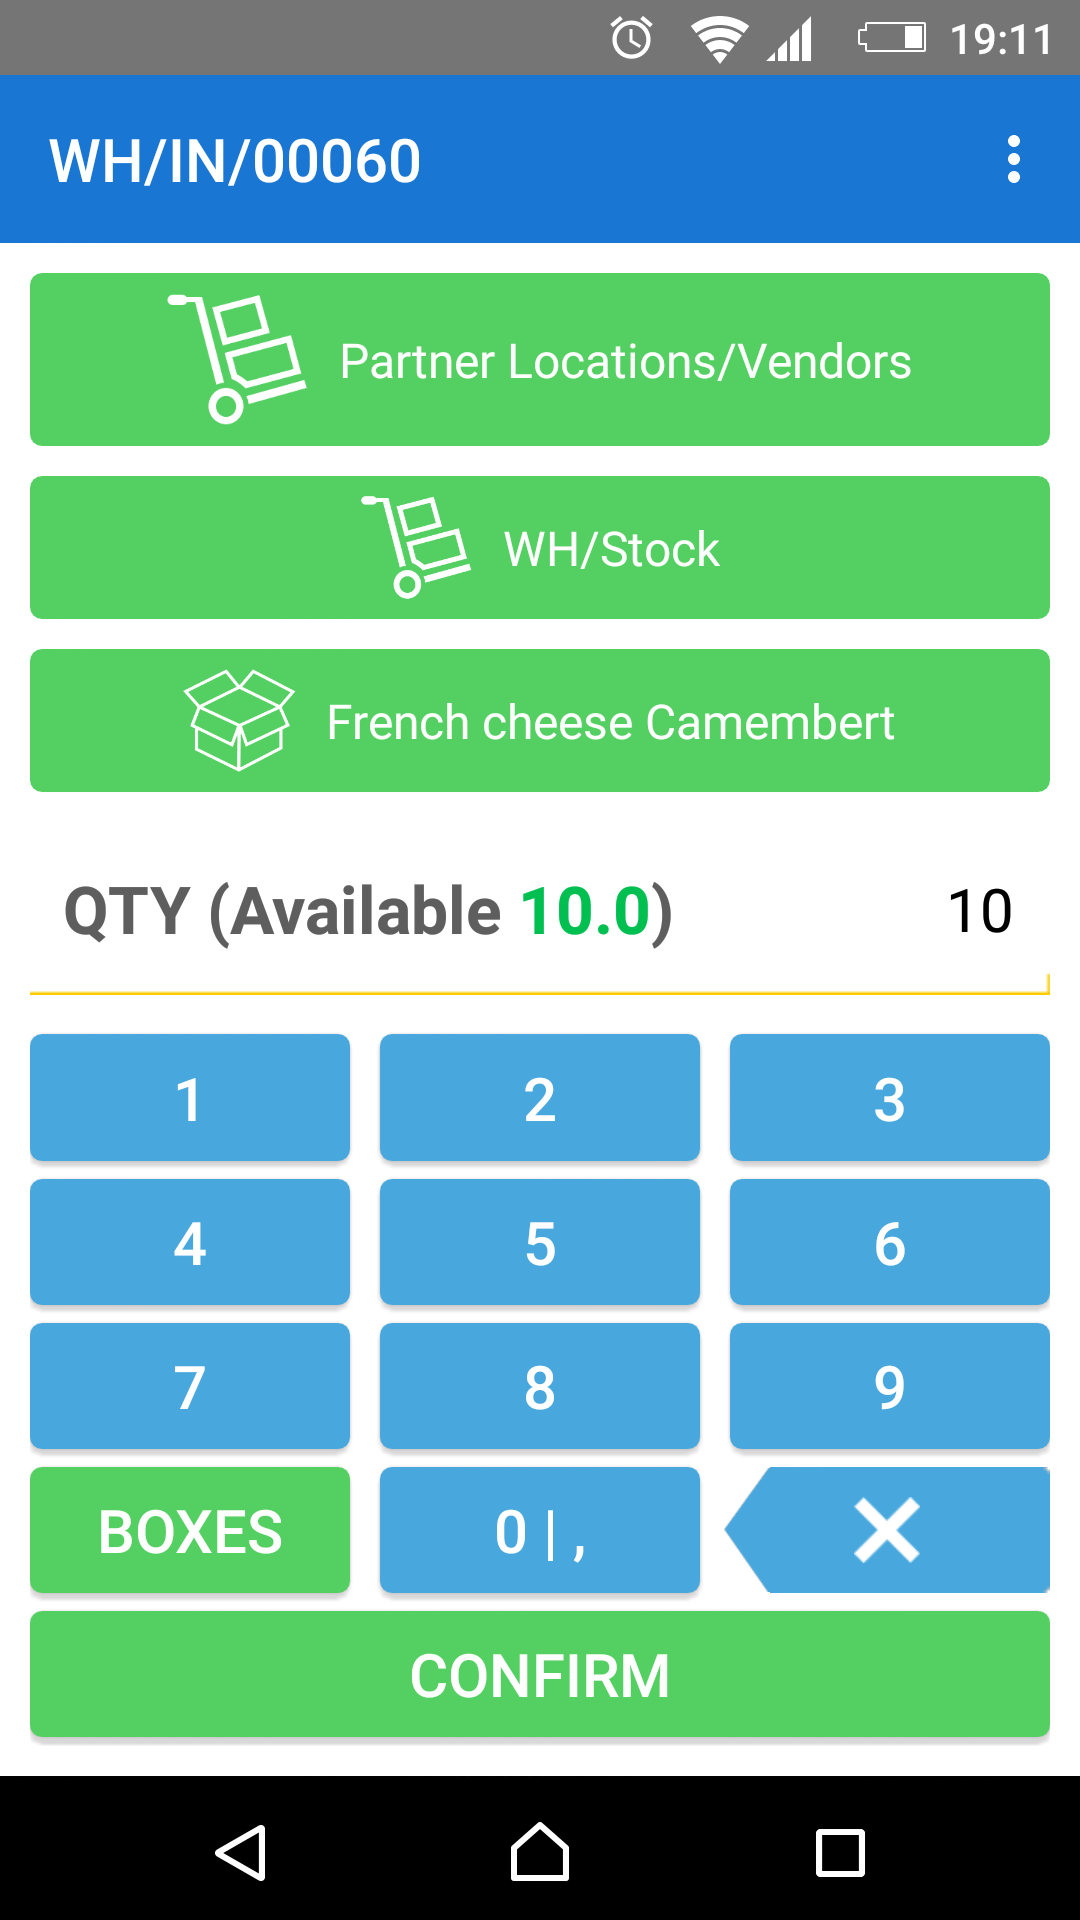
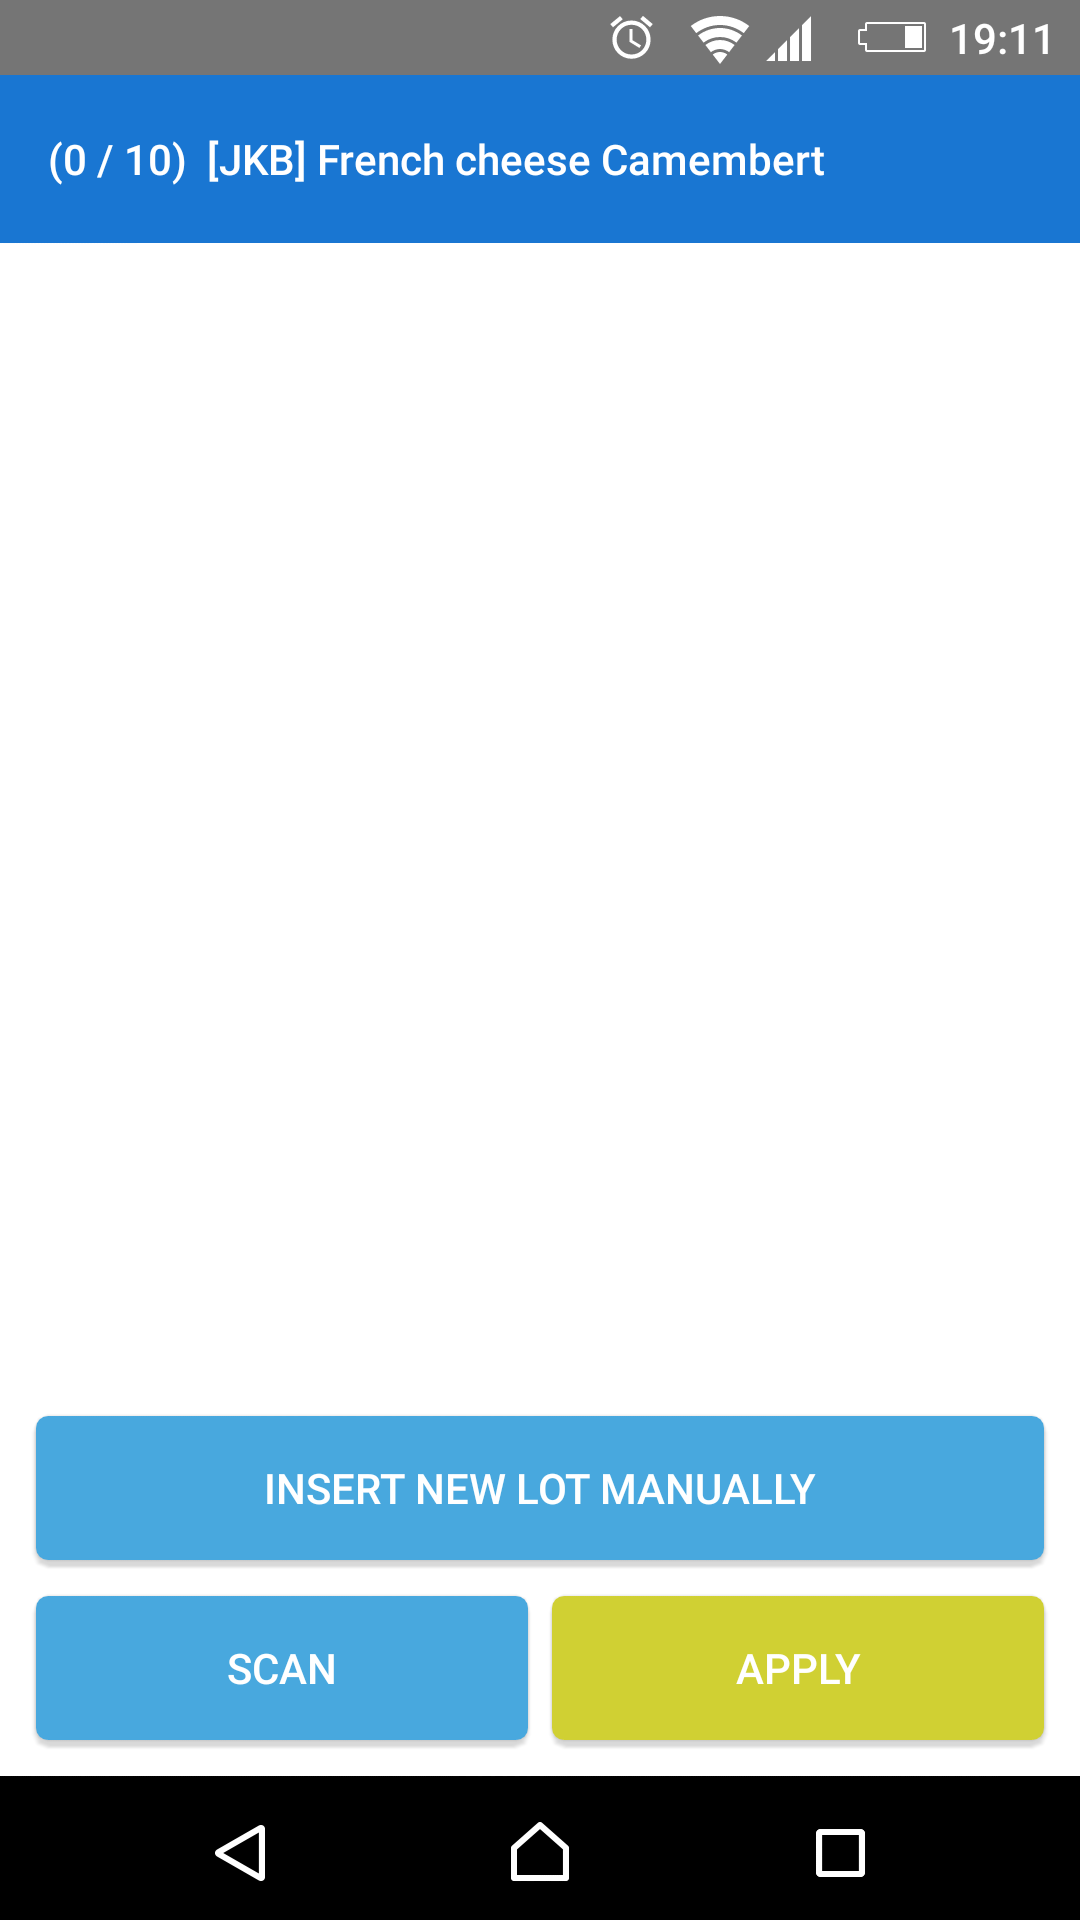
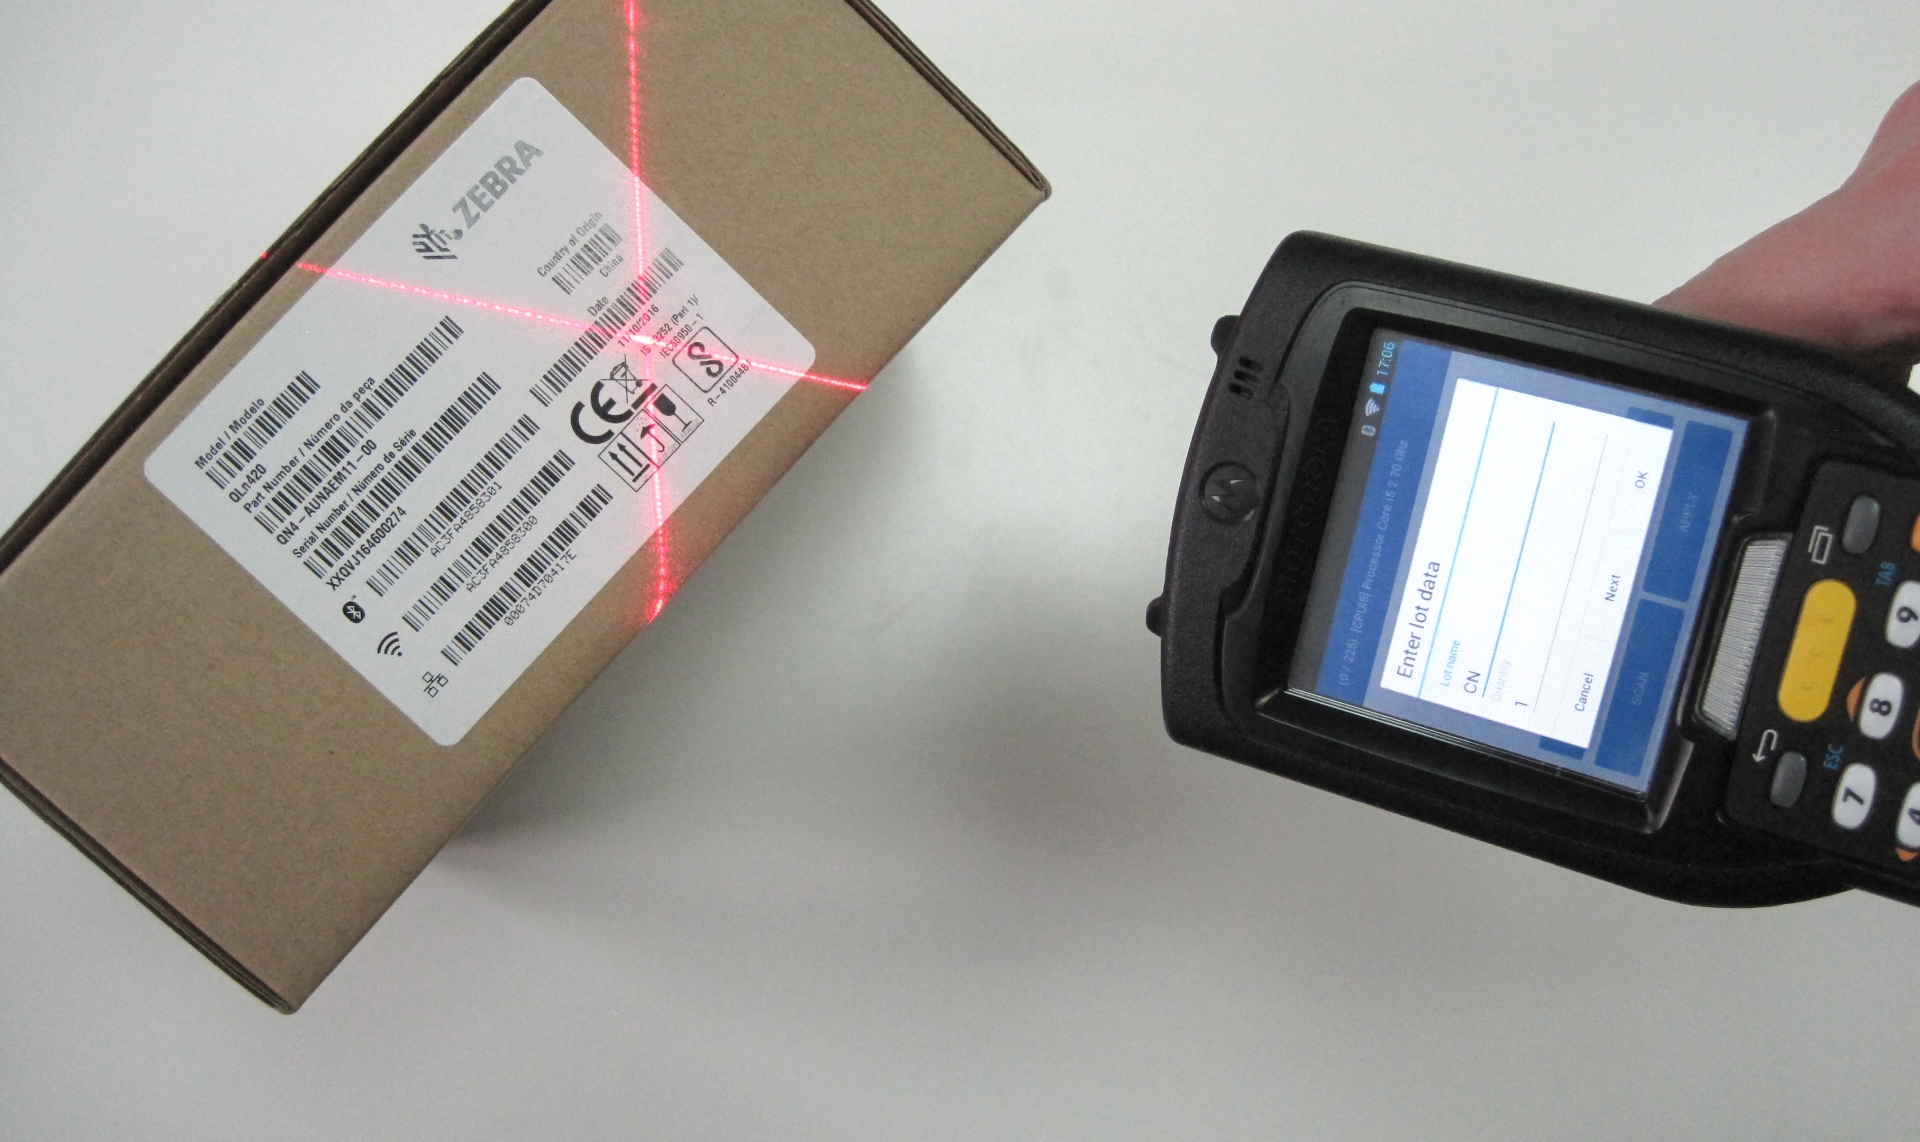
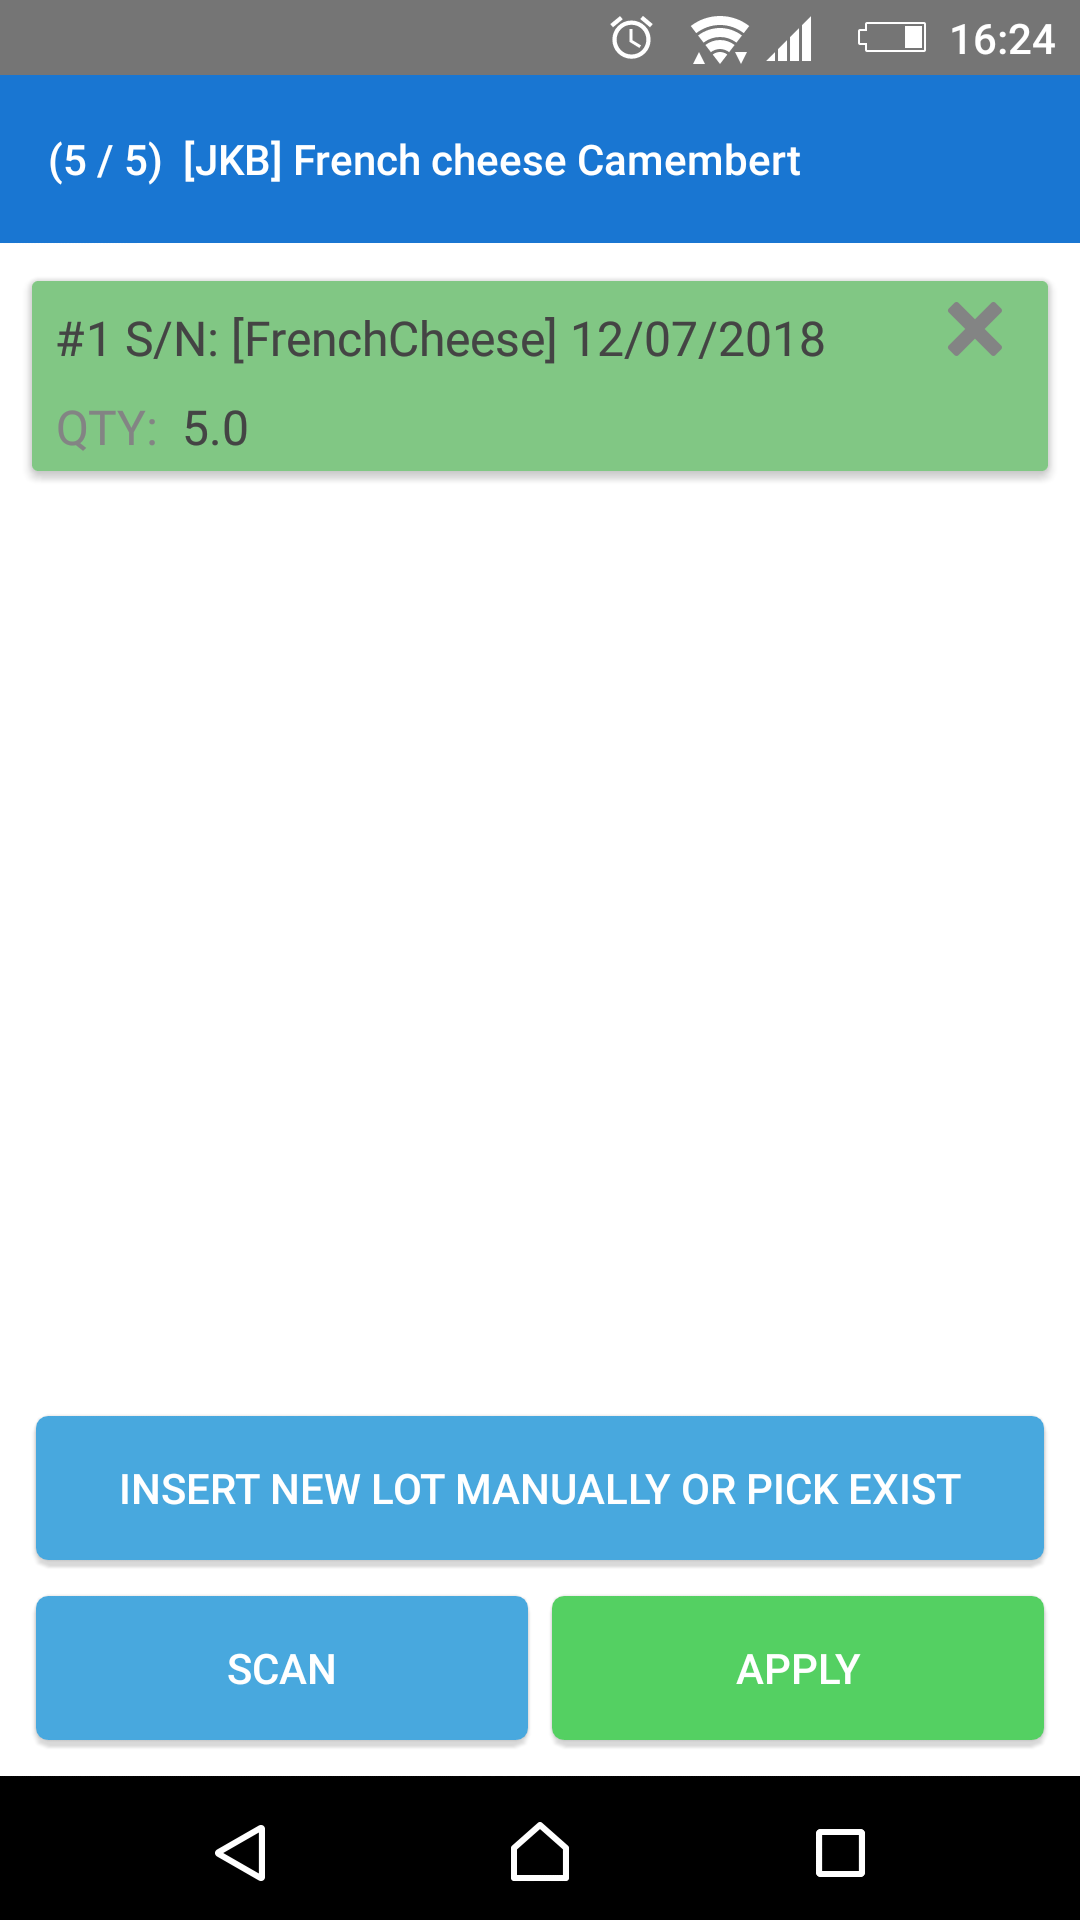
c. At the new screen, the user can see the name of the item and product quantity (QTY) he needs to receive. The user can scan the lot number if it has already been placed on the product as a barcode). Also, the user can manually insert a name of the lot using the “Insert New Lot manually” button. Please note that if you use a laser barcode scanner (like ScanSKU) and not a mobile phone, you simply need to click on the built-in hardware button to activate the laser scanner and scan the item
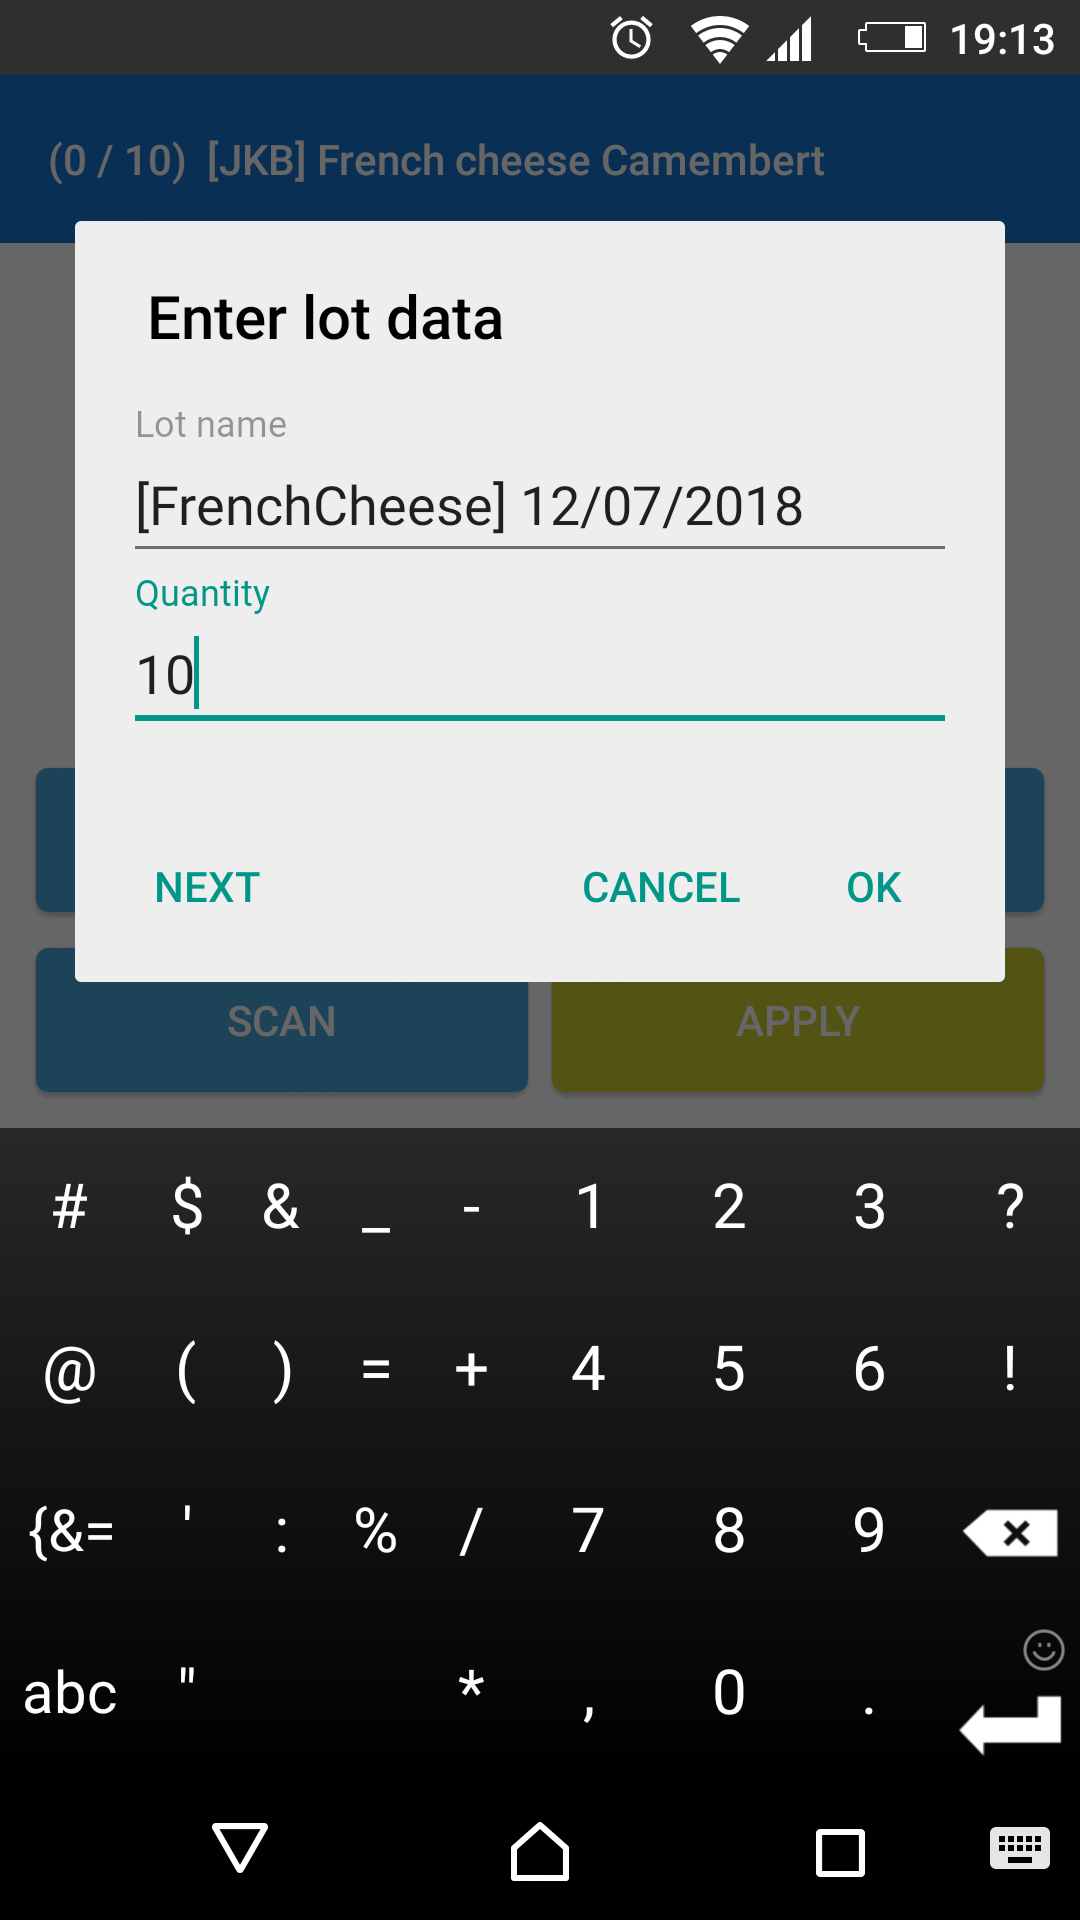
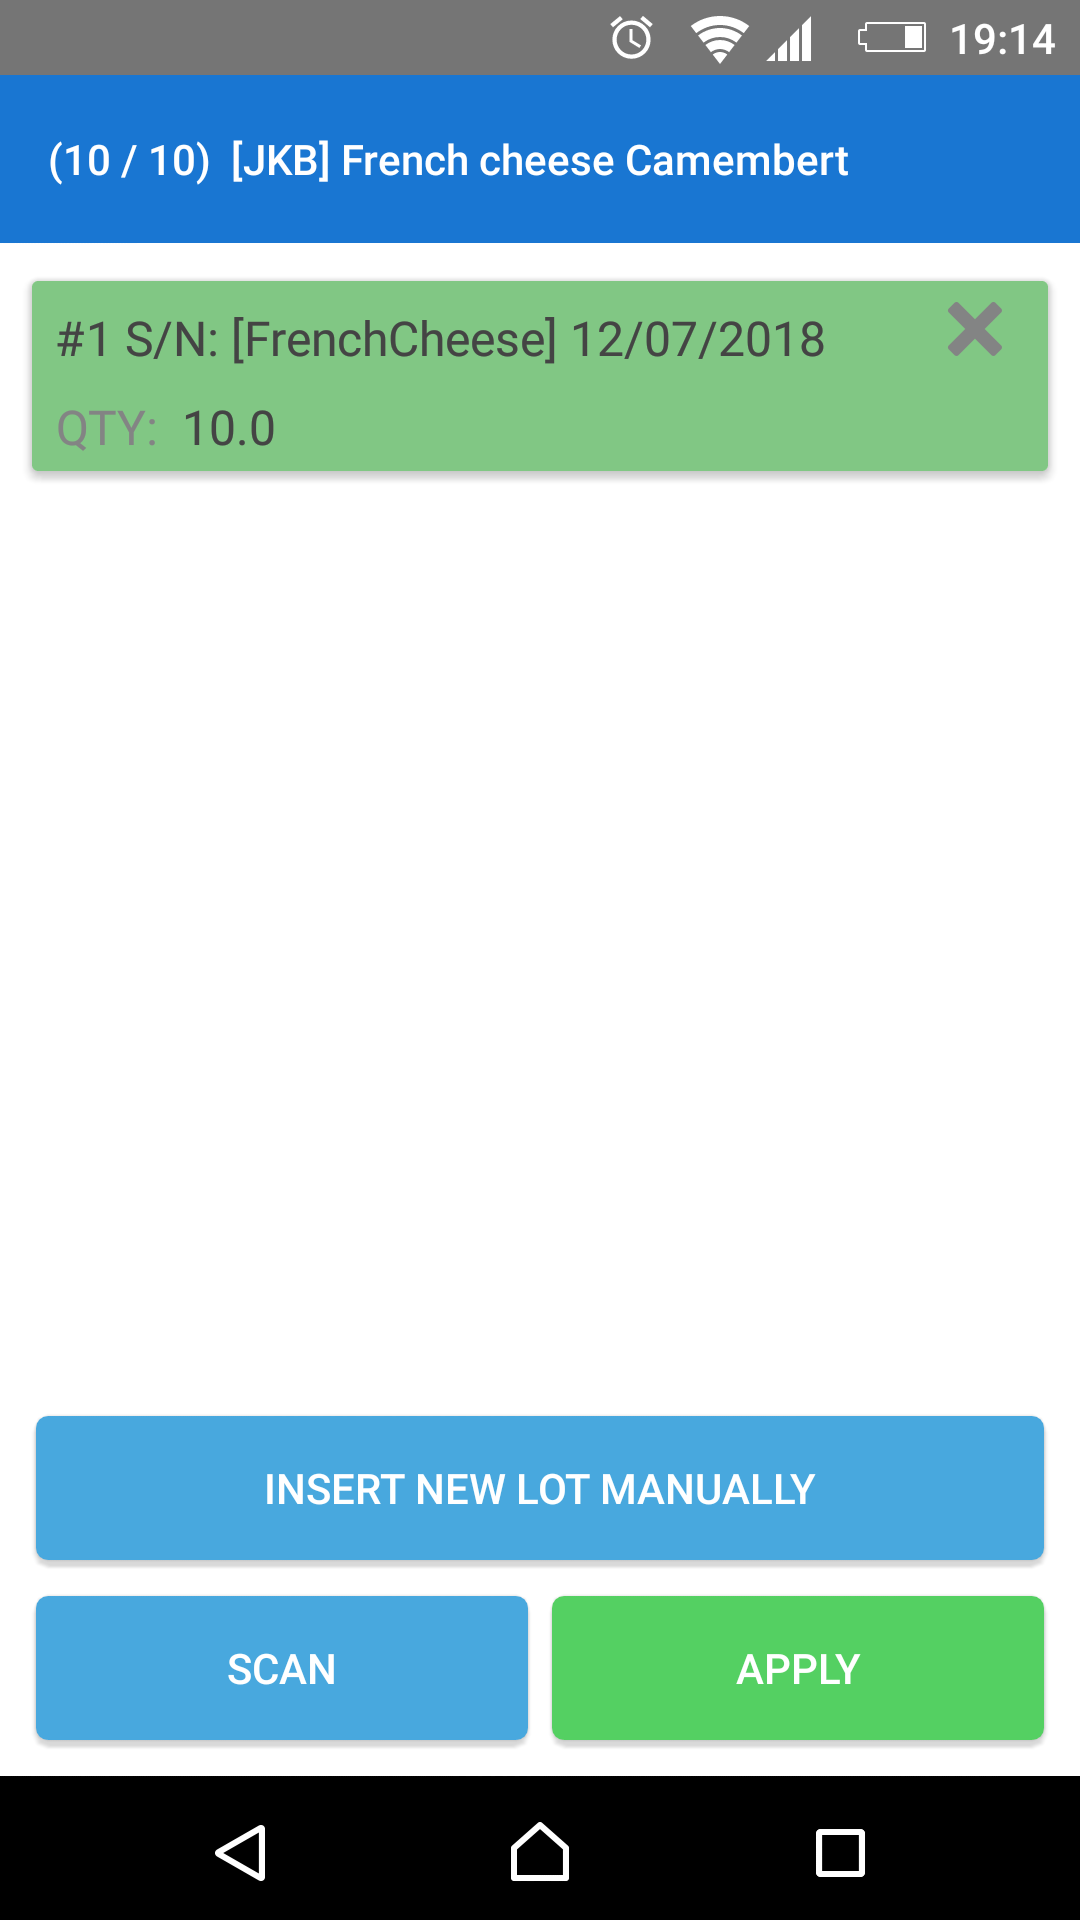
d. After all the information about the lot is added, the user clicks “Apply”
e. Next, the user can click “Confirm”, and all items go to the warehouse with the appropriate lot number
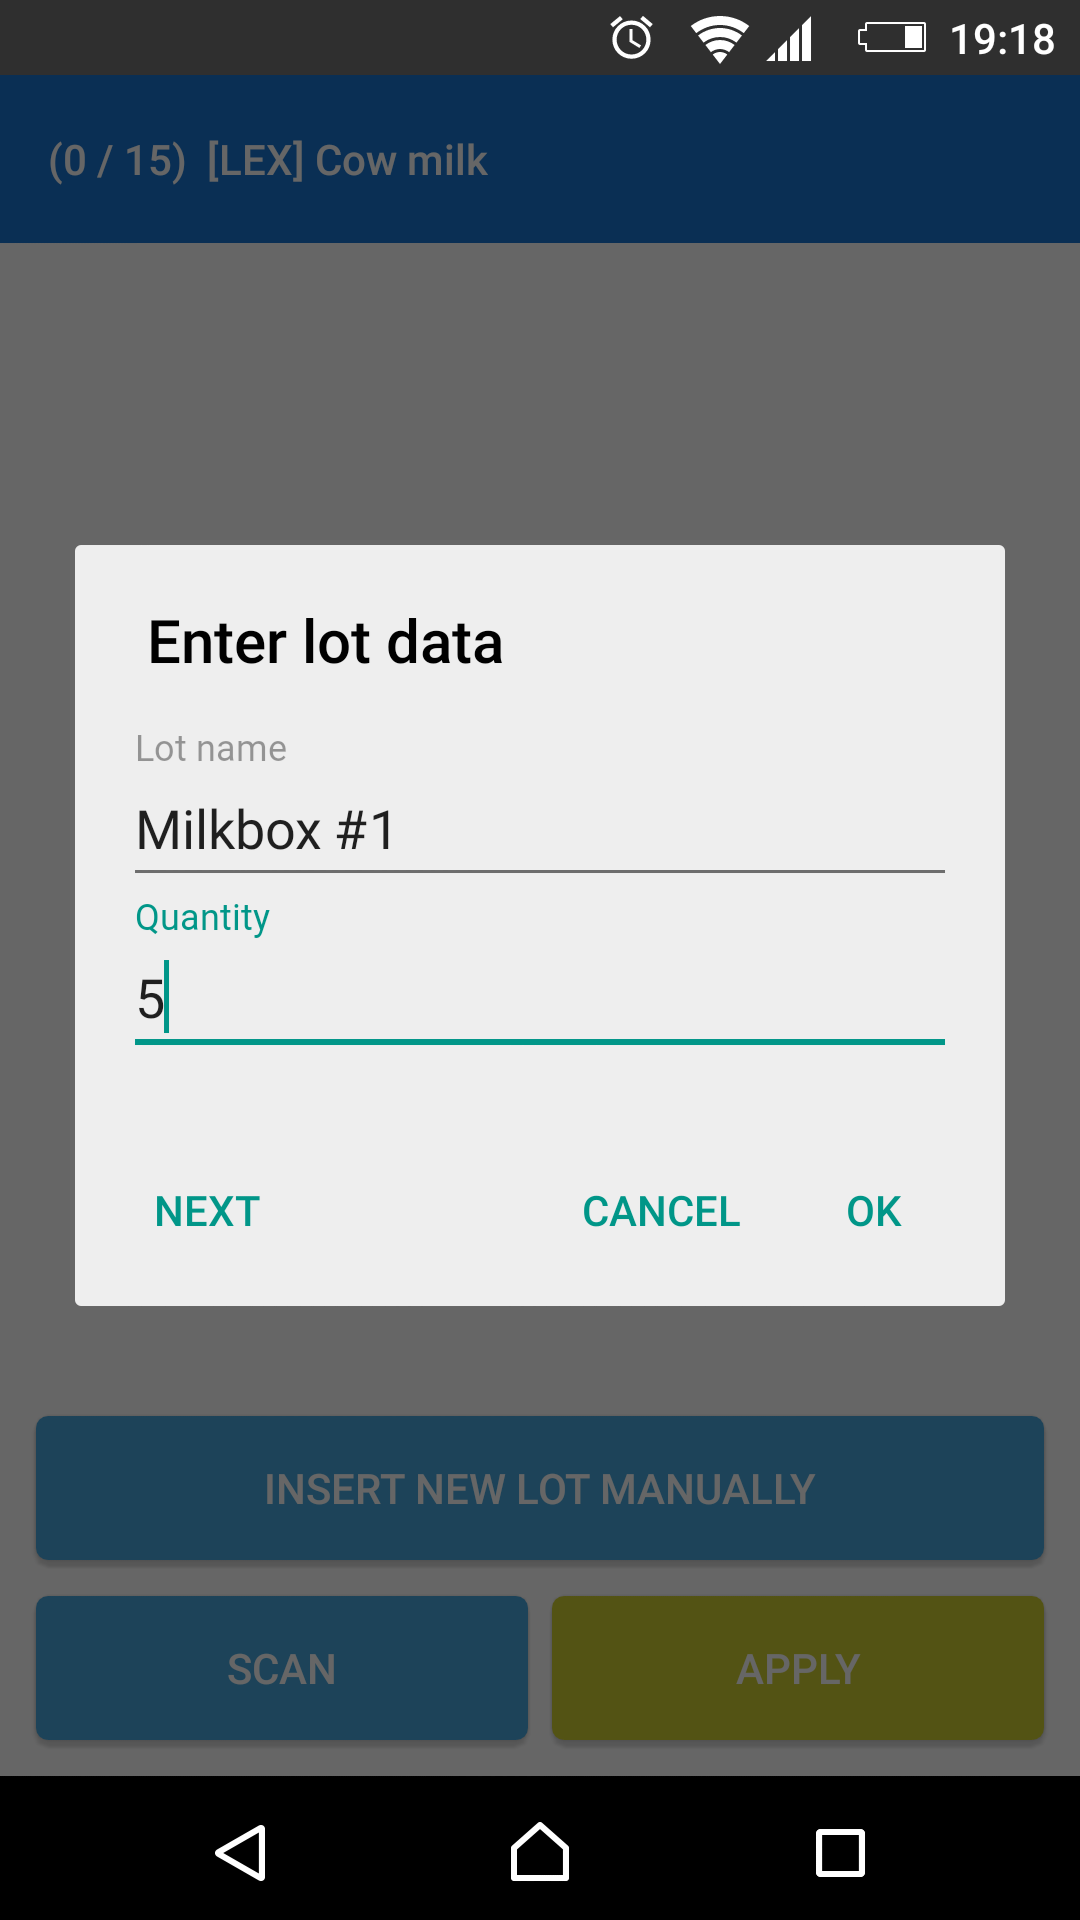
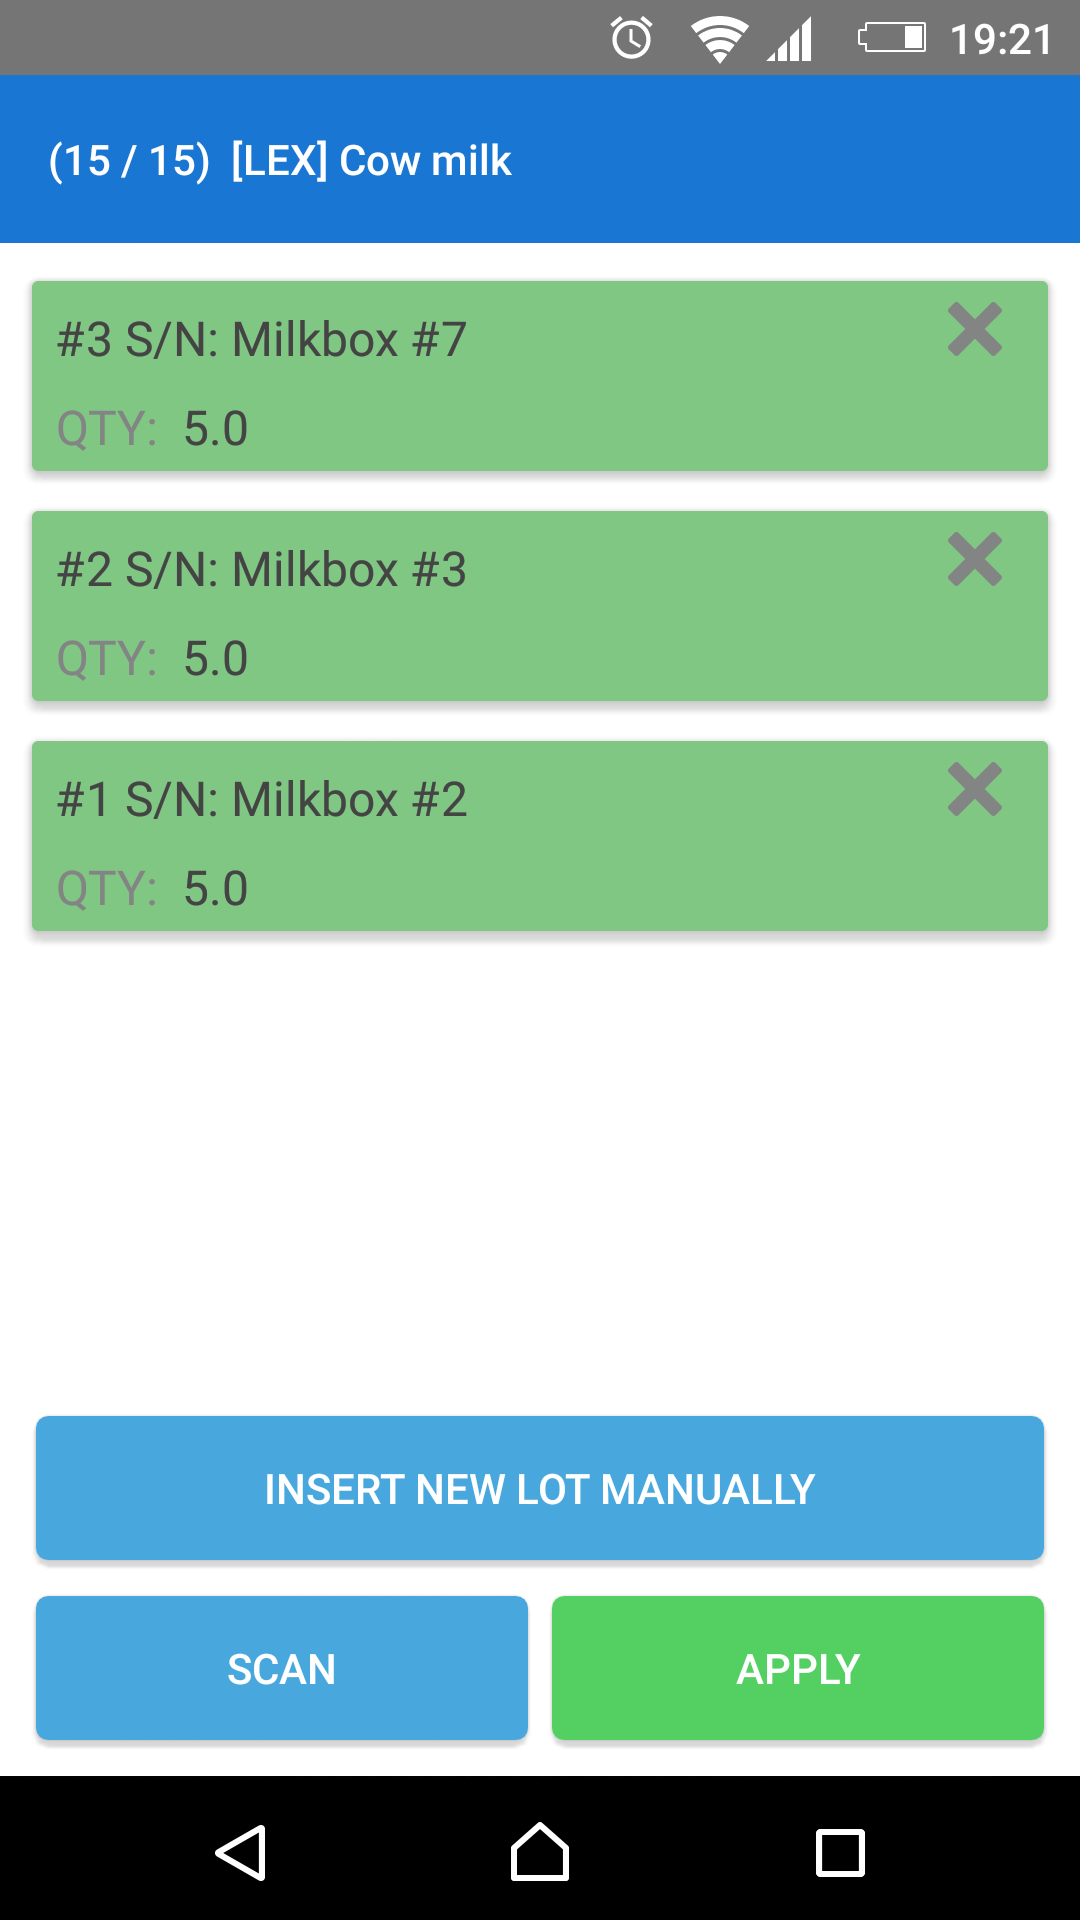
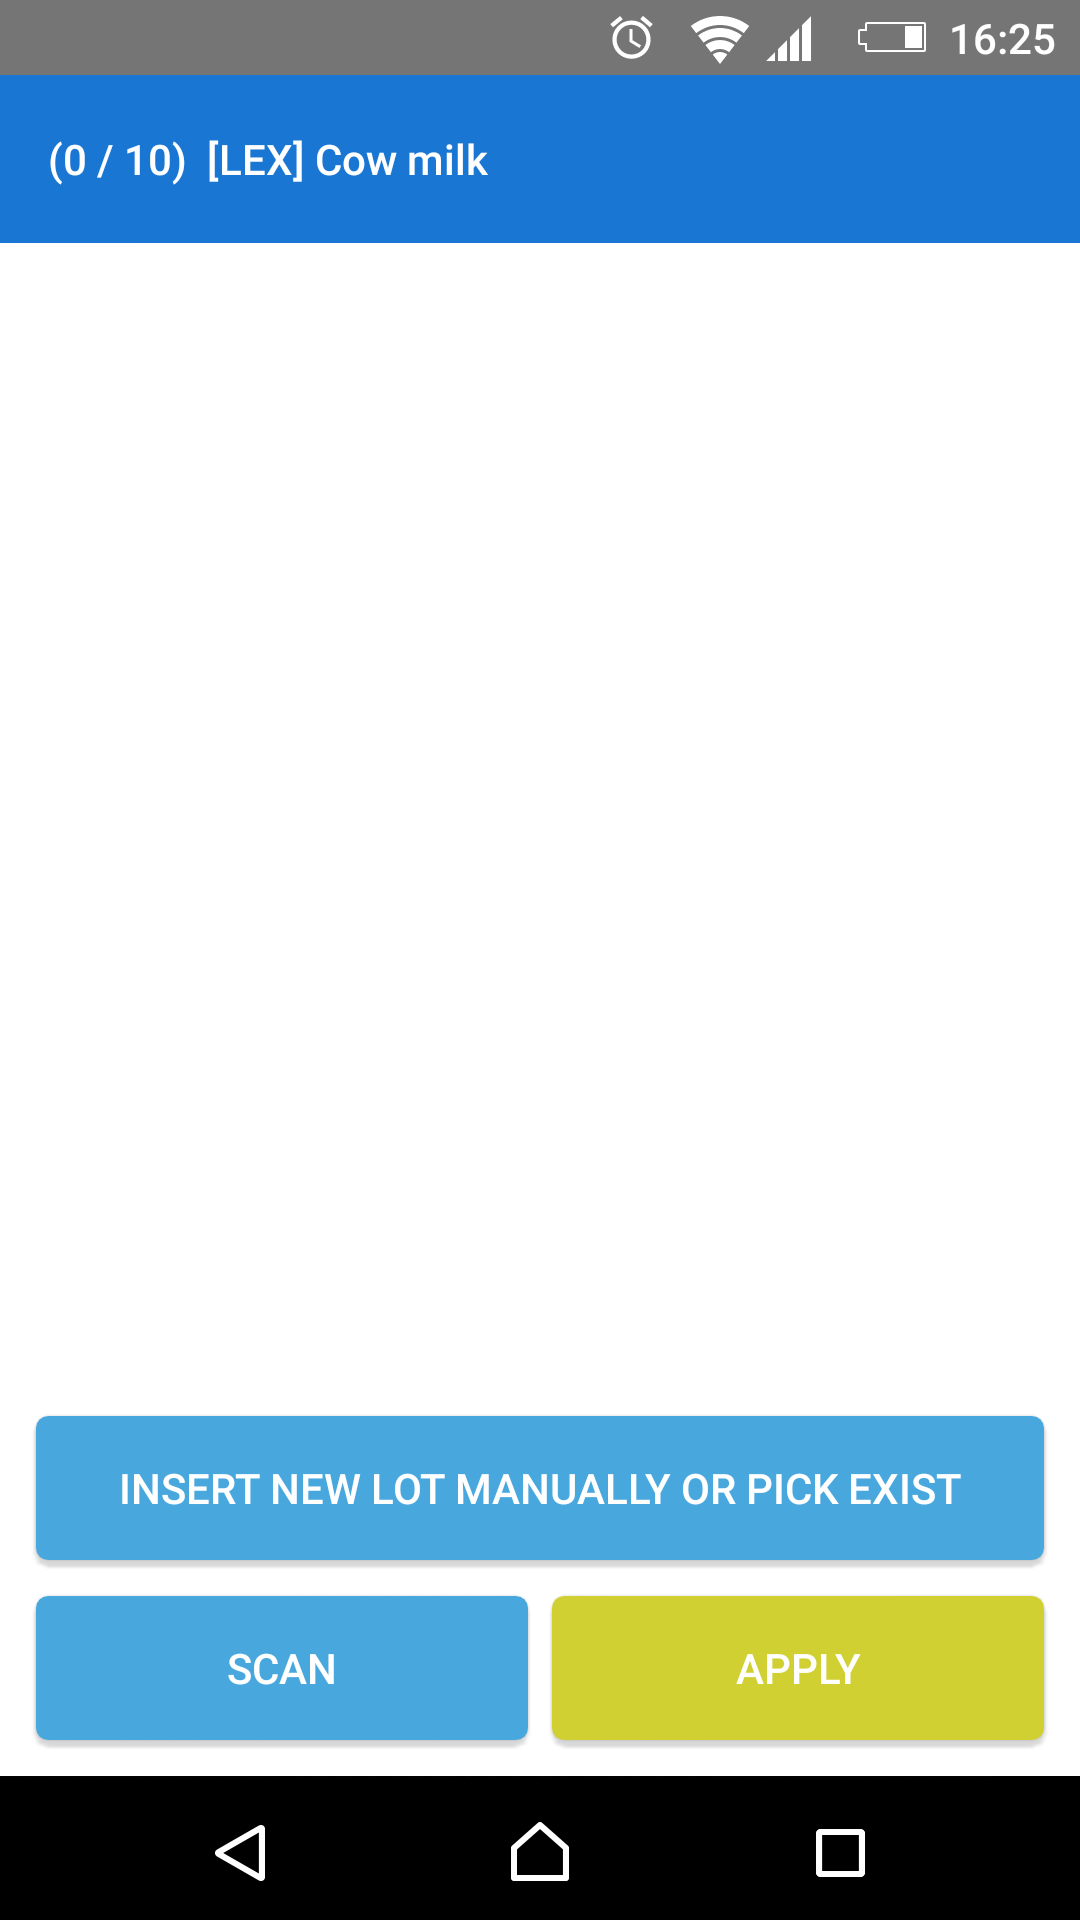
4. After that, the user scans the next item (cow milk, 15 bottles). Let’s imagine the user needs to split these 15 bottles into 3 lots (e.g., Milkbox #2, Milkbox #3 and Milkbox #7) with 5 bottles in each one
5. Click “Insert New Lot manually” or scan it using the built-in scanner or the “Scan” button. The user can change the name of lot and its QTY. Use the “Next” button to instantly add a new lot (for example, for the next 5 of 15 items)
6. When lots are all entered, the user clicks the “Apply” button. Finally, all items are received
7. All the items are then transferred into the warehouse on the Odoo side and have appropriate lot numbers
Picking and Delivery Goods with Lots
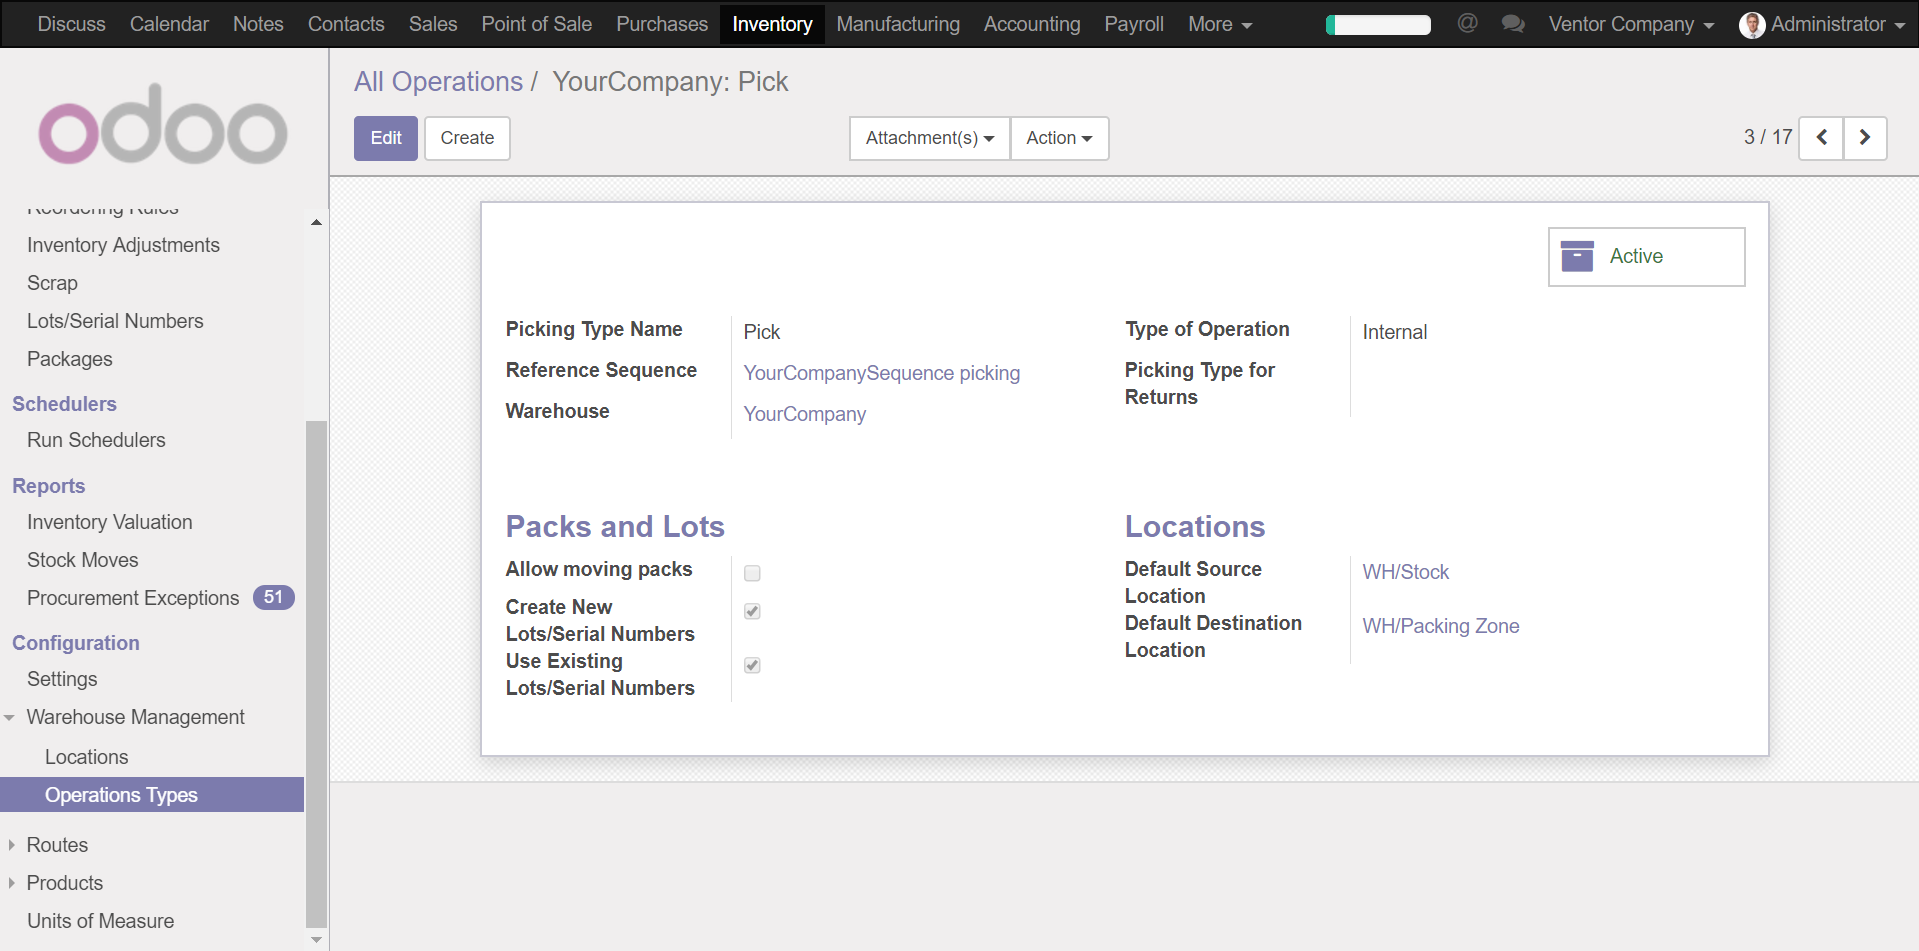
Delivery processing can be done in one (picking/delivery) or two to three steps (picking + packing + delivery). For each step, you will need to confirm lot numbers of items you are going to move. Remember that logic of the app is dependent on operational type settings in Odoo. You can create a new lot (or S/N) for set of items during receiving, use an existing one, or both options can be supported together during internal transfers and delivery.
Prerequisites
- The receiving product should be set to “Tracking by Lot”
– The delivery order should be created in Odoo (manually or based on SO) before the delivery process begins
User case
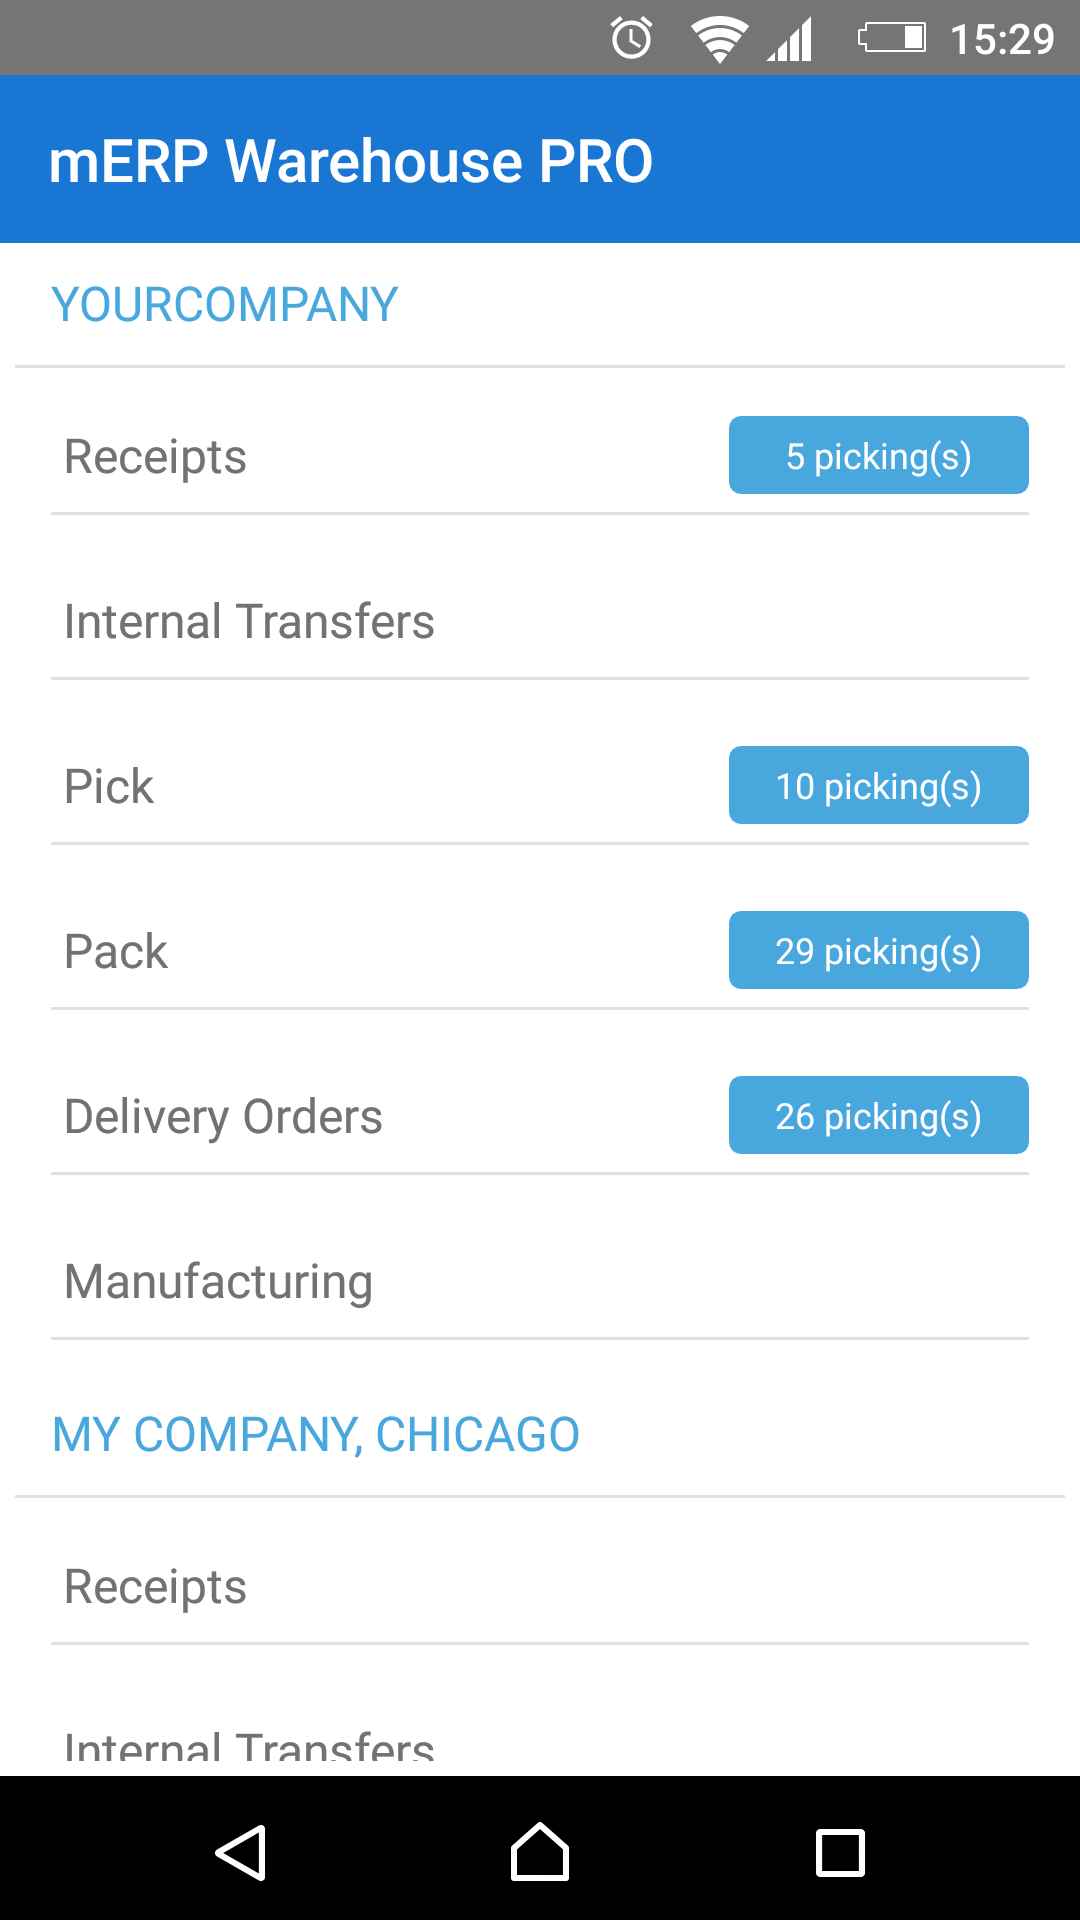
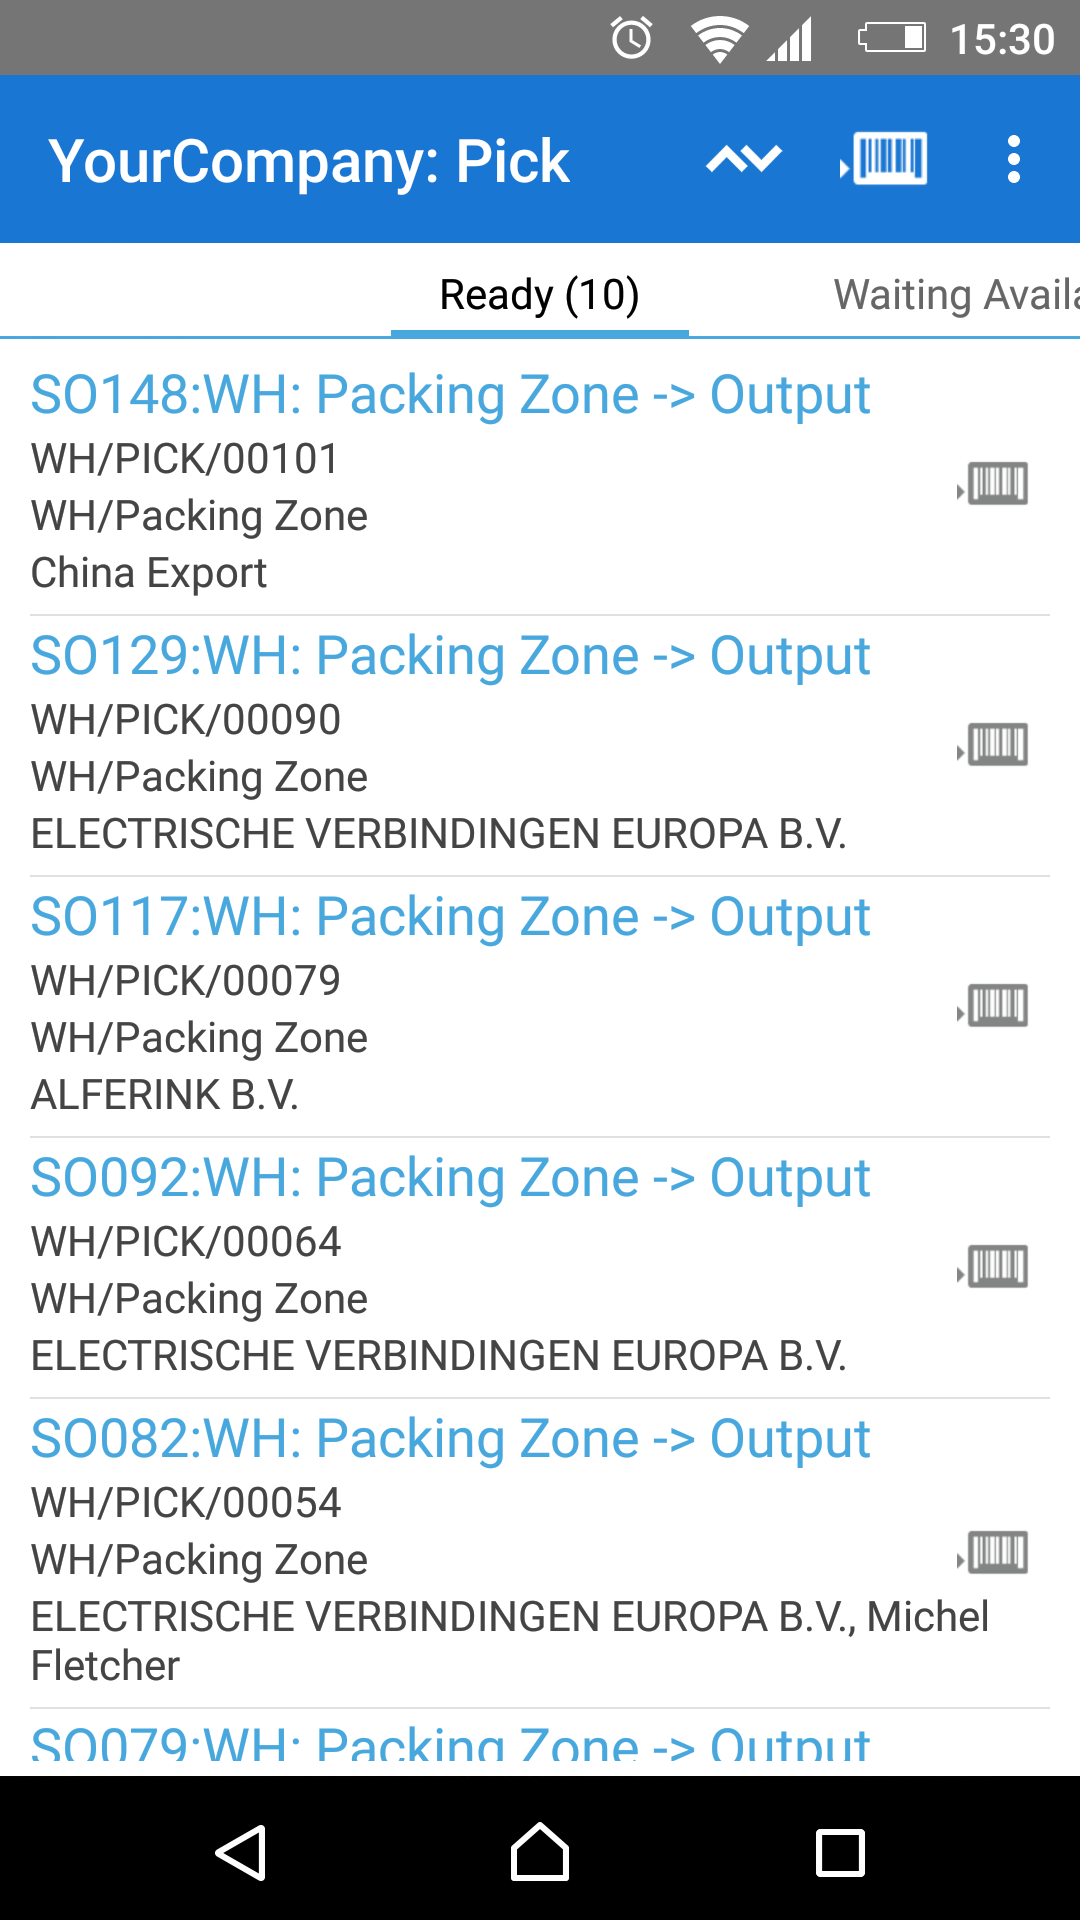
1. The user takes a scanner (or mobile phone) and goes to pick the order (selecting the “Pick” menu among the warehouse operations)
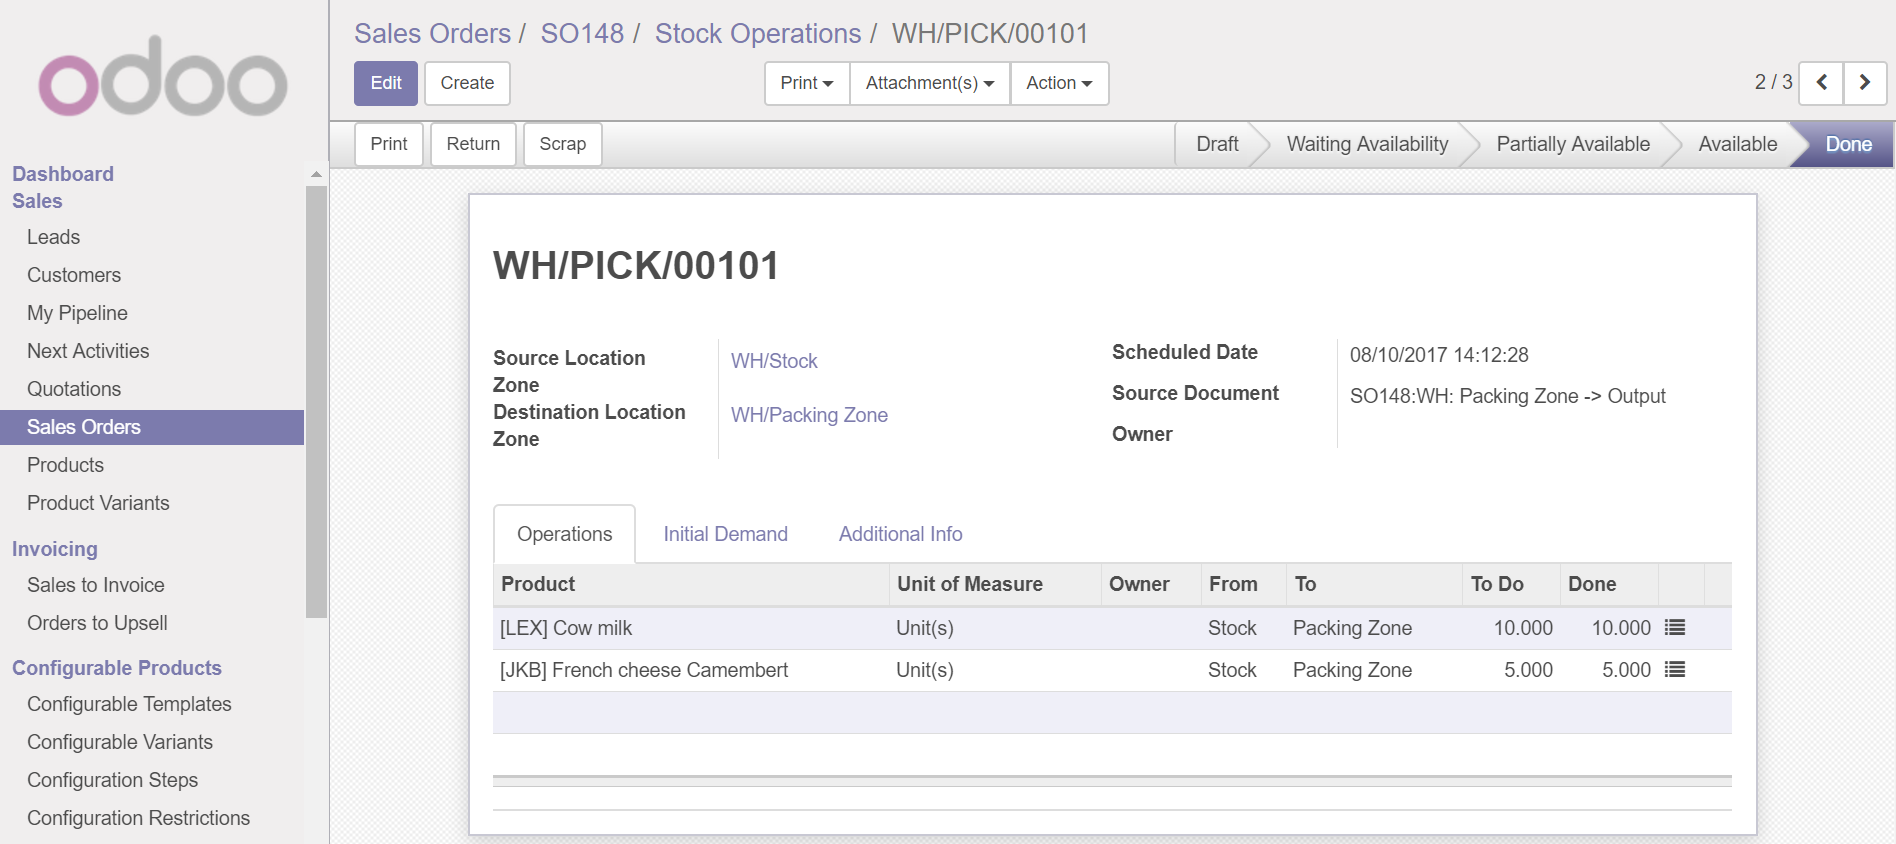
2. The user then opens the appropriate transfers (Warehouse operations > Pick/Delivery > WH/PICK/00101, as related to SO148) and clicks on “Start Transfer”
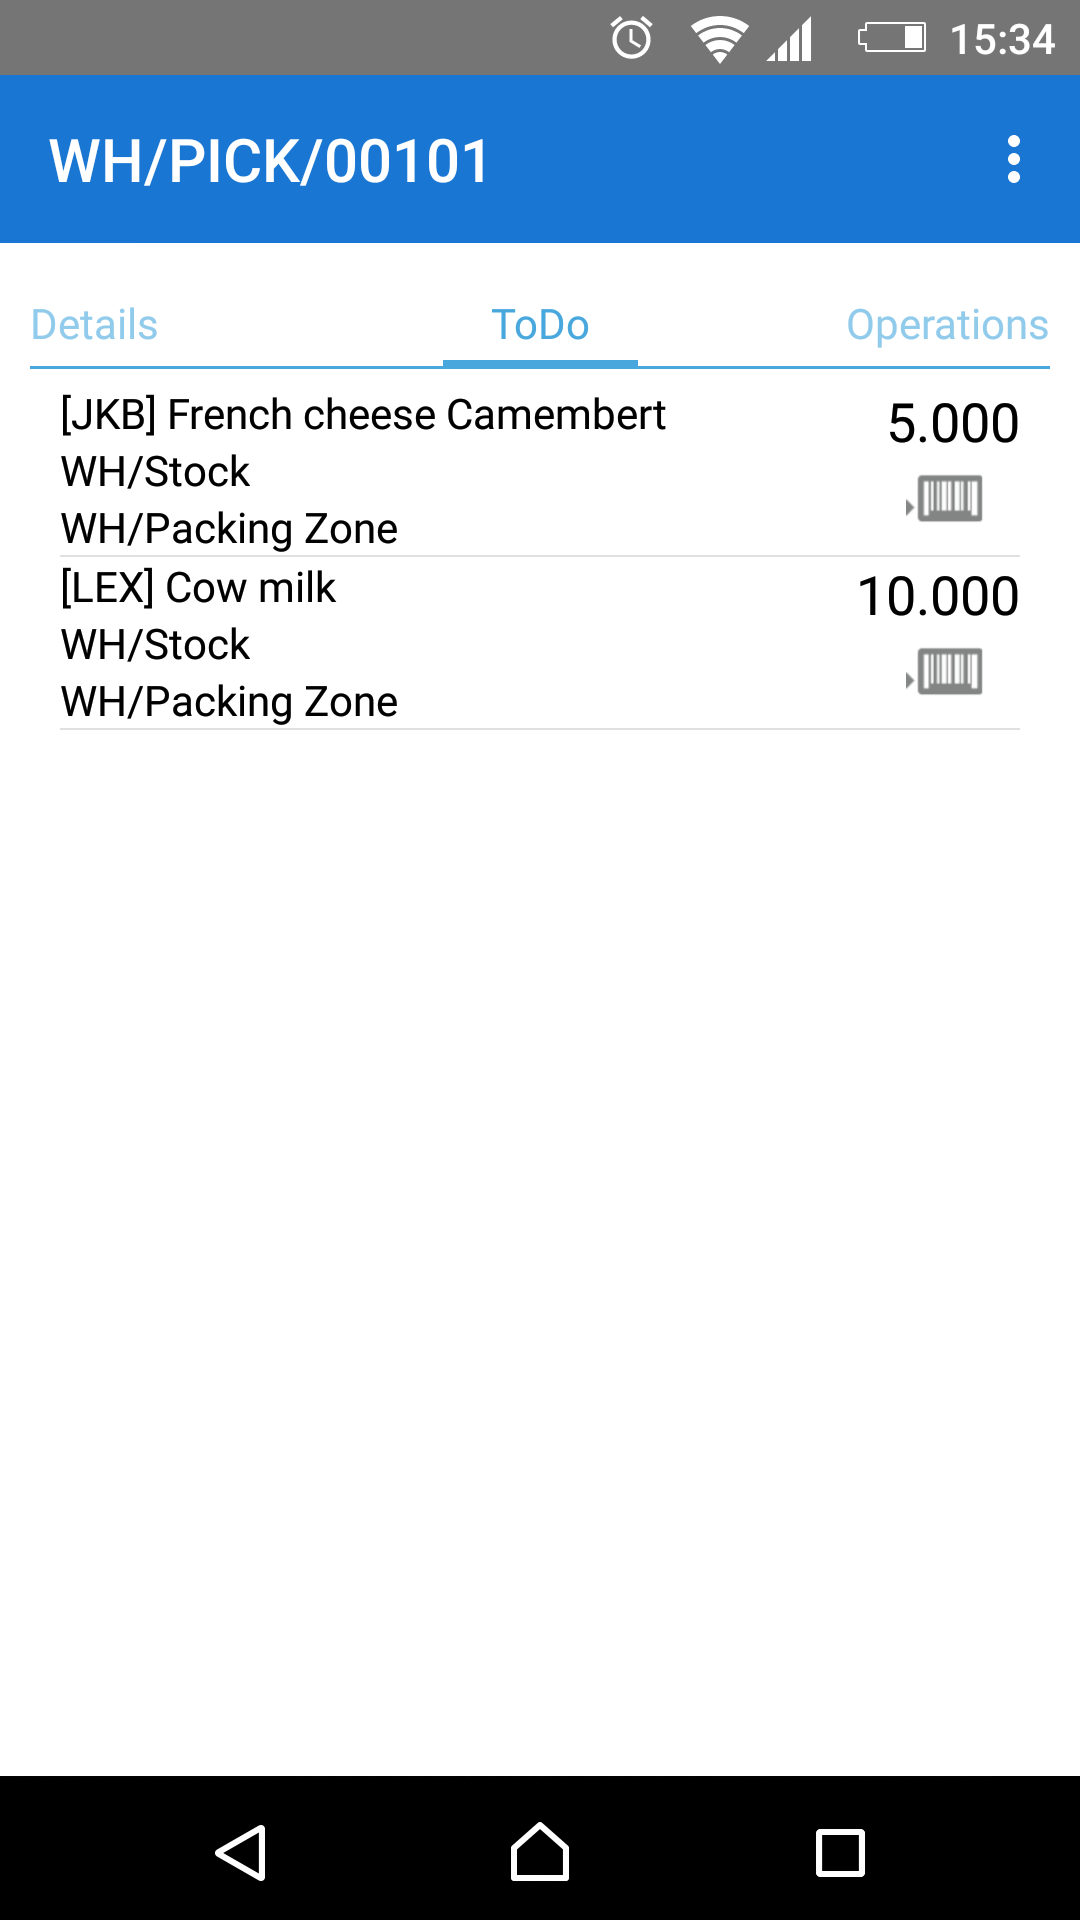
3. If the “suggest new product” setting was activated in the settings menu, the app shows a location and item that the user needs to take
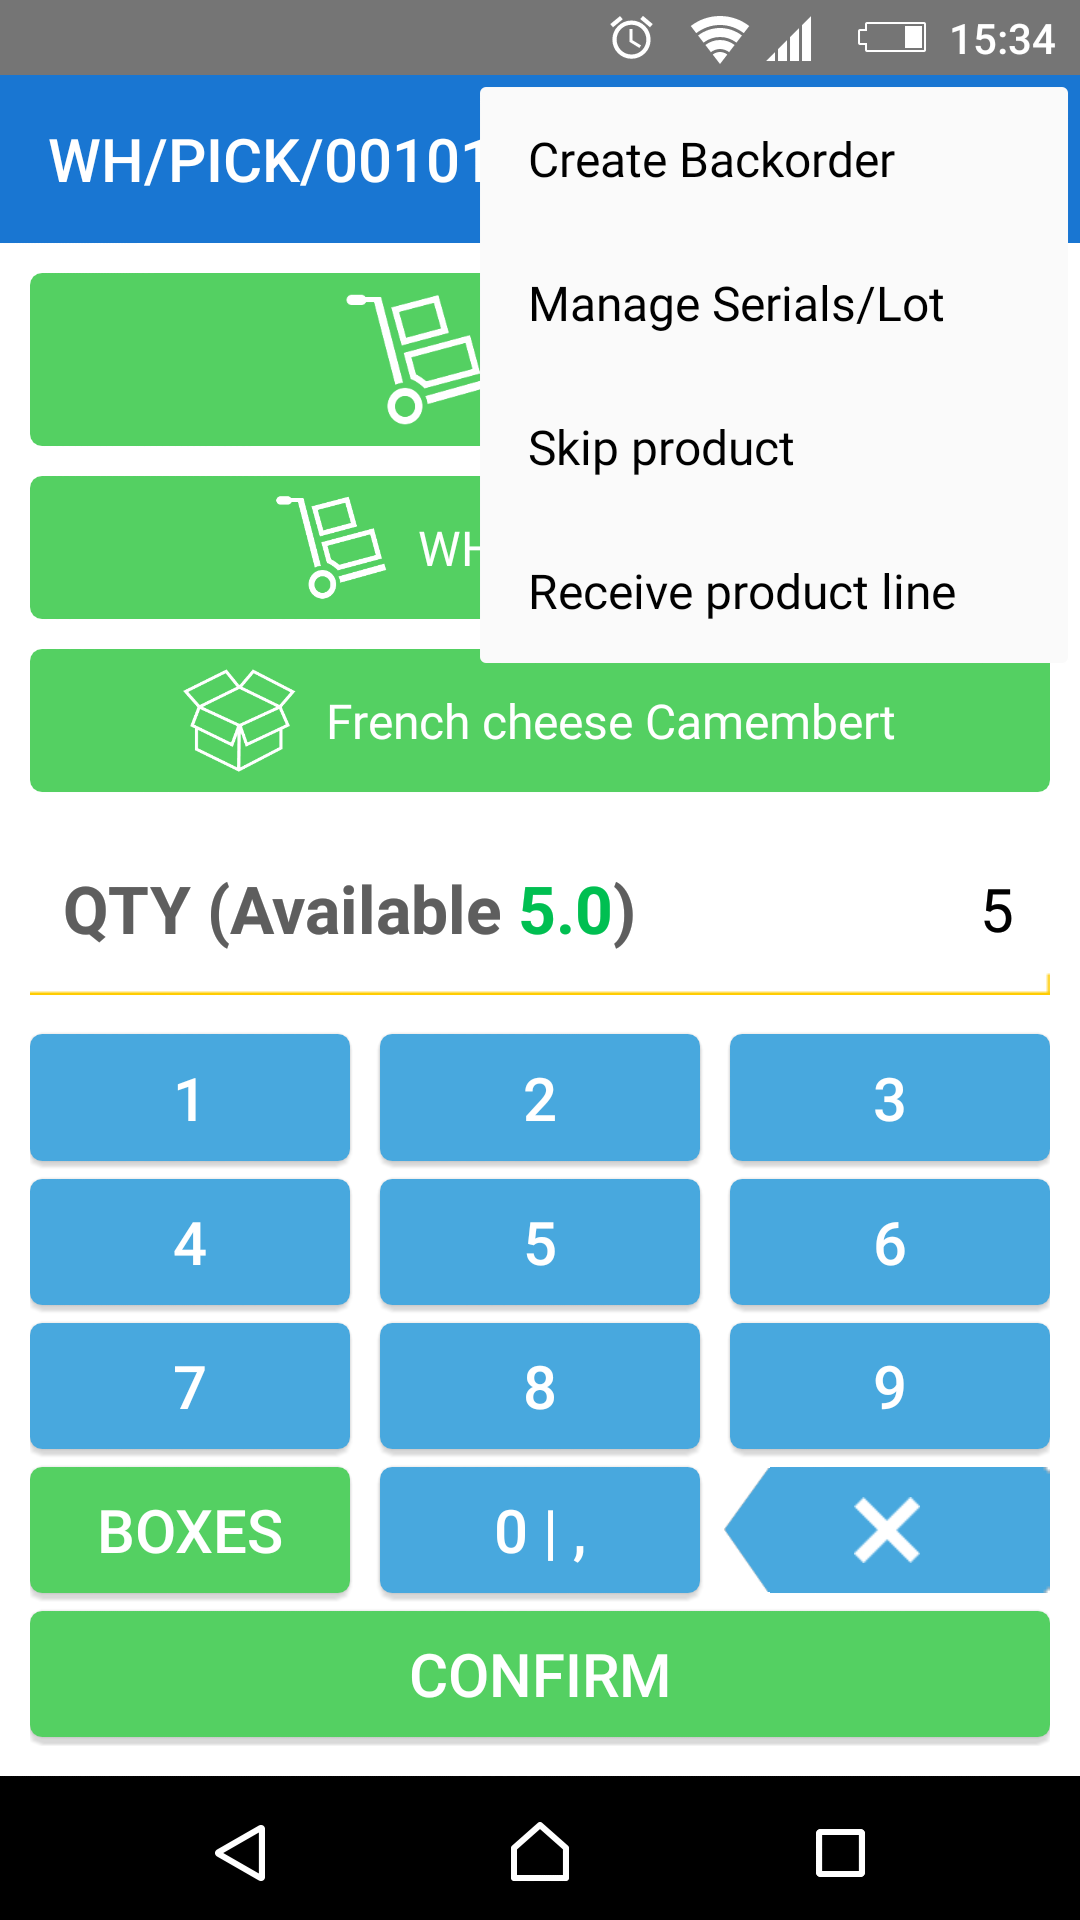
4. The user goes to the additional menu and clicks on “Manage Serials/Lots” to get the list of lots he needs to pick
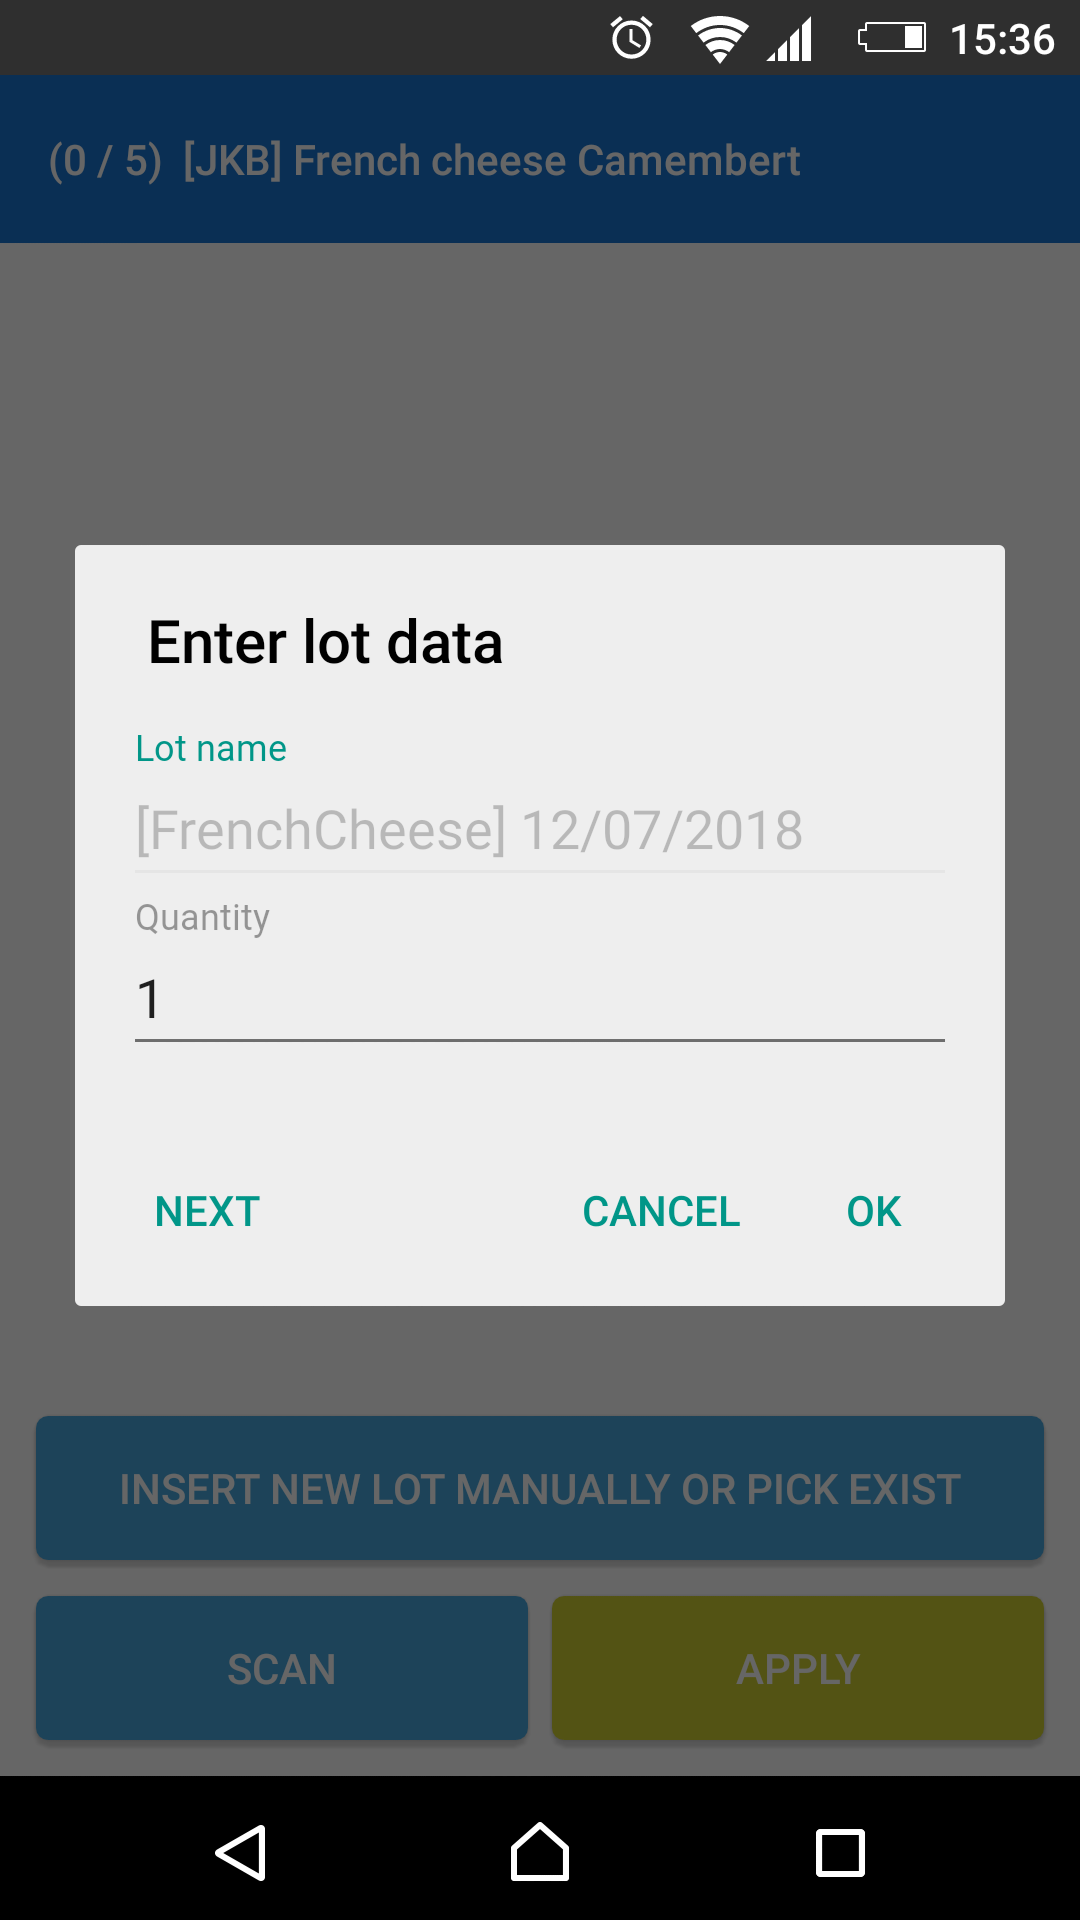
5. With the appropriate setting in Odoo (create and use existing lot or serial), we can create a new lot number or choose an already existing one. The user clicks “Insert New Lot Manually or Pick Exist” button and searches for the needed name (e.g., French cheese). The user can also scan a lot number if it has a barcode / QR code
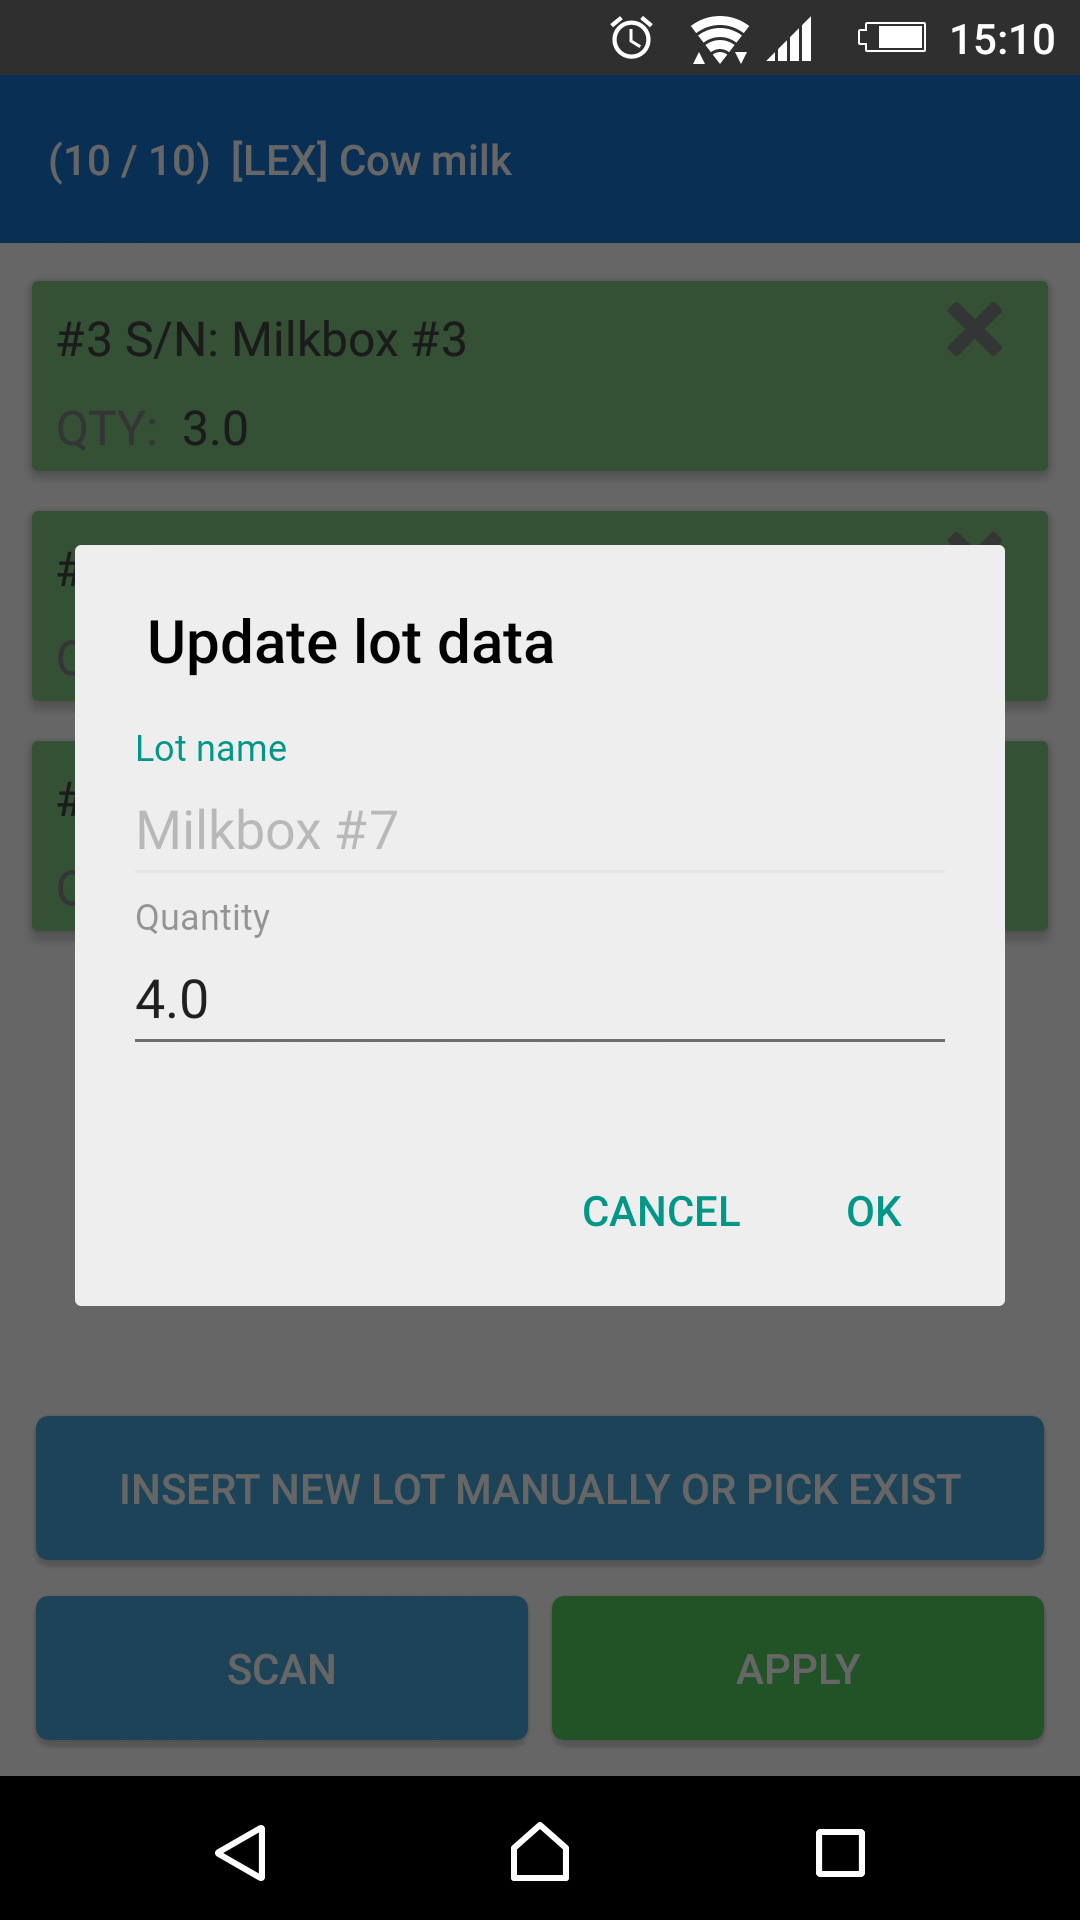
6. In the next dialog box, the user inserts the quantity of the item he is going to take and clicks “OK”. The new green-colored card will appear next. After all lots are scanned, the user clicks on the “Apply” button. The user can also move less items if some of them were missed
7. Next, the user clicks on “Confirm”, and all scanned items move to the customer location (or move to the next zones, such as packing or delivery) with their appropriate lot numbers. The user then goes to pick next one (e.g., cow milk)
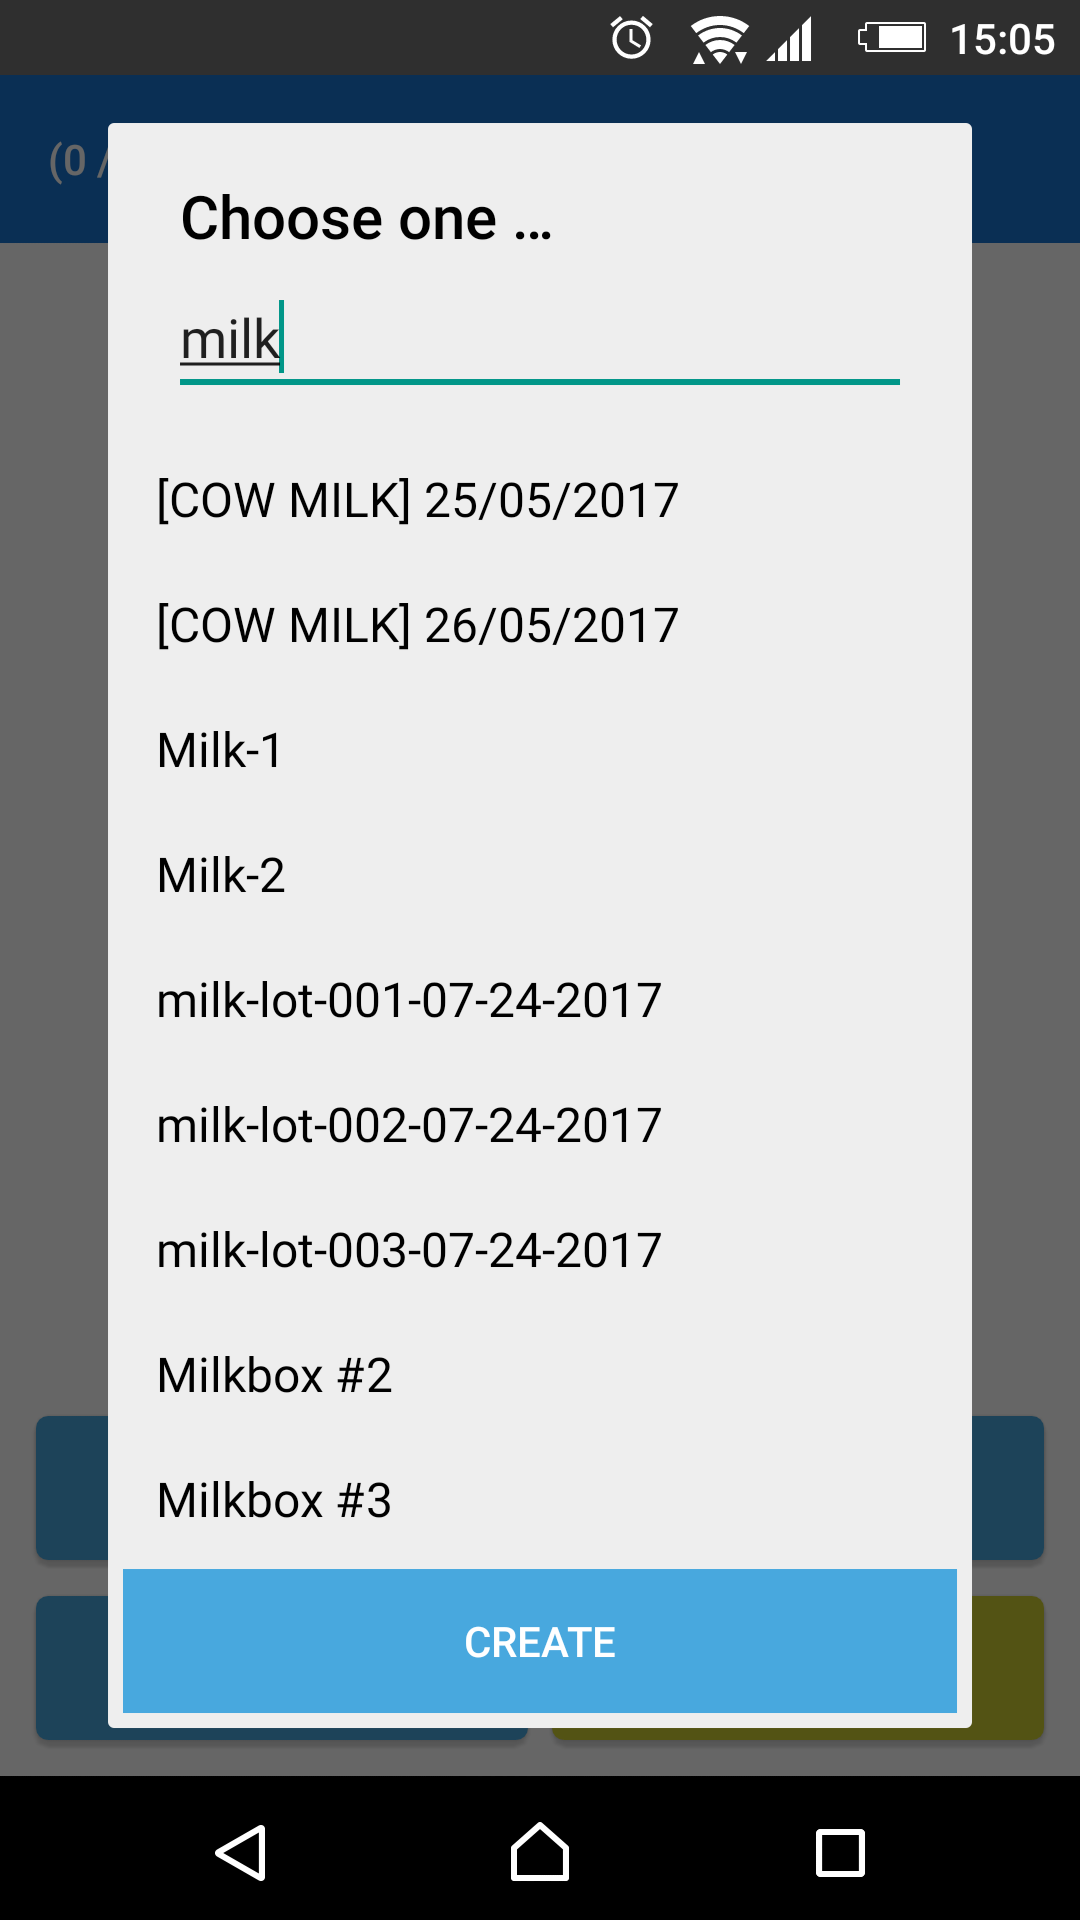
8. The user searches for “milk” to find the appropriate lot and chooses it from the list. The user can click on a green card to change the quantity of a particular lot

9. When all lots are inserted, the user can click “Apply” and then “Confirm” and go to the next item (but in our example case here, we have only two items to pick)
10. We can make sure the transfer was completed via the Odoo interface. Simply go to SO148 > Delivery > Pick operation (WH/PICK/00101) to check that the transfer was done
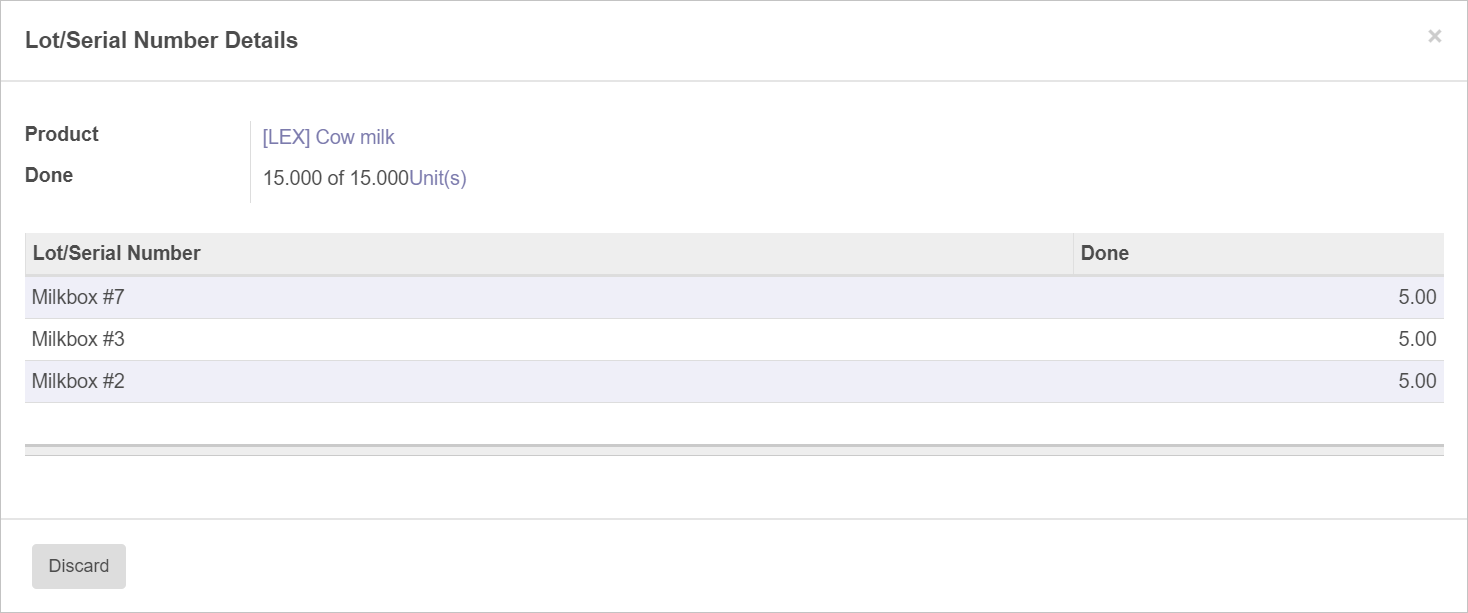
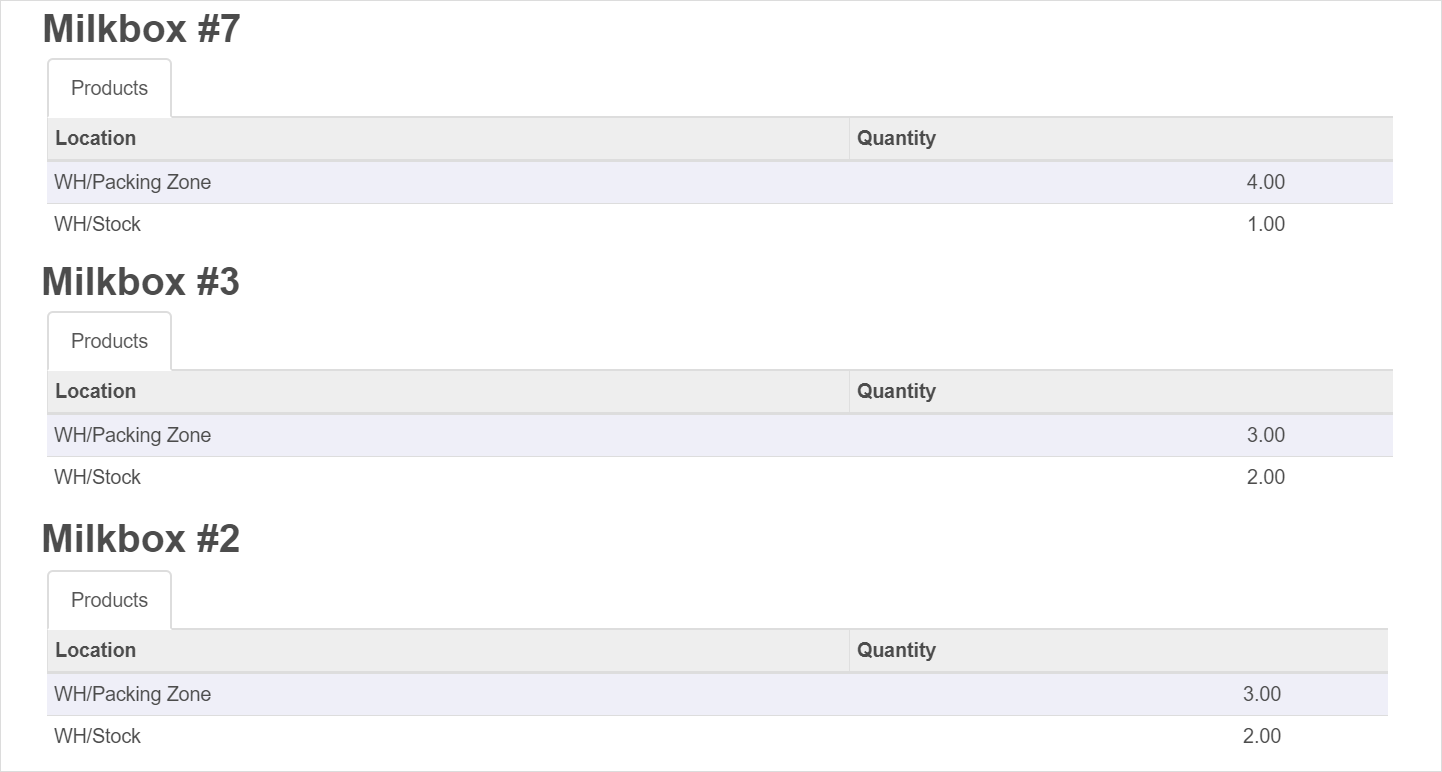
Also, to make sure we have a correct balance of received and delivered items, let’s check by opening the appropriated lots numbers (Inventory > Lots/Serial Numbers > Cow milk). Remember, we received 15 items and split them into 3 groups of 5 lots each: Milkbox #2, Milkbox #3 and Milkbox #7. All of them were delivered in Stock.
After that, we moved them from Stock to the Parking Zone: 4 items of lot “Milkbox #7” and 3 items (in each) of lots “Milkbox #2 and Milkbox #3”. Drilling down to the appropriate lot or serial number provides full traceability of all quantities. Check out the combined report below, with three lots in one view.
Conclusions
Now you know how to manage lots and serial numbers in Odoo ERP. Using the Ventor app allows you to easily receive and deliver items with lot or serial numbers and have full traceability in your warehouse. If you still have questions about lot or serial numbers management in Odoo, please feel free to contact us or leave your comments below.
Try Ventor For Free With Your Odoo Instance
Follow our twitter account to don’t miss updates

- 3+ years of experience in product manager and product owner roles
- 6+ years of experience in sales and offline and online marketing
- 5+ years of experience in web and mobile project management
- 4+ years of experience in B2B marketing (IT companies, ERP systems)
- 5+ years of experience in warehouse management and logistics
- Main project roles: Marketing Manager, Project Manager, Product Owner, Consultant
- Primary objectives: Increase sales and brand awareness; implement marketing strategy; achieve objectives and goals.
----------------------------------------------------------------------
Education: Bachelor's degree.
----------------------------------------------------------------------
Experience:
Project Manager
Bookshop
Marketing Manager, Chief Sales and Marketing Officer
XPANSA Group
----------------------------------------------------------------------
Current position: Co-founder & CBDO
VentorTech
----------------------------------------------------------------------
Licenses & certifications:
IT Product Management (Basic Level)
IT Product Management (Professional Level)
My Monday

0 Comments