Intro
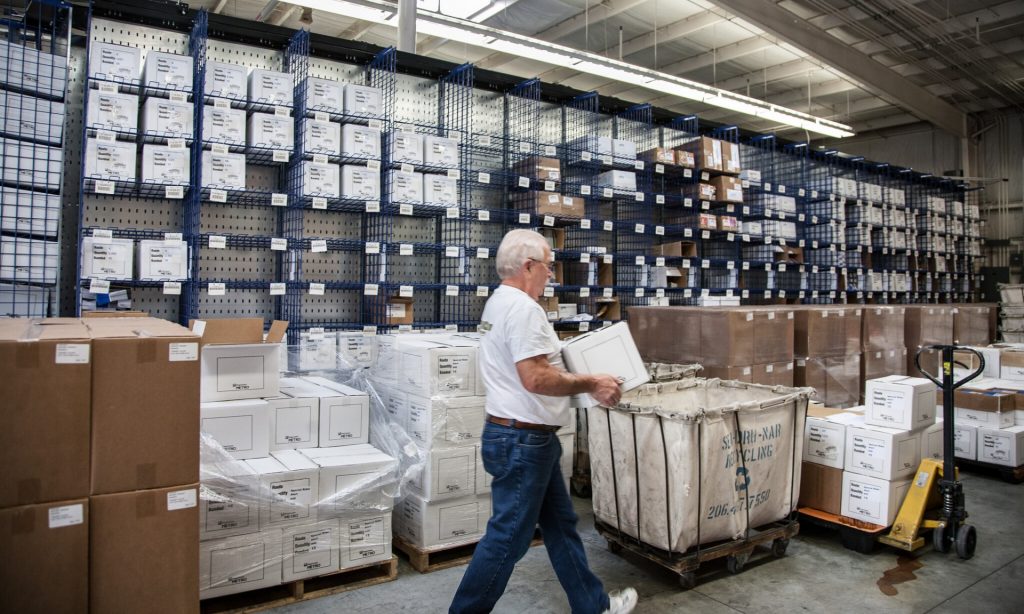
One of the primary goals of any warehouse is to increase pick speed and reduce walk time to process more orders at once. Quick and efficient movement of goods can reduce costs of stock management per product and will help clients to receive their orders faster. As a result, they will become more loyal to your brand,and will come back for new purchases faster.
A picker spends more than 70% of picking time walking around racks Share on XThe main problem is that pickers can spend more than 70% of picking time simply walking around racks and rooms while looking for items. In this article we’ll tell you how to reduce walking time by optimizing pickers’ routes.
Goals
- Increasing pick speed by picking multiple orders
- Minimizing the time required to pick items
- Reducing walk time and collecting items in optimal route
Steps
- Draw a warehouse map
- Create an optimal route based on the map
- Upload and apply the route to your WMS system
- Pick items with a barcode scanner (Ventor)
Prerequisites
In this article, we assume that you’ve already set up all the racks in your warehouse and you have a building or room fully prepared for items storage. Or probably, you’ve been working with your current configuration for quite some time and now do want to make optimizations.
Useful links:
How to name locations
– For a big warehouse
– For a small shop
1. Warehouse map
Location names
First, you need to assign a unique name for each location in your warehouse.
We recommend to use Latin alphabet to avoid any possible issues with software.
Zones
For added simplicity in optimization, make an abbreviation of zone or room as your starting symbols. It’s time to put your warehouse on paper!
You can use a piece of paper, an Excel sheet, or a painting tool – whatever works best for you and your team. The goal of this task is to clearly define zones in your warehouse.
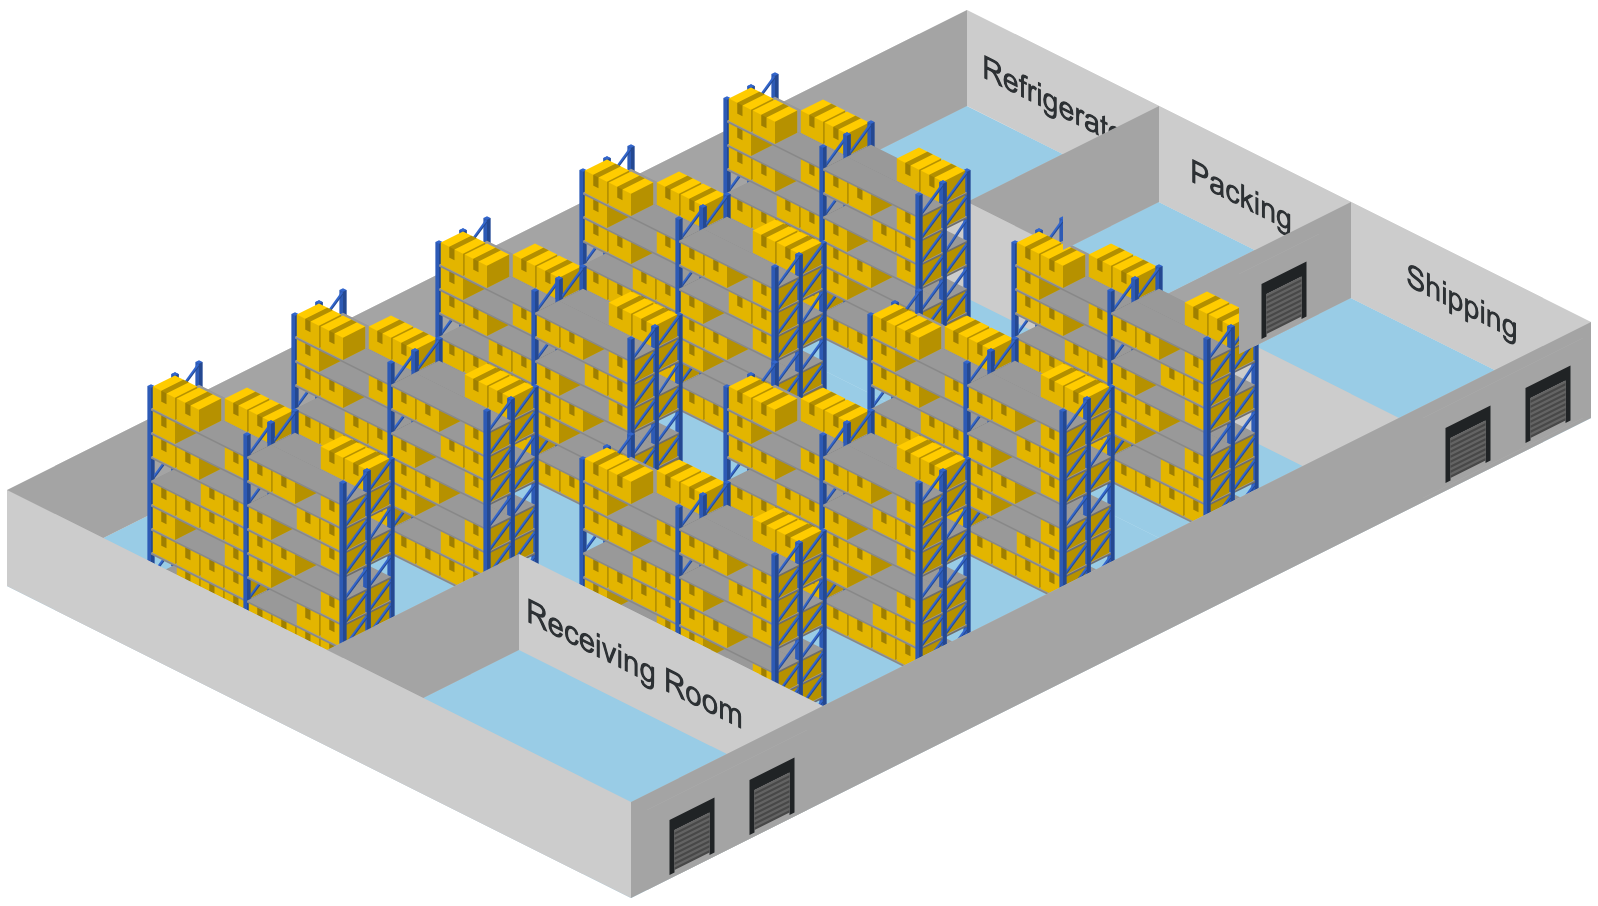
If you have quite a large facility with multiple rooms and zones, we recommend grouping them based on your experience.
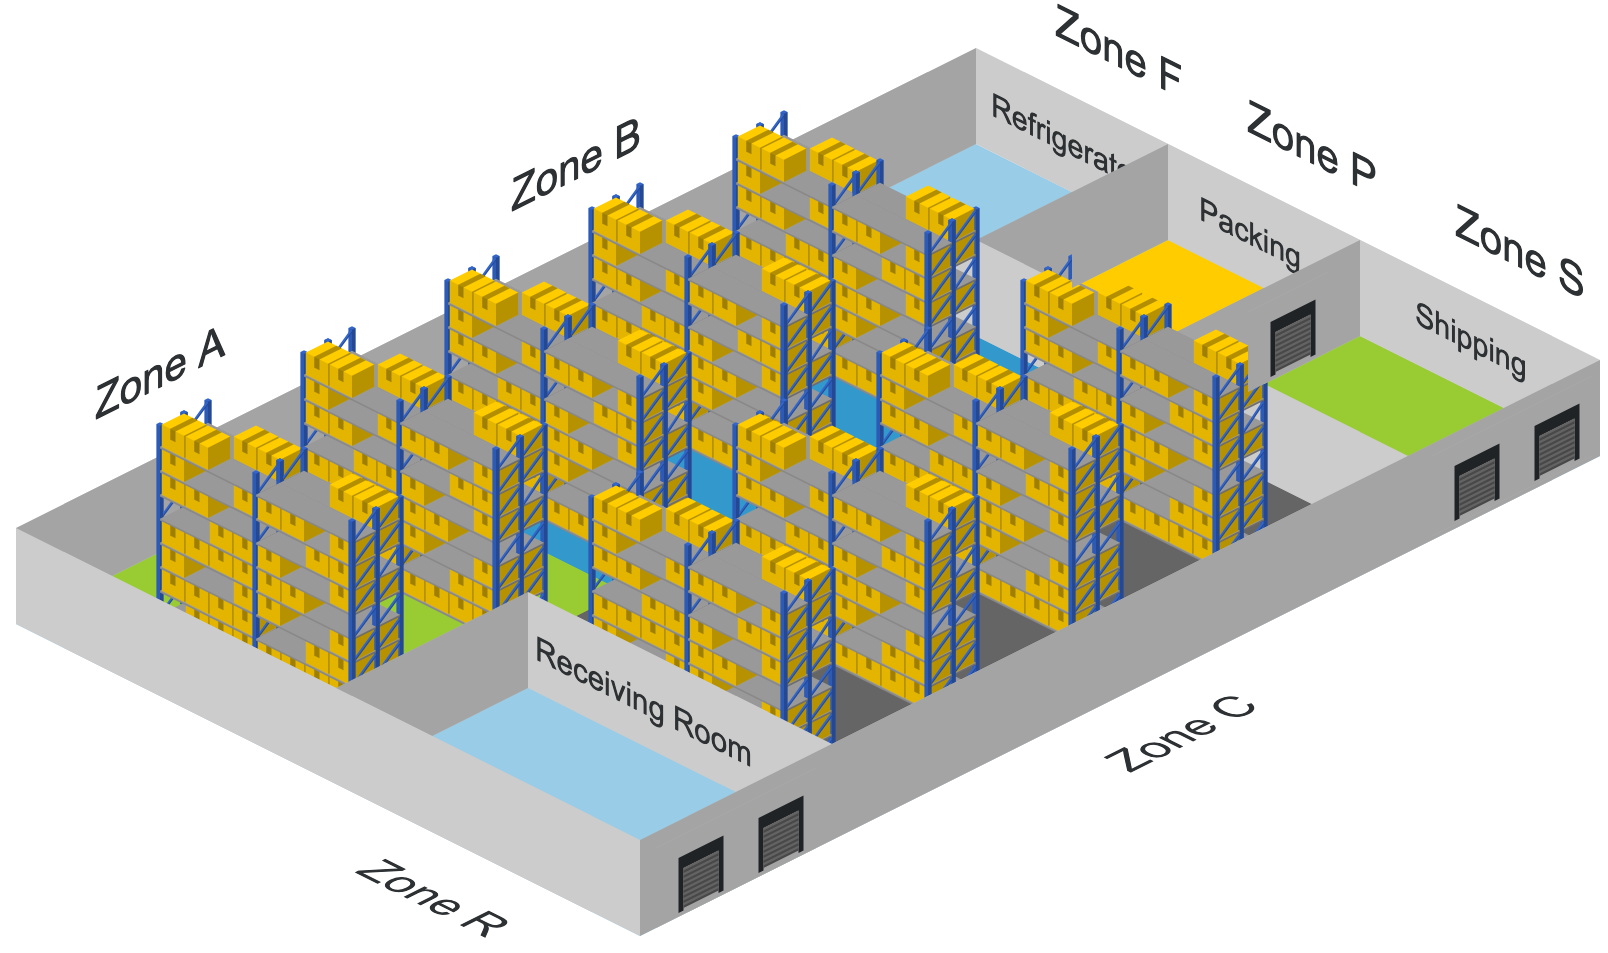
Avoid using long names for zones and locations. Keep it simple, save space on labels and make them easy to read and understand.
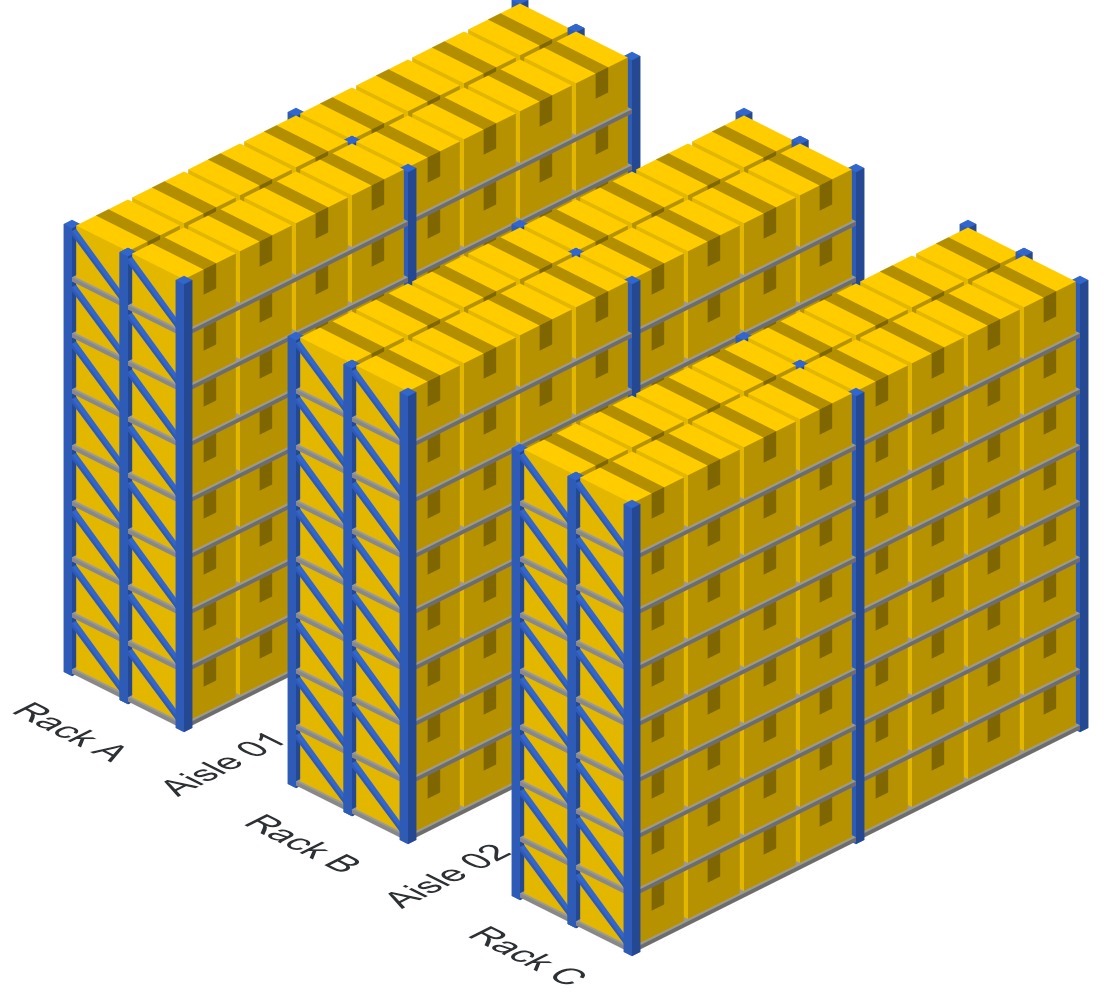
Racks and Aisles
You can use either a rack or an aisle to further specify locations, or even utilize them both. It might be reasonable if you have a lot of racks. However, don’t overcomplicate it if you have only a few racks or locations.
Sections, Shelves and Bins
Sections
Use a 2-letter approach. The first letter should be the same as the name of the rack (Rack A = Sections AX). Then enumerate each section alphabetically (AA, AB, AC, …, AN). Go around racks like a snake to name opposite sides.
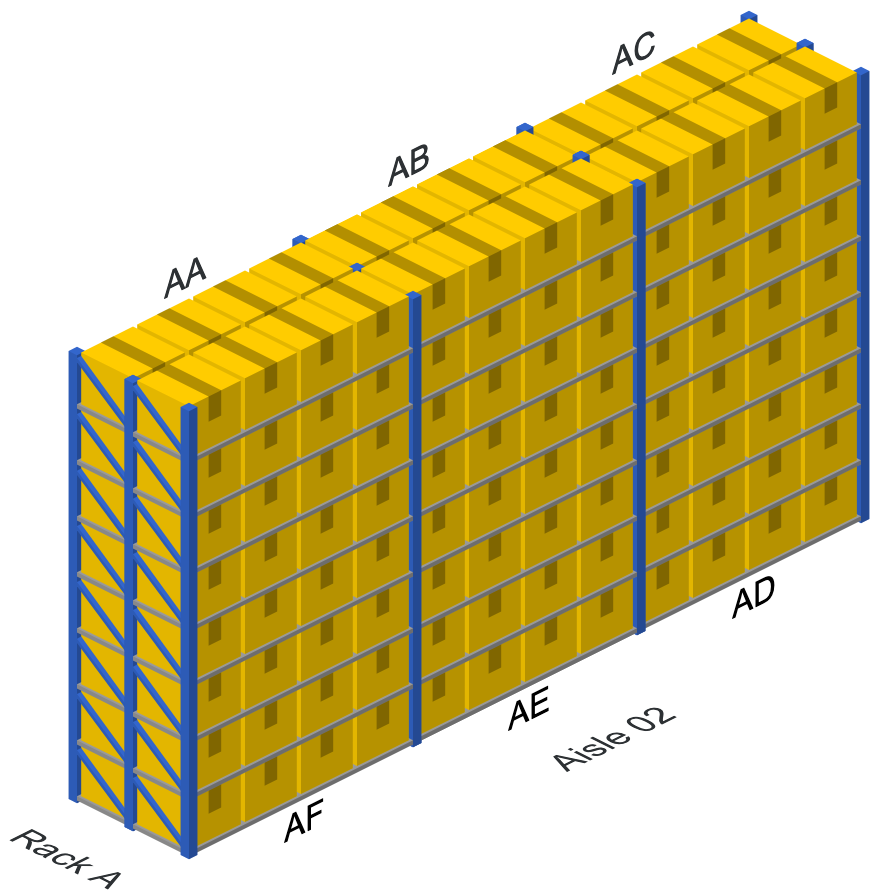
E.g. AA, AB, AC for the rear side of the rack and AD, AE, AF for the front side
Skip a few letters after finishing naming the first side of the rack, just in case you will need to add additional sections to racks later. Avoid starting from “XA” section if there is a possibility to extend your racks at both ends.
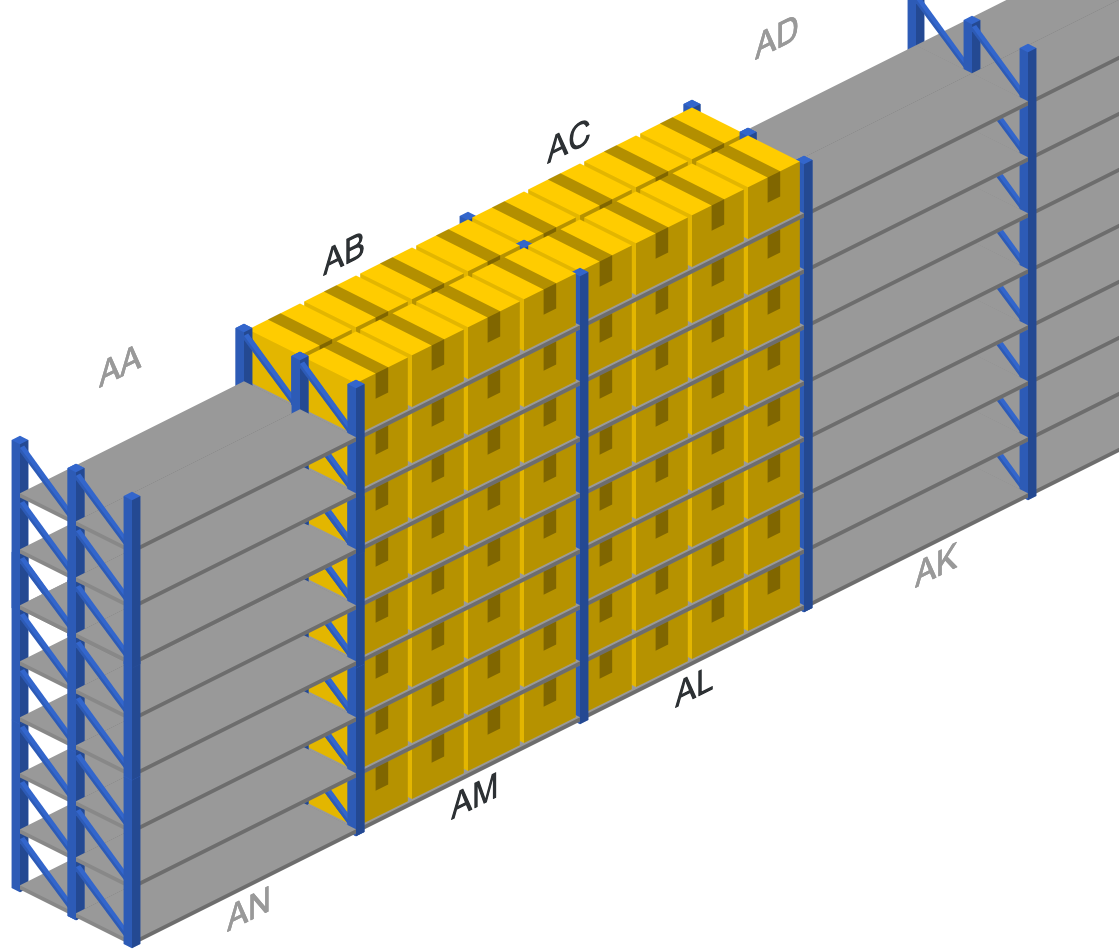
E.g. (AA), AB, AC, (AD) for the rear side of the rack and (AN), AM, AL, (AK) for the front side
If the racks stay against the wall, have them stand close to the wall. Name sections based on your and your workers’ experience. Trust your feelings, nobody knows your business better than you.
Shelves / Rows
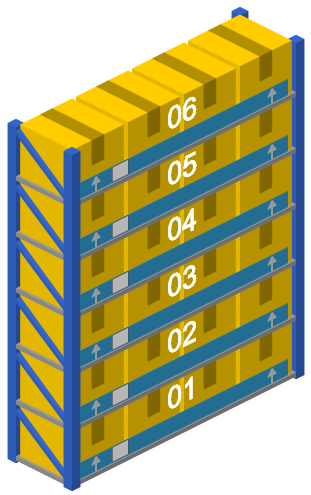
Name your shelves from bottom to top. You can add additional shelves on top of existing ones without any issues and simply apply names to new locations. Add arrows on labels to point to the location for easy recognition.
Bins
Give names for each bin on the shelf if it is necessary.
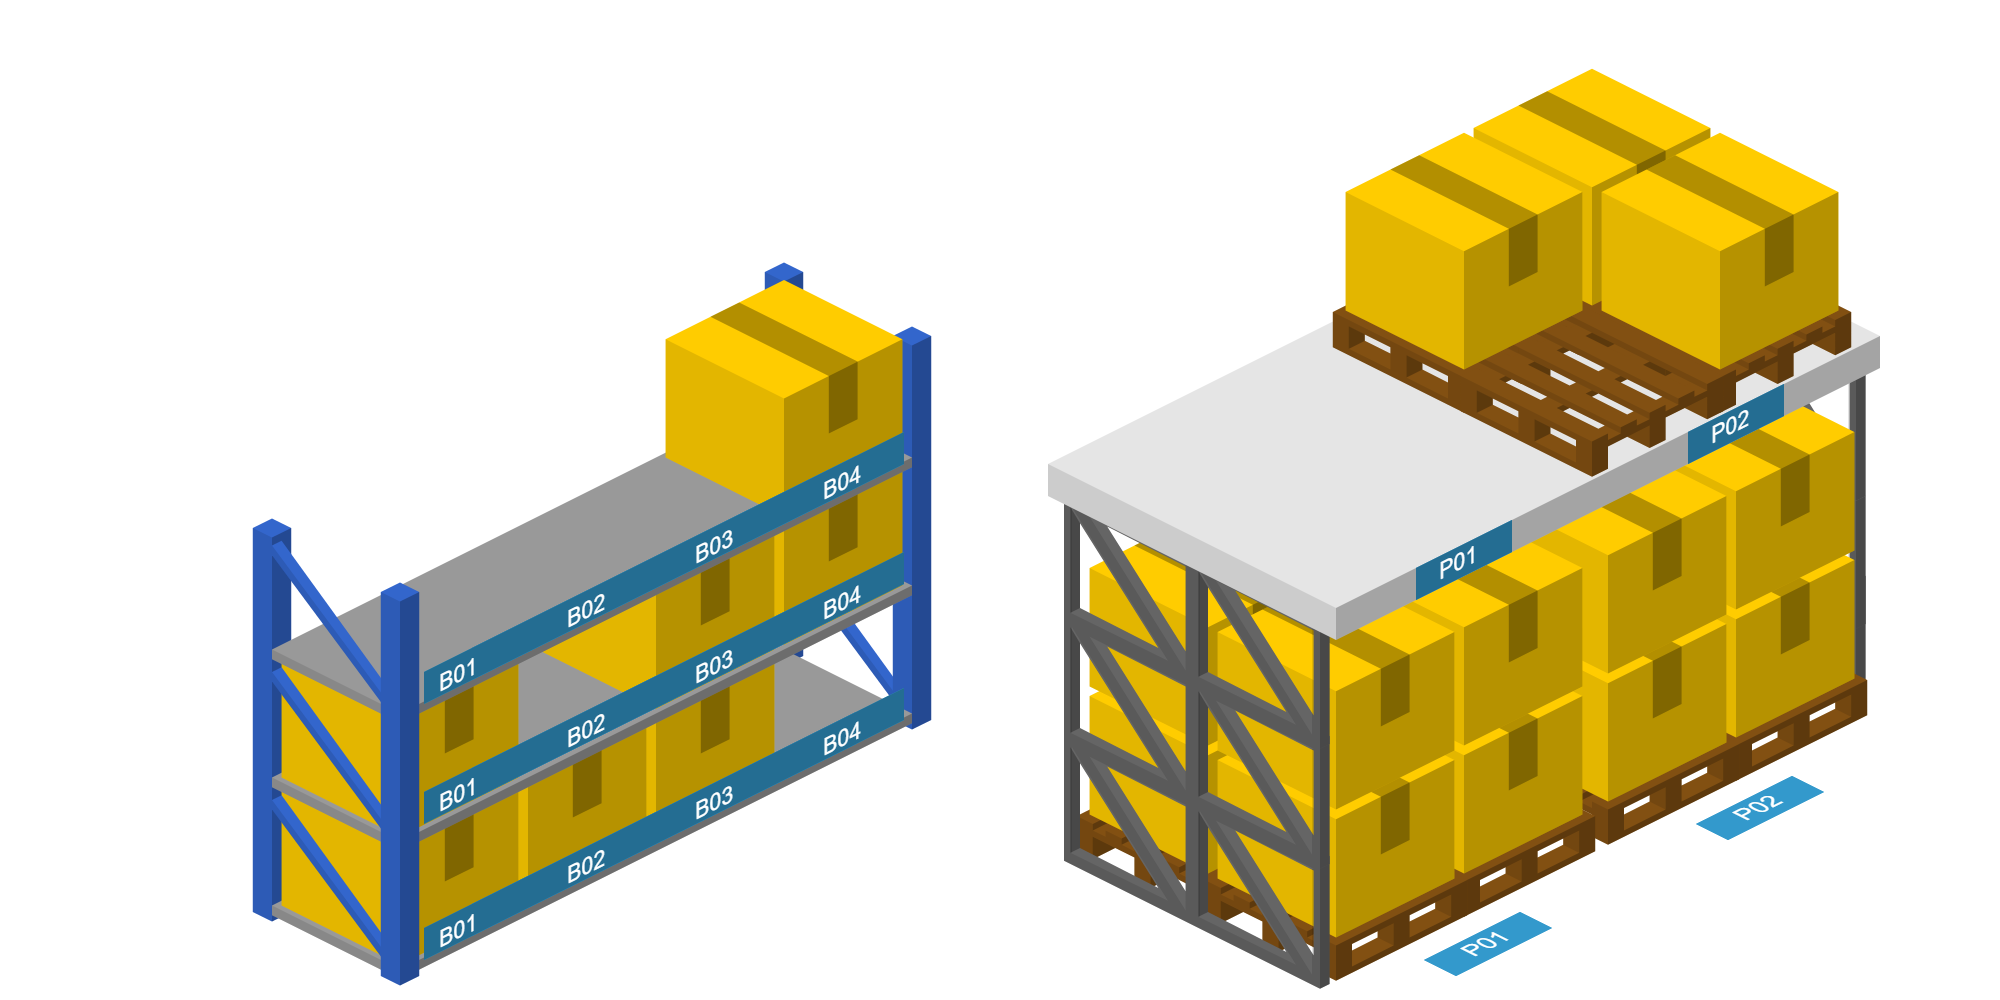
Items might be placed on pallets. Pallets can contain one or different items and be placed on different levels. Goods can be picked from pallets to other areas of the warehouse or can be moved entirely by a forklift.
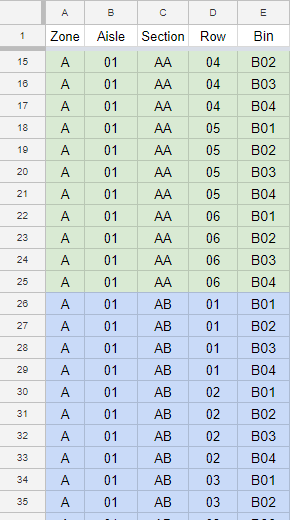
Now, we know the script for generating all location names. Each location in the warehouse has its own unique name. E.g. B-02-CA-04-B01 (look at the transcript below).

Example of location label
Let’s generate all the location names. Use Excel, Google Sheets or other similar tools.
***
In this section we described one of the most popular approaches of naming locations in a warehouse based on our and our customers’ experience. But it is OK if you have your own view. Every business is unique and only you know what fits you better.
Print labels
As soon as we have names of all the locations, we can generate labels with barcodes. Although warehouse management systems are able to generate and print labels for locations, we recommend design labels using a third party software.
E.g. look at the location labels below generated by one of WMS systems.
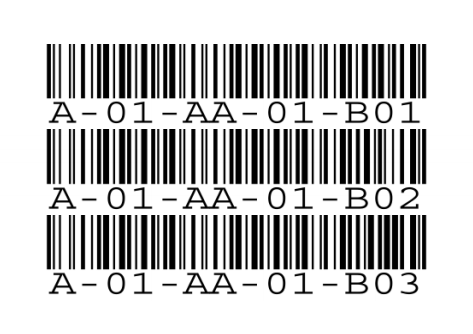
Labels are close to each other and it is difficult to split them. There are no arrows that point to the location. Barcodes are small and it can be an issue to read them from a few meters.
It is OK if you have a small warehouse and just want to launch the storage quickly. But for large and medium warehouses with multiple locations it can turn into a headache for you.
If you have a good programmer, it will not be so difficult for him to generate labels based on your list of location names. You can also use one of the techniques described below, or google it yourself.
https://www.clearlyinventory.com/how-to-print-barcodes-with-excel-and-word
https://www.tec-it.com/en/software/barcode-software/office/excel/Default.aspx
After you generate labels, you just need to print them and paste at all of your warehouse locations.
Related resources:
https://www.camcode.com/asset-tags/how-to-design-a-warehouse-floor-plan/
2. Create an optimal route based on the map
Now you need to teach your WMS to calculate optimal routes for pickers. In majority of inventory management systems it is possible to assign a sequence for each location.
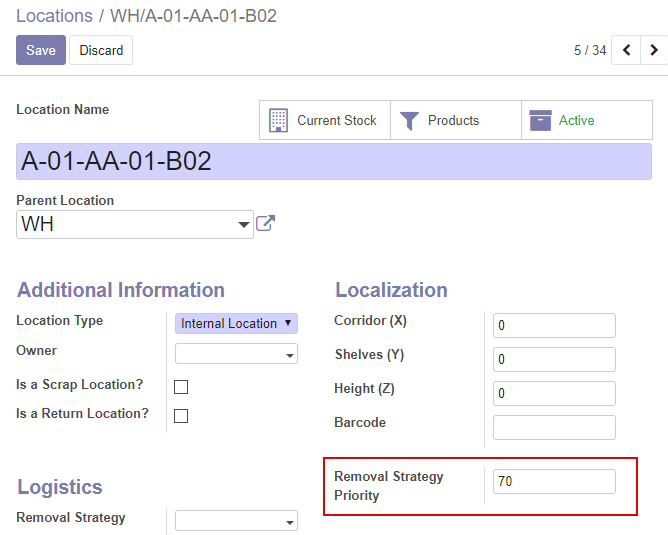
Location settings in Odoo ERP. Install this module to add the field
When priority for each location has been assigned, the system is able to build an optimal route for pickings. An application on a scanning device will show a picker to which location they have to go to pick next item.
We recommend you the following flow for initial assigning of priorities for locations:
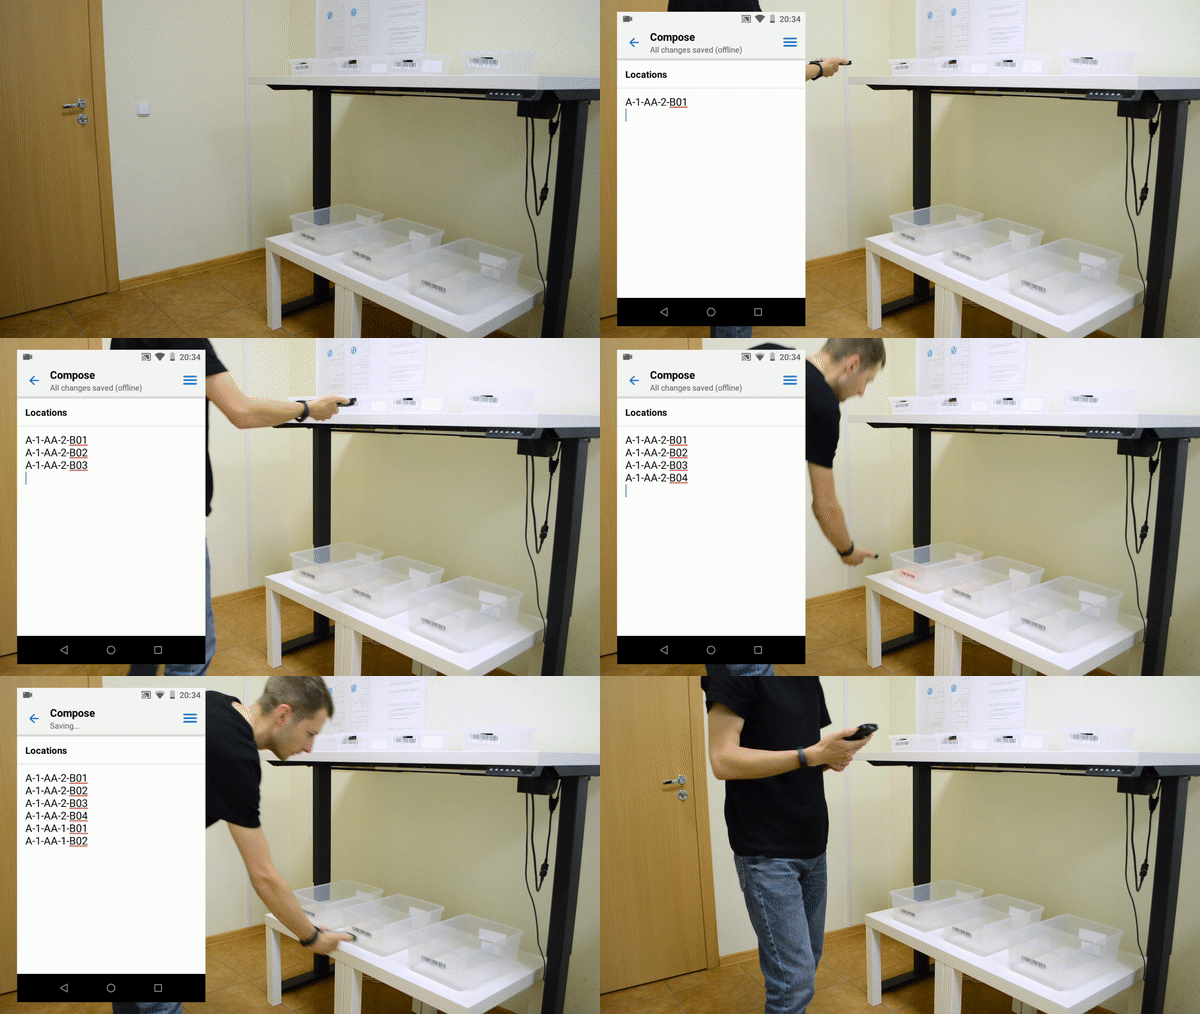
A. Go through your warehouse in an optimal way and scan each location
There are several methods to define an optimal route in a warehouse, but not all of them work in real life, which is why we recommend our customers to create routing based on their own experience.
Just take a scanner and go around your racks in the way you are sure is optimal. Open a text document or a spreadsheet and scan a barcode of each location on the way.
B. Assign priority for locations
In the end you will get a list of all your locations sorted in the optimal route. Add sequences to the adjacent column.
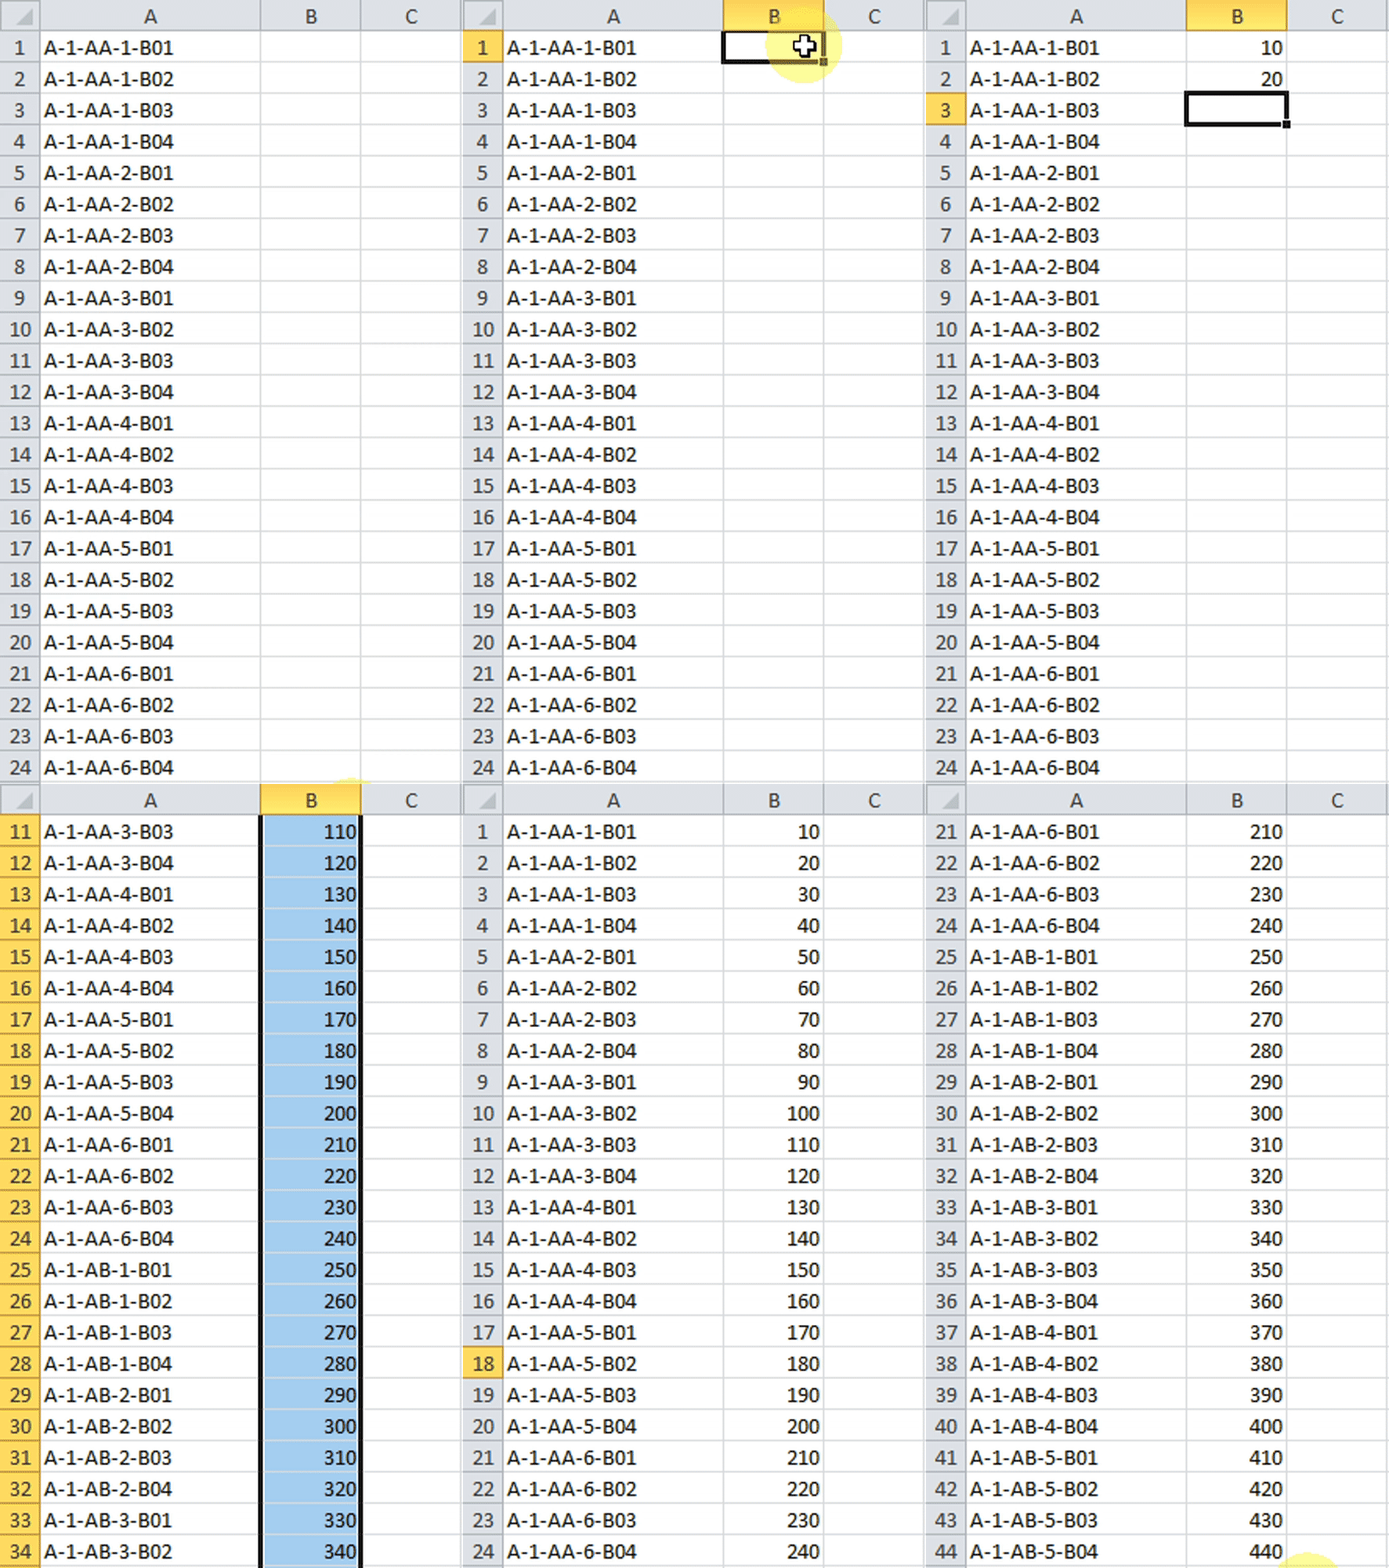
3. Upload and apply the route to your WMS system
Finally, we can import the locations with assigned priority to your WMS. Go to your locations configuration and upload the file.
Let’s look how to make this in Odoo WMS.
Note, please install this free module to activate the priority field for locations
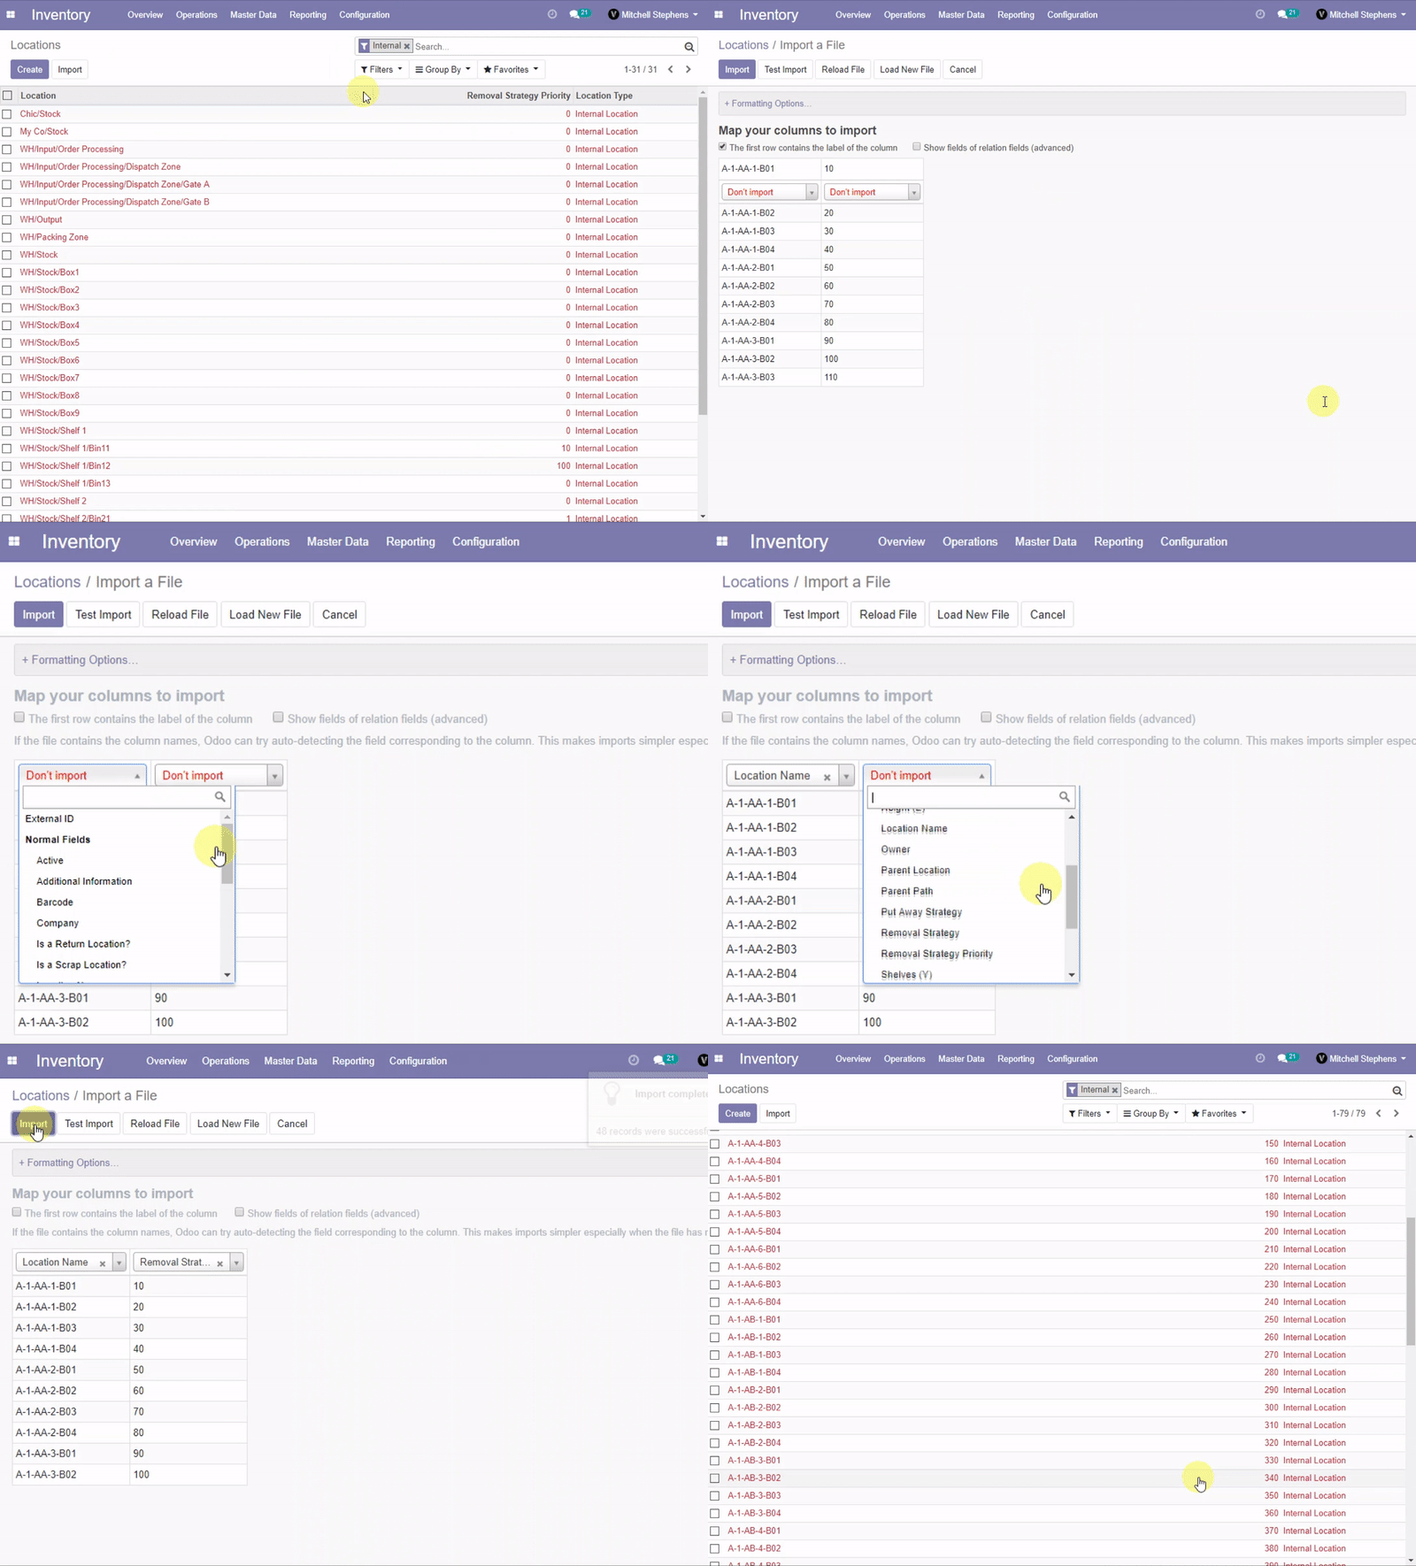
That is it, now your system knows the warehouse configuration and can calculate optimal routes for pickers, either for picking goods for only one order or picking items for multiple orders at once (batch or waves picking).
The module Ventor Outgoing Routing for Odoo also allows setting up additional strategies for route calculation, depending on selected strategy and order (ascending or descending):
- sort by names of source locations in alphabetical order
- sort by location removal strategy priority
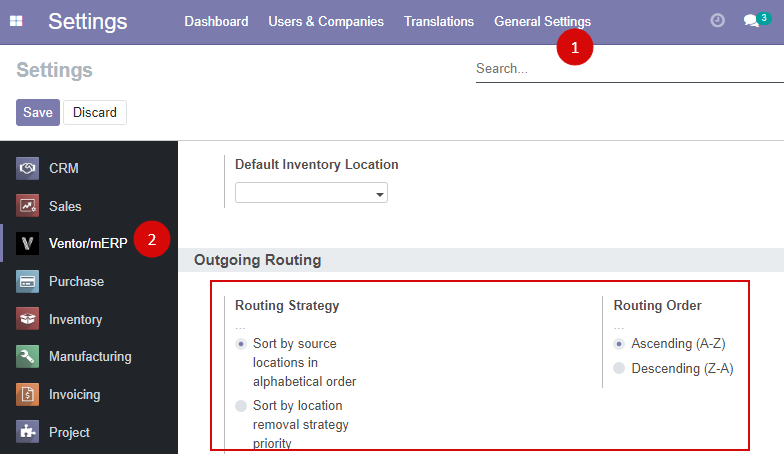
4. Pick items with a barcode scanner
As soon as your warehouse map is configured in the system, we can pick our first order. Let’s do this based on the example of already reviewed Odoo WMS.
a. Install the Ventor app and log into your system
Ventor is the only native Android mobile app developed specifically for barcode scanners. It allows to easily connect your handheld computers to Odoo WMS in order to assist your warehouse workers with warehouse operations.
You can download the app here. Follow these instructions to connect your barcode scanner to Odoo.

b. Open a picking order and start picking
Go to ‘Warehouse operations’ > ‘Picking’ > find needed order or scan its barcode.
The app calculates an optimal route based on your warehouse map and locations priority.

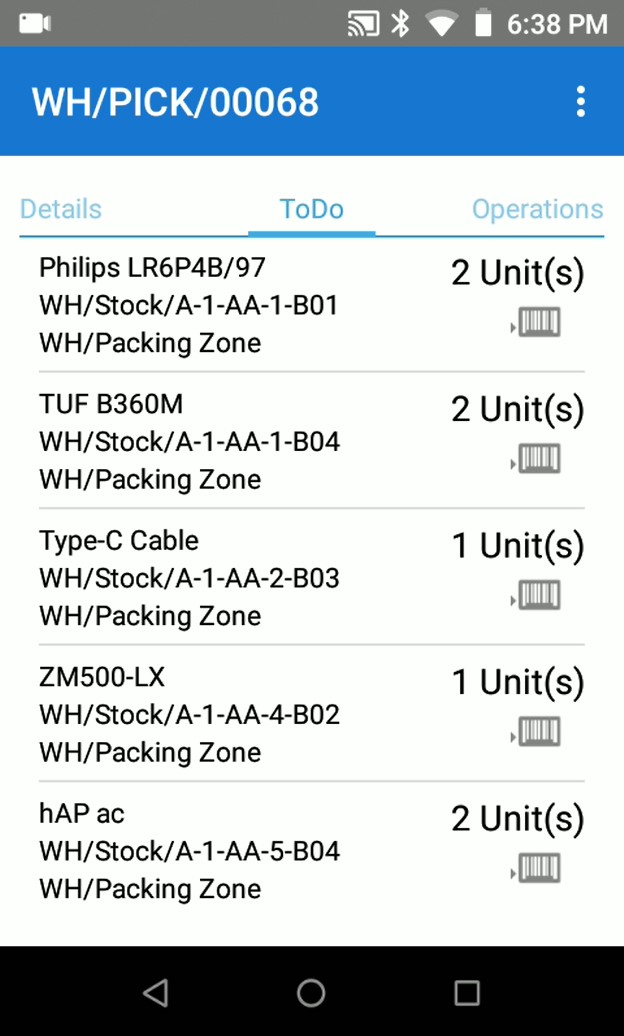
On the screen of the handheld computer a picker sees to which location he or she should go and which item to pick.
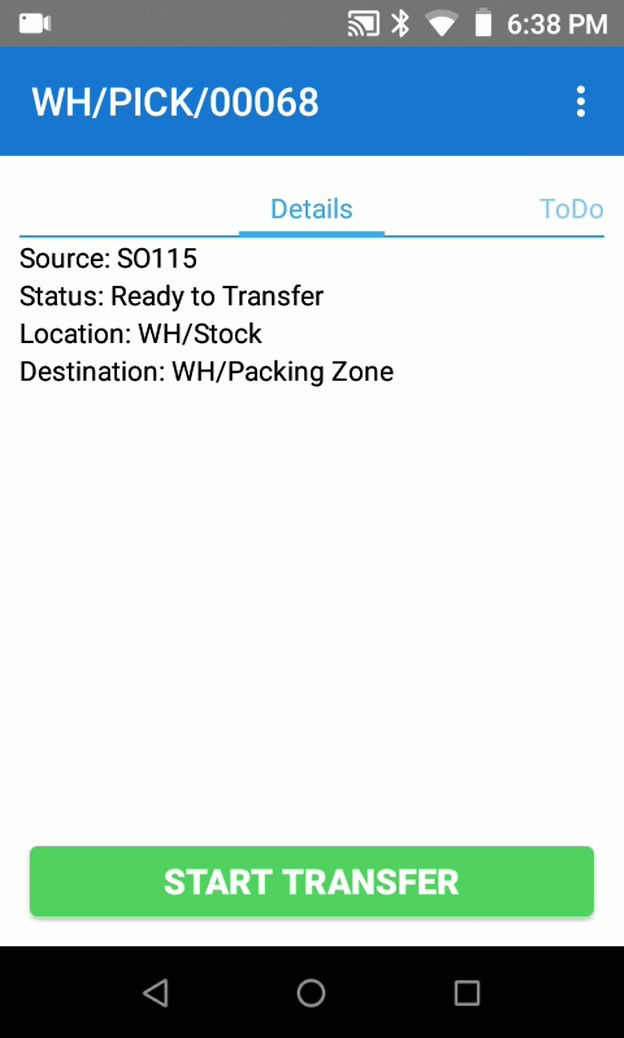
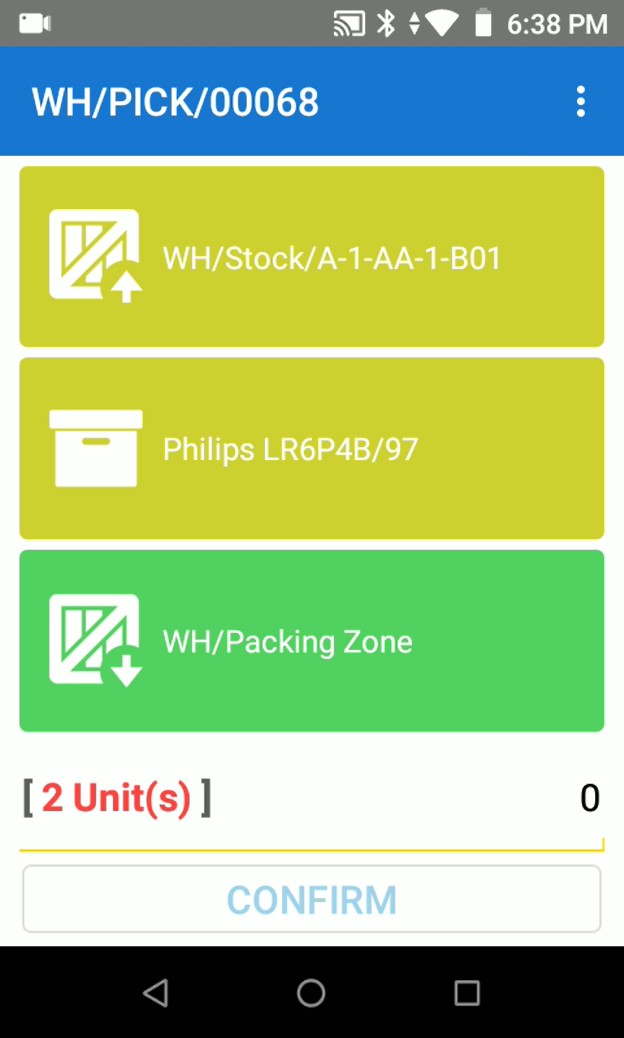
c. Scan product and location
Now scan suggested product and location using hardware buttons on your device. Input the quantity or increment by scanning. Then go to the next location.
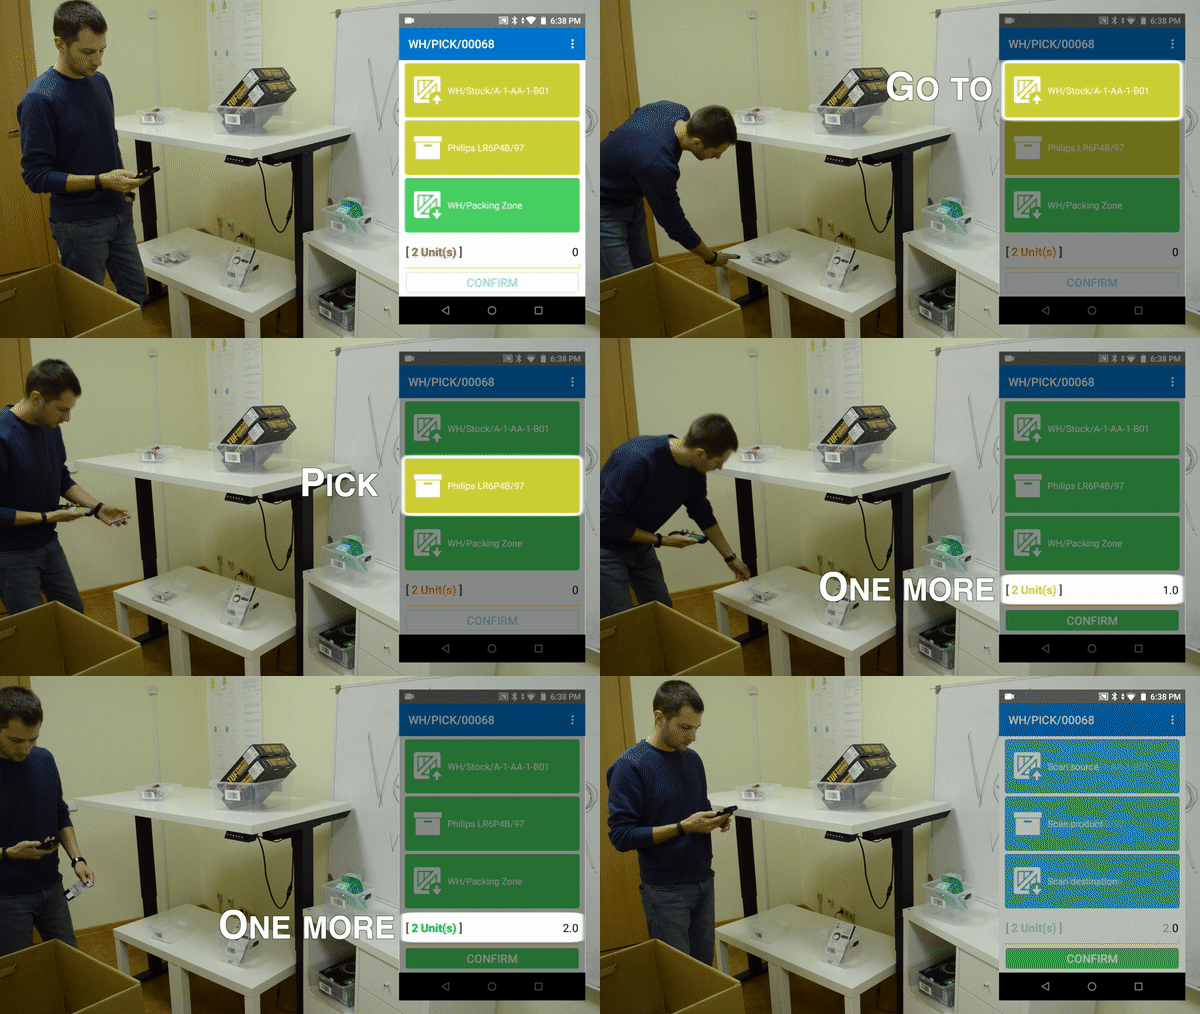
d. Complete picking
After picking all items and clicking confirm button the picking is validated.
So, a picker passed through the warehouse in the optimal way and visited each location one time only. Now the items can be moved to a packing zone and the picker can start next picking.
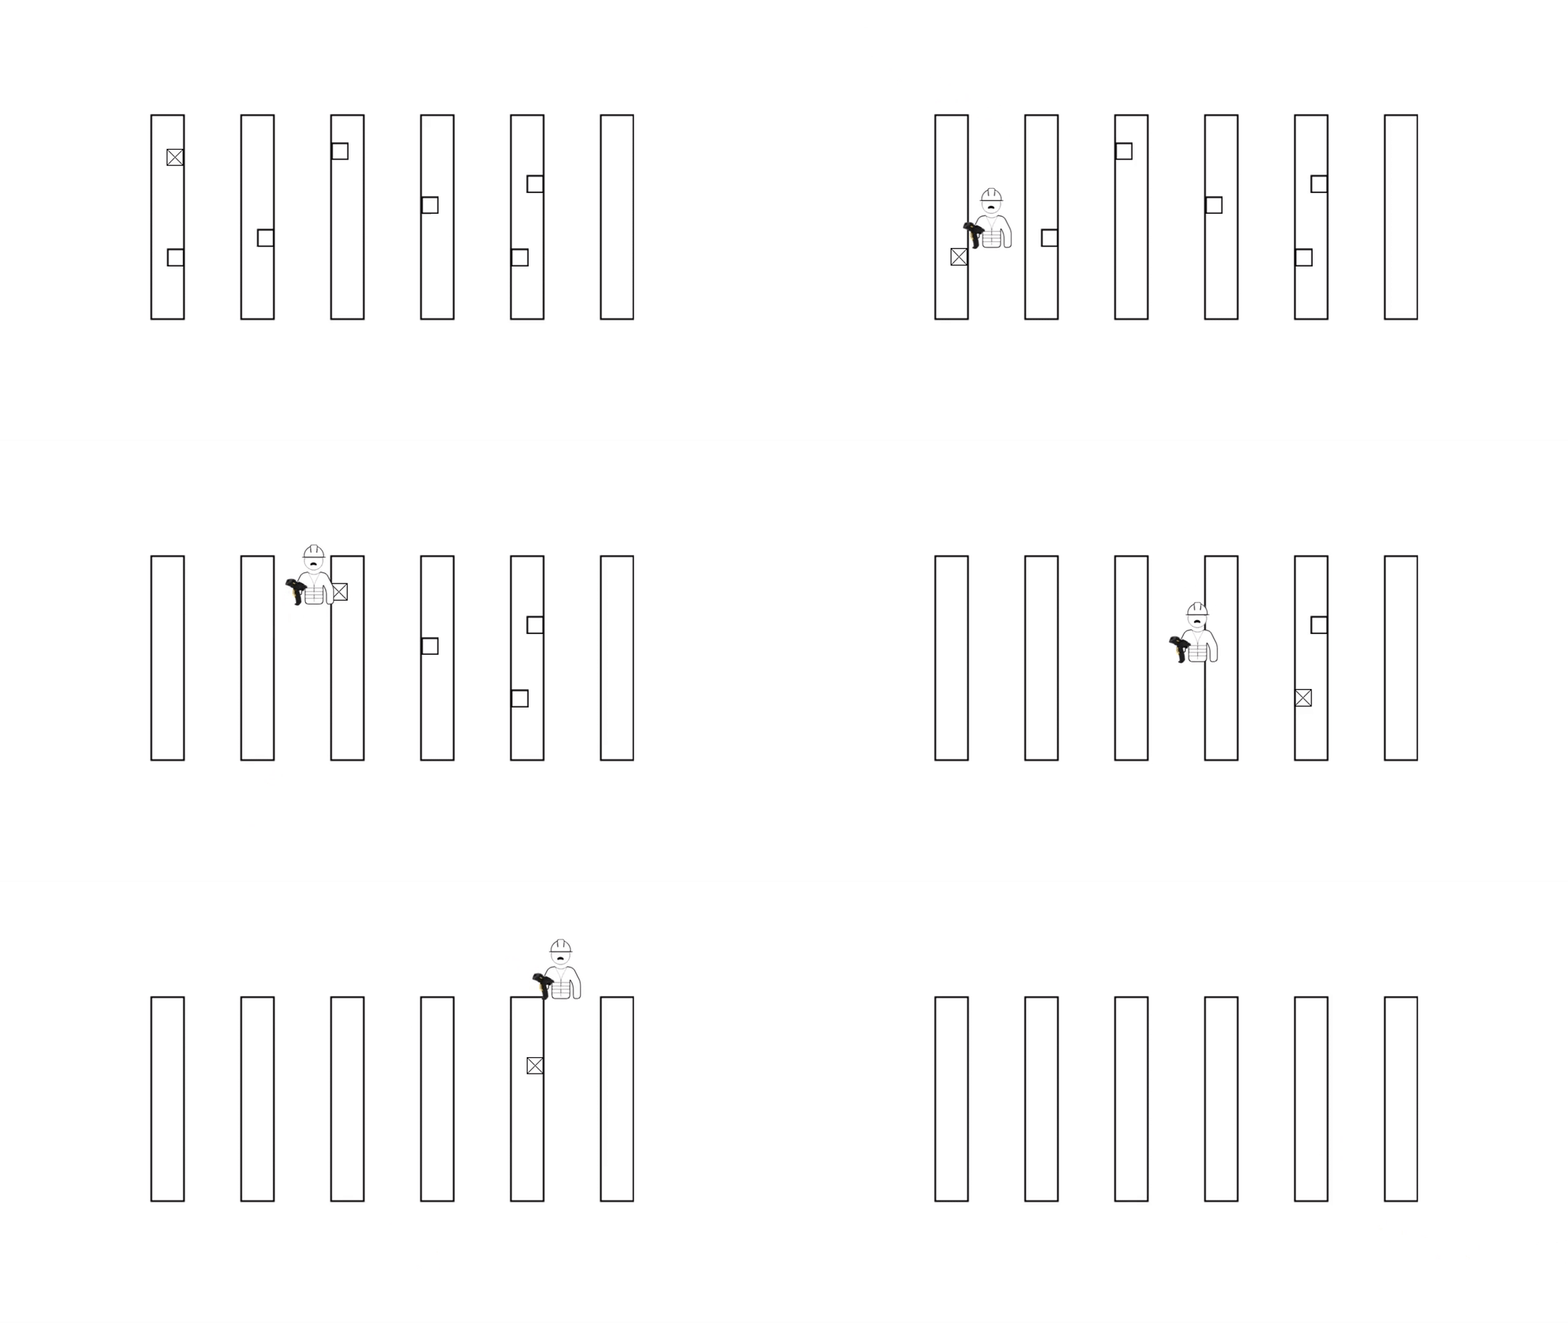
The Ventor app allows you to also pick multiple orders at once using Batch picking and Cluster picking features.
Warehouse optimization equals income increase
Minimization of unproductive travel around a warehouse is one of the main challenges in warehouse processes optimization. It can significantly reduce time of goods dispatching to your clients, speed up goods movement, and therefore increase your income.
Now you can configure location priority for your warehouse, and automatically route your workers in an optimal way to minimize walking.
Try Ventor For Free With Your Odoo Instance
Related service – Estimate automation of your business
Follow us on Twitter and subscribe to our newsletter and YouTube channel to make sure you don’t miss updates.
Photo by King County
Recommended articles:
