Intro
In this article, we will show you how to receive items into a warehouse using an android-based barcode scanner (or an android mobile phone). We will use Odoo ERP and android mobile app Ventor (formerly mERP Warehouse) to receive items from a purchase order (PO) without web interface interaction. If you do not already have the app, you can download the Ventor Pro here (free 14-day version)
Odoo and Ventor interface
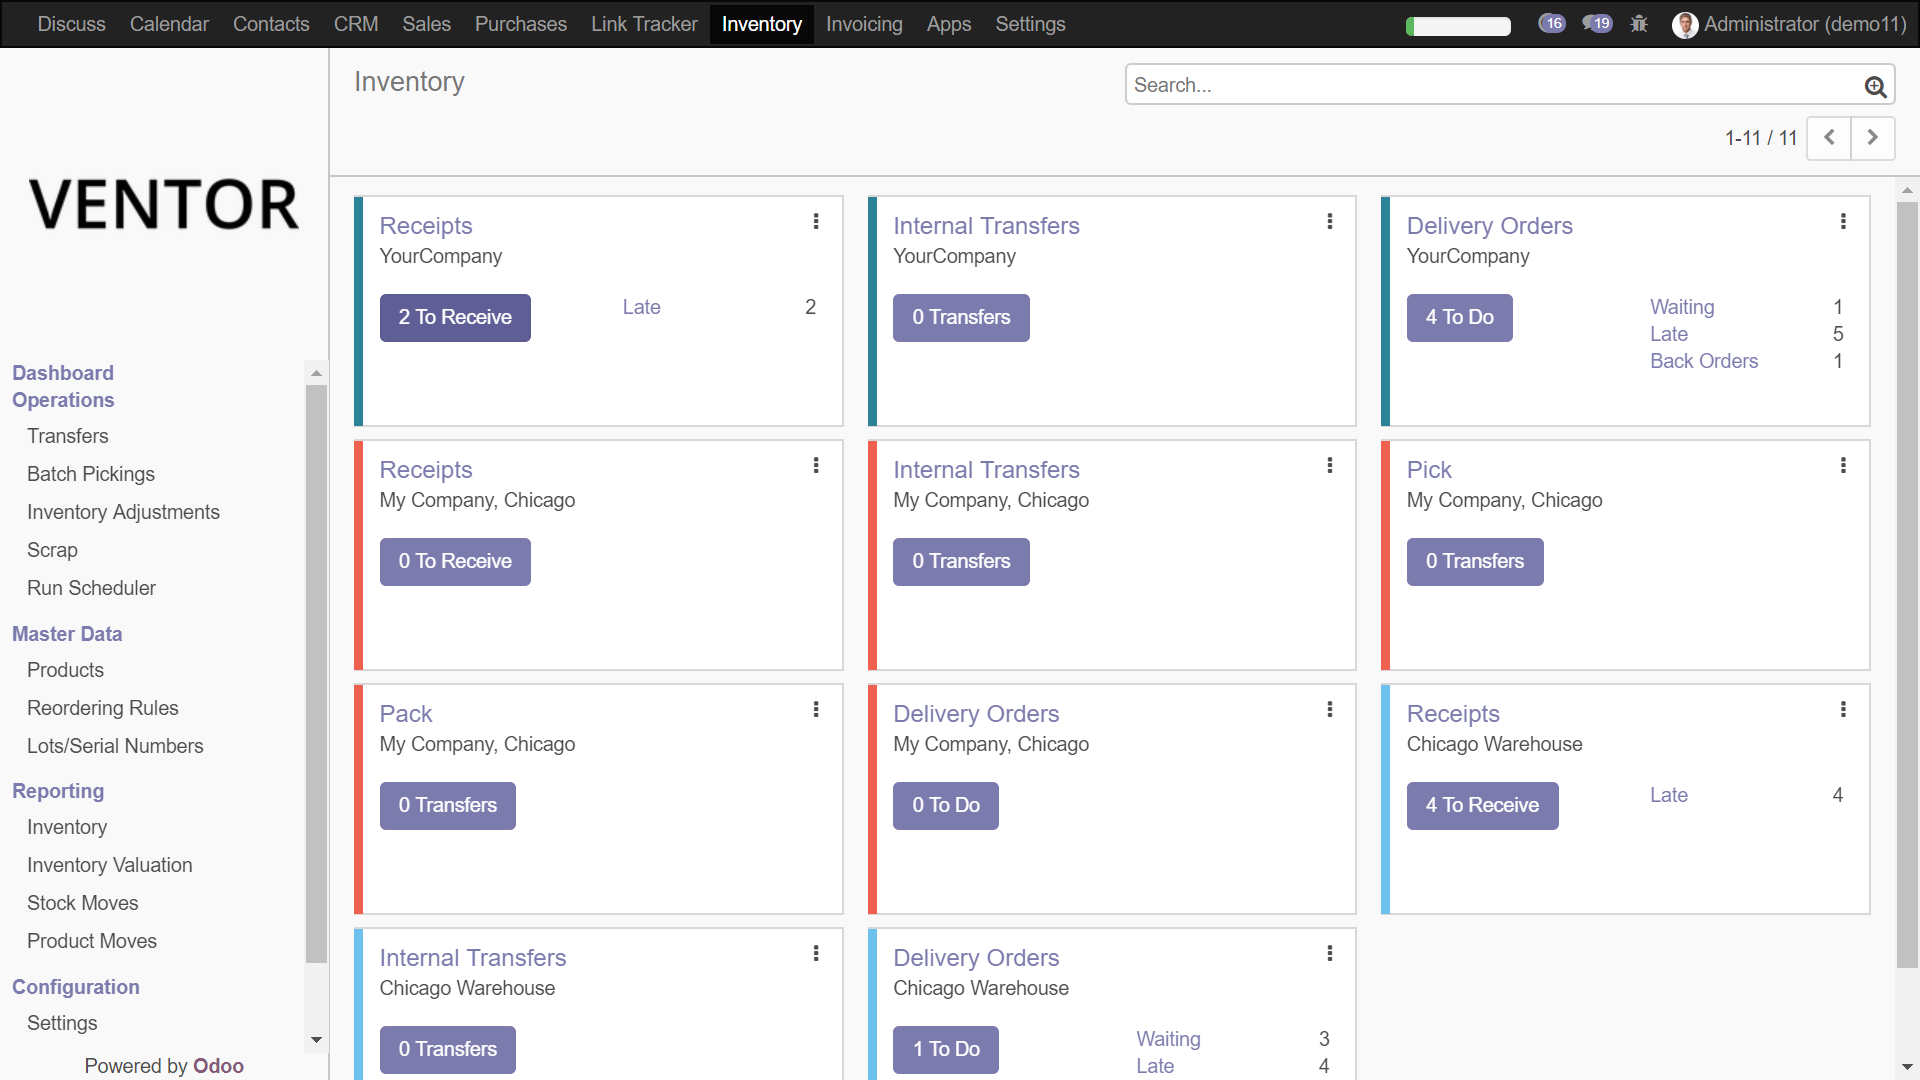
When items arrive at the warehouse from suppliers, we need to know the correlating PO’s number to check the arrived goods and put them away inside warehouse. Let’s start from the Odoo dashboard. Open your Odoo ERP > Inventory App > Receipts. There you will find all the transfers you will process to receive items from different suppliers. At this stage, you can compare the Odoo interface with the mobile interface of Ventor.
Open your Ventor app on your mobile phone or android barcode scanner (check out a full list of supported devices here).
To login to Odoo instance via Ventor, you will take the following steps:
1. Open the app
2. Insert your server URL
3. Click on “Start” to connect
4. Insert the database’s name
5. Enter your user login and password
6. Click on “Login”
Use the “Odoo SAAS Login” button for logging with your Odoo account.
Click on the “Contact Us” button to drop us an email.
After successful connection, you will see the main menu of the app.
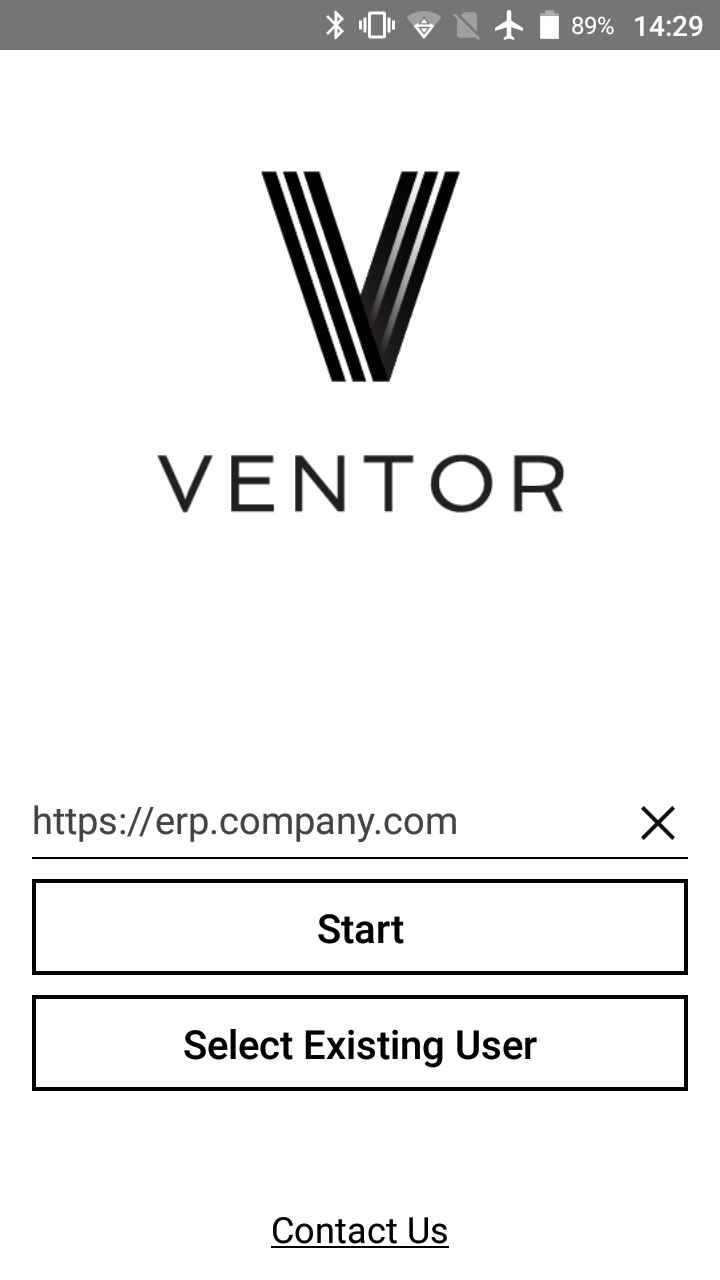
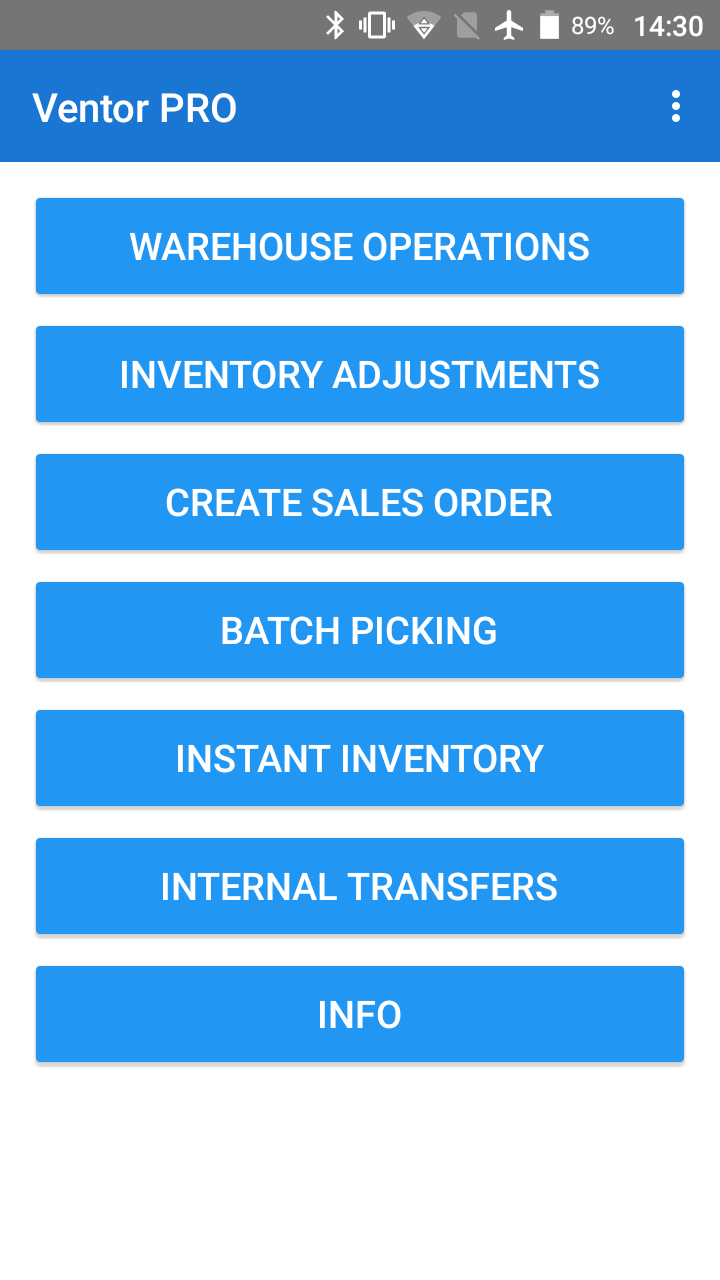
Ventor App Login and Main Menu screens
Receiving items with Ventor
Watch this video:
Or follow these instructions:
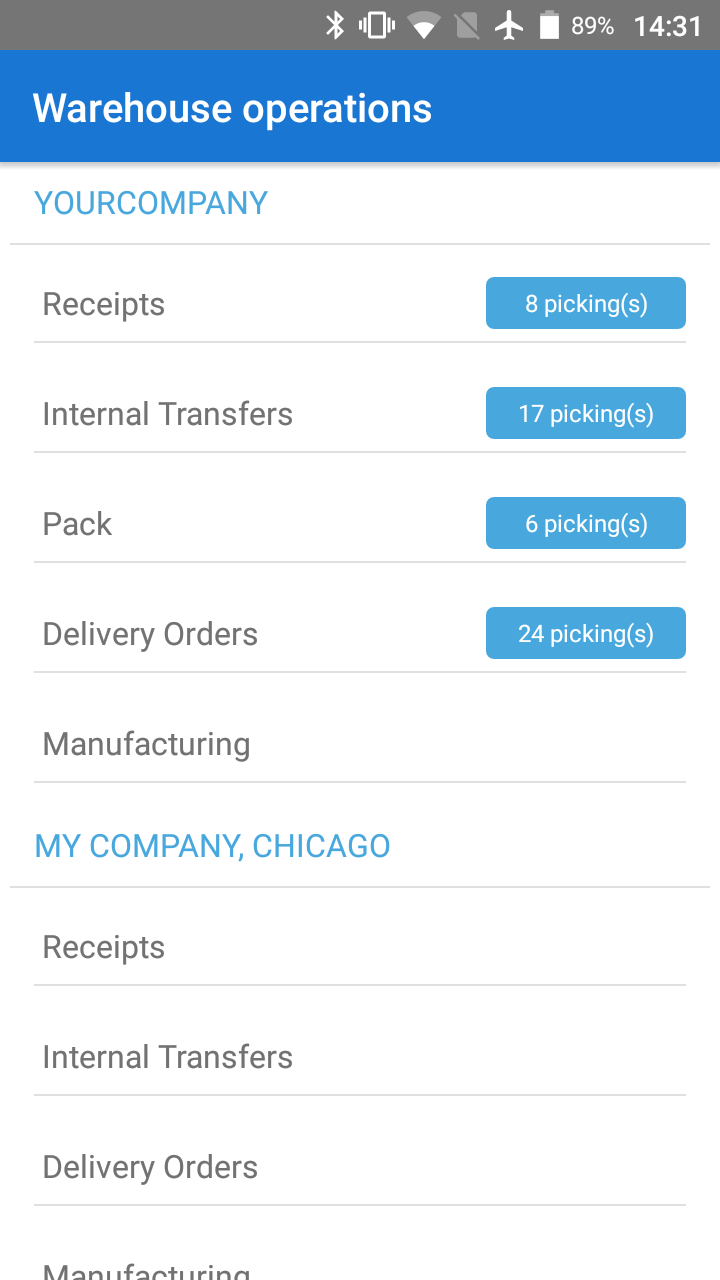
The warehouse operations menu is a full version of the Odoo Inventory Dashboard. The dashboard shows all warehouses and their operation types (i.e., zones such as Input, Picking, Packing, etc). In most cases, you have one warehouse and three zones: Receipts (to receive items in stock), Delivery Orders (to dispatch items from stock) and Internal Transfers (for internal movements), as the default configuration.
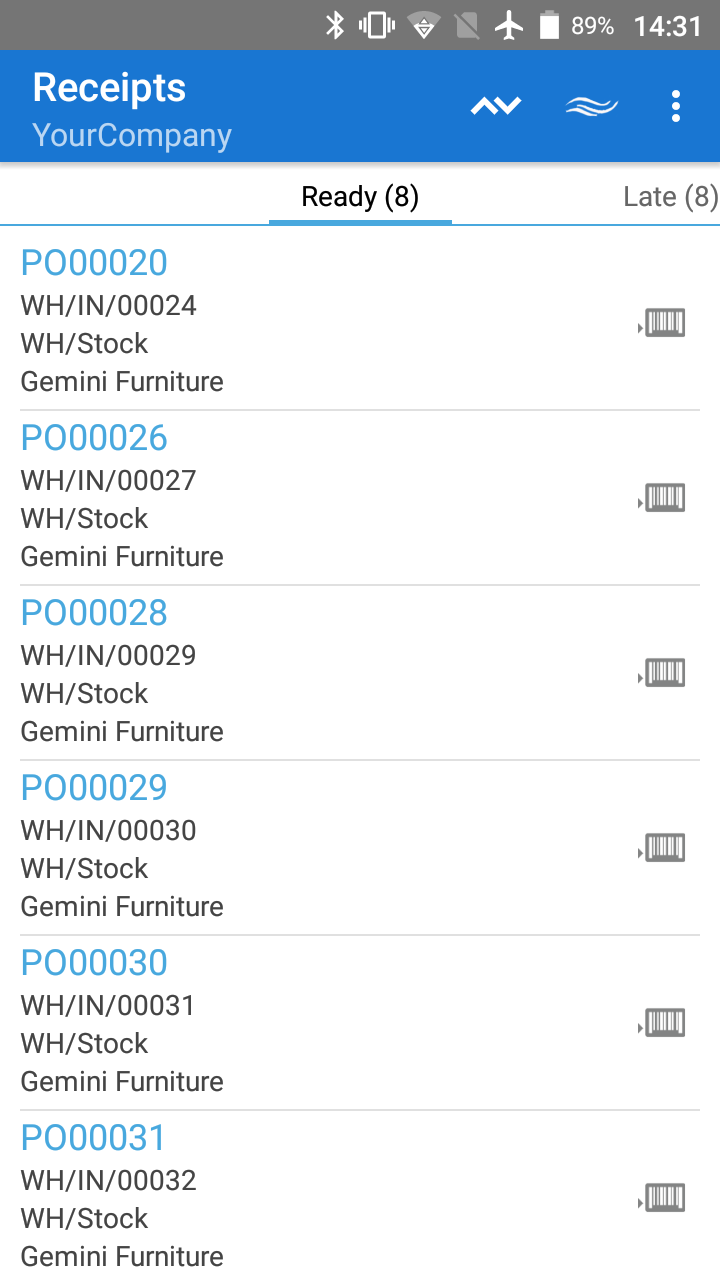
Click on “Receipts” to see all the available transfers linked to particular purchase orders. There you will see a list of transfers showing PO numbers, transfer numbers, supplier names and destination locations. You can also use search to find a specific transfer. Click on any transfer to start the receiving process.
Step-by-step receiving process
1. Open the Warehouse Operations menu
2. Select the warehouse (for example, YourCompany) and open Receipts to see transfers
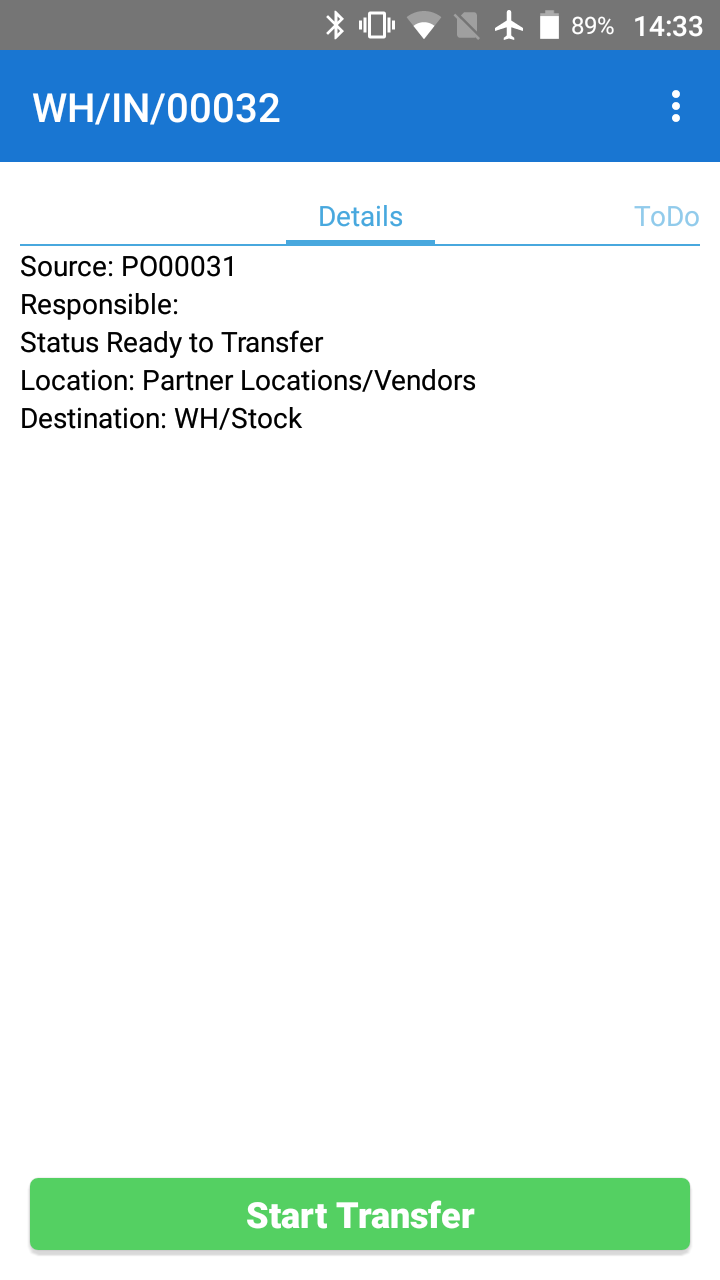
3. Find and open a transfer you need to process (you can search by scanning a related purchase order)
4. Open the transfer and click on “Start Transfer”
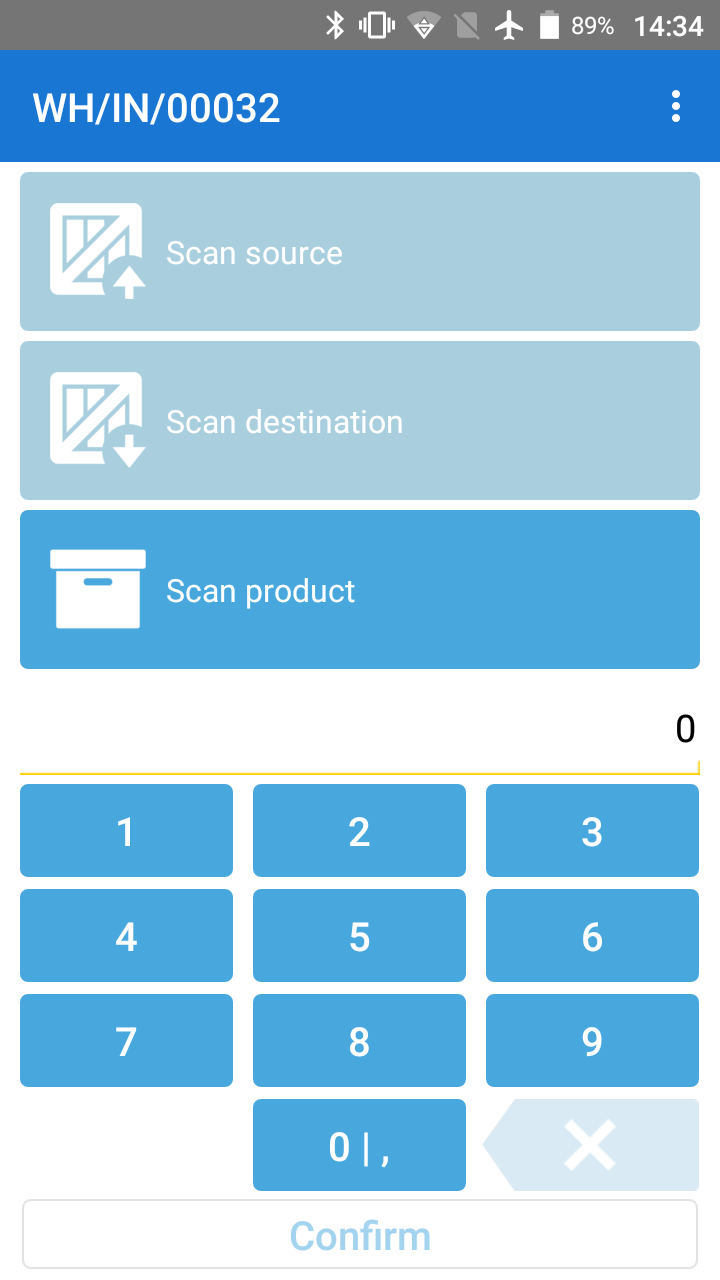
5. Click on “Scan product” or push a hardware button on professional scanners
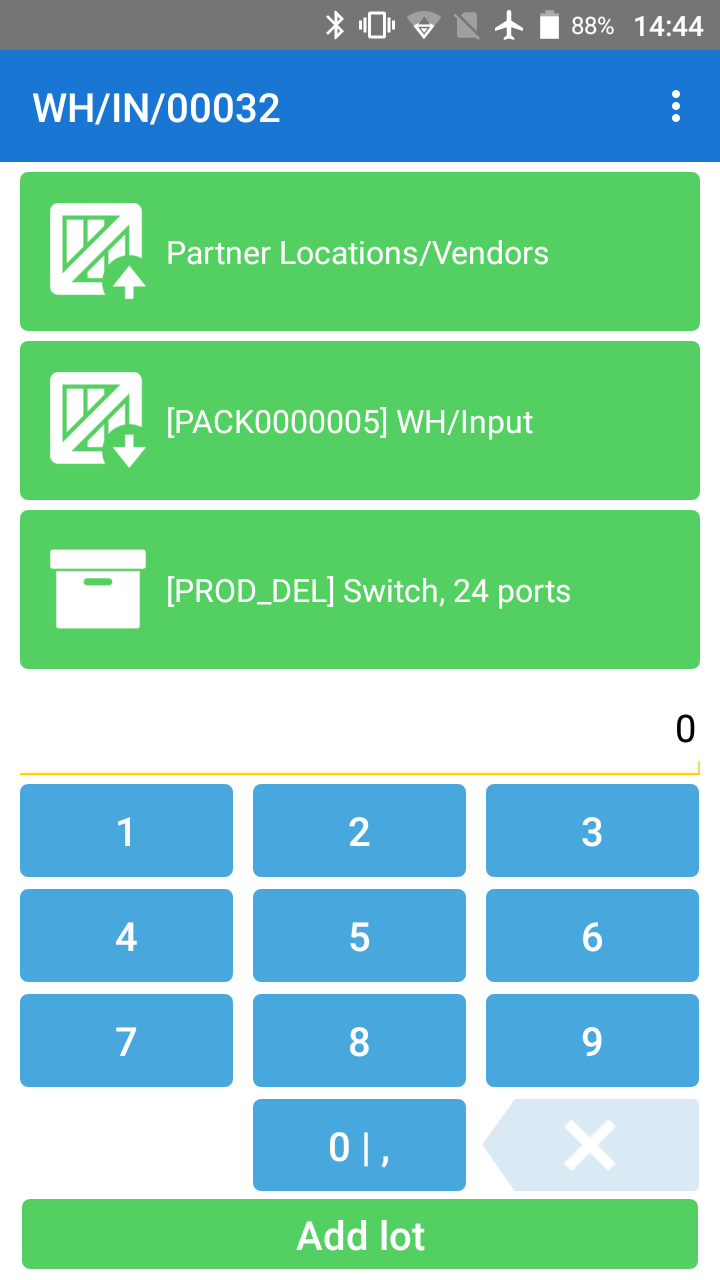
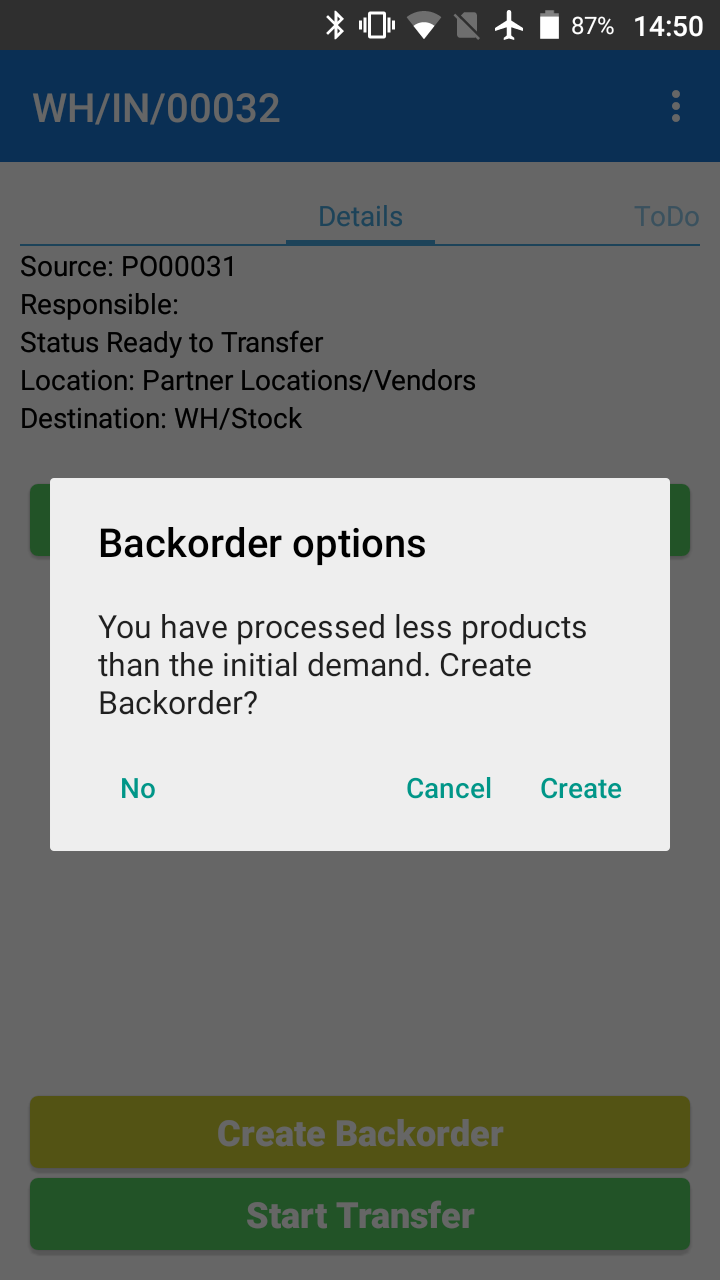
6. Scan an item from the transfer
7. Change QTY of product and click on “Confirm” to finish transfer
8. If you do not have enough items after processing the last item, the app suggests to create a backorder. Also, the app notifies you if a product is tracking by serial or lot number. You can add it during reception
9. Then, you can continue the receipt process with the next product until all products are received
Settings of zones
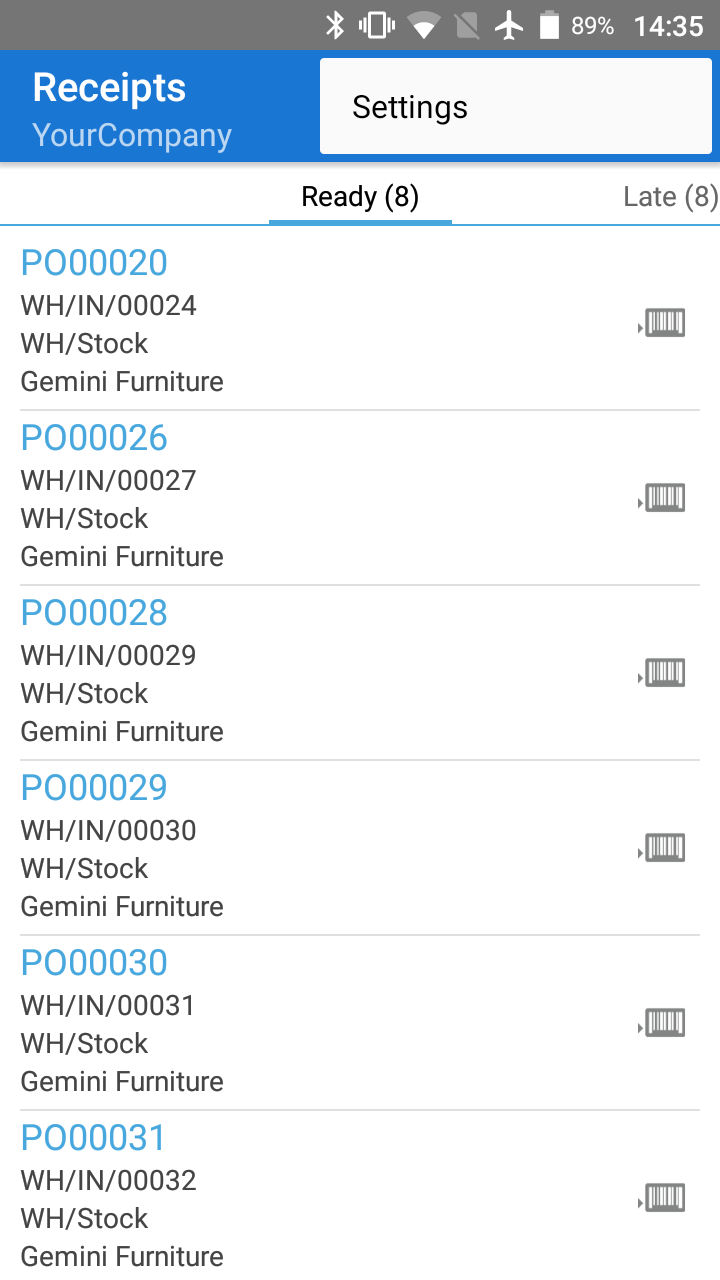
Each zone (receiving, delivery, etc.) has its own settings. Go to the particular zone and open settings by clicking on the three dots at the upper right-hand corner.
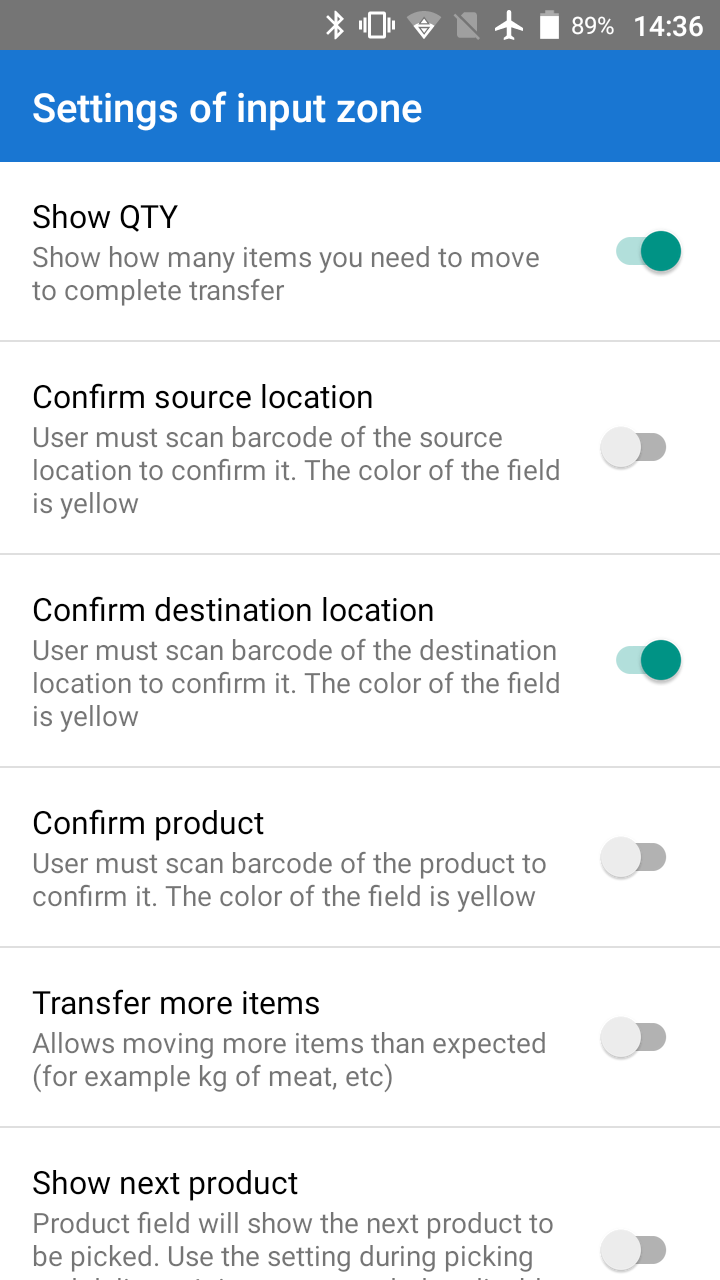
Confirm product source and destination locations
Allows a forced validation to be made by using additional scanning of each field. This function is not activated by default but can be configured for each operational type.
Suggest next product
Suggests where to pick the next product from the picking list. This feature is not activated by default and is usually not active at the receipt zone but active on any other zone to help the picker see the next produсt and a location where the items are located. The picking process has become straightforward and simple for a picker of any experience level.
Conclusions
Now you know how to receive items from your vendor using a barcode mobile computer and the Ventor app. Using the app allows you to easily receive items and have full traceability of incoming goods in your warehouse, even without Odoo web interface interaction.
Feel free to leave your comments about inventory management in Odoo below. You also can test the app on your Odoo instance (Odoo v8 and higher) here.
How else the application may be useful for your warehouse
Follow our twitter account to don’t miss updates
Photo by Zebra Technologies
