Every business is unique and has its own specific needs. Some of them have a workflow where a customer walks together with an employee through a shop or warehouse and fills a cart with products on the go (E.g. building materials business or small wholesale distributor). The employee makes a list of purchases and then transfers it from paper onto an ERP system to make an invoice, start the accounting processes and update stock counts.
If this is what your business looks like and you want to avoid a routine paperwork by automating your sales workflow, this article is for you as we will show you how to create a sales order directly from your warehouse.
Creating a sales order using Ventor
We will emulate a case where a customer shops together with a sales or warehouse worker while walking through the shop. The customer looks through the stocks and puts needed items into a cart. The employee has to track all the picked items in the system and prepare a sales order by the moment the client has finished his shopping.
The workflow described below uses Odoo ERP and the Android mobile app Ventor, which connects barcode scanners to the ERP system.
Prerequisites
Make sure a warehouse worker who works with Ventor has the appropriate access rights and settings.

User case
1. The user takes a scanner (or a mobile phone or a mobile phone connected with a barcode reader) and goes to a warehouse or a shop (possibly together with a customer) to pick products and create a sales order on the go;
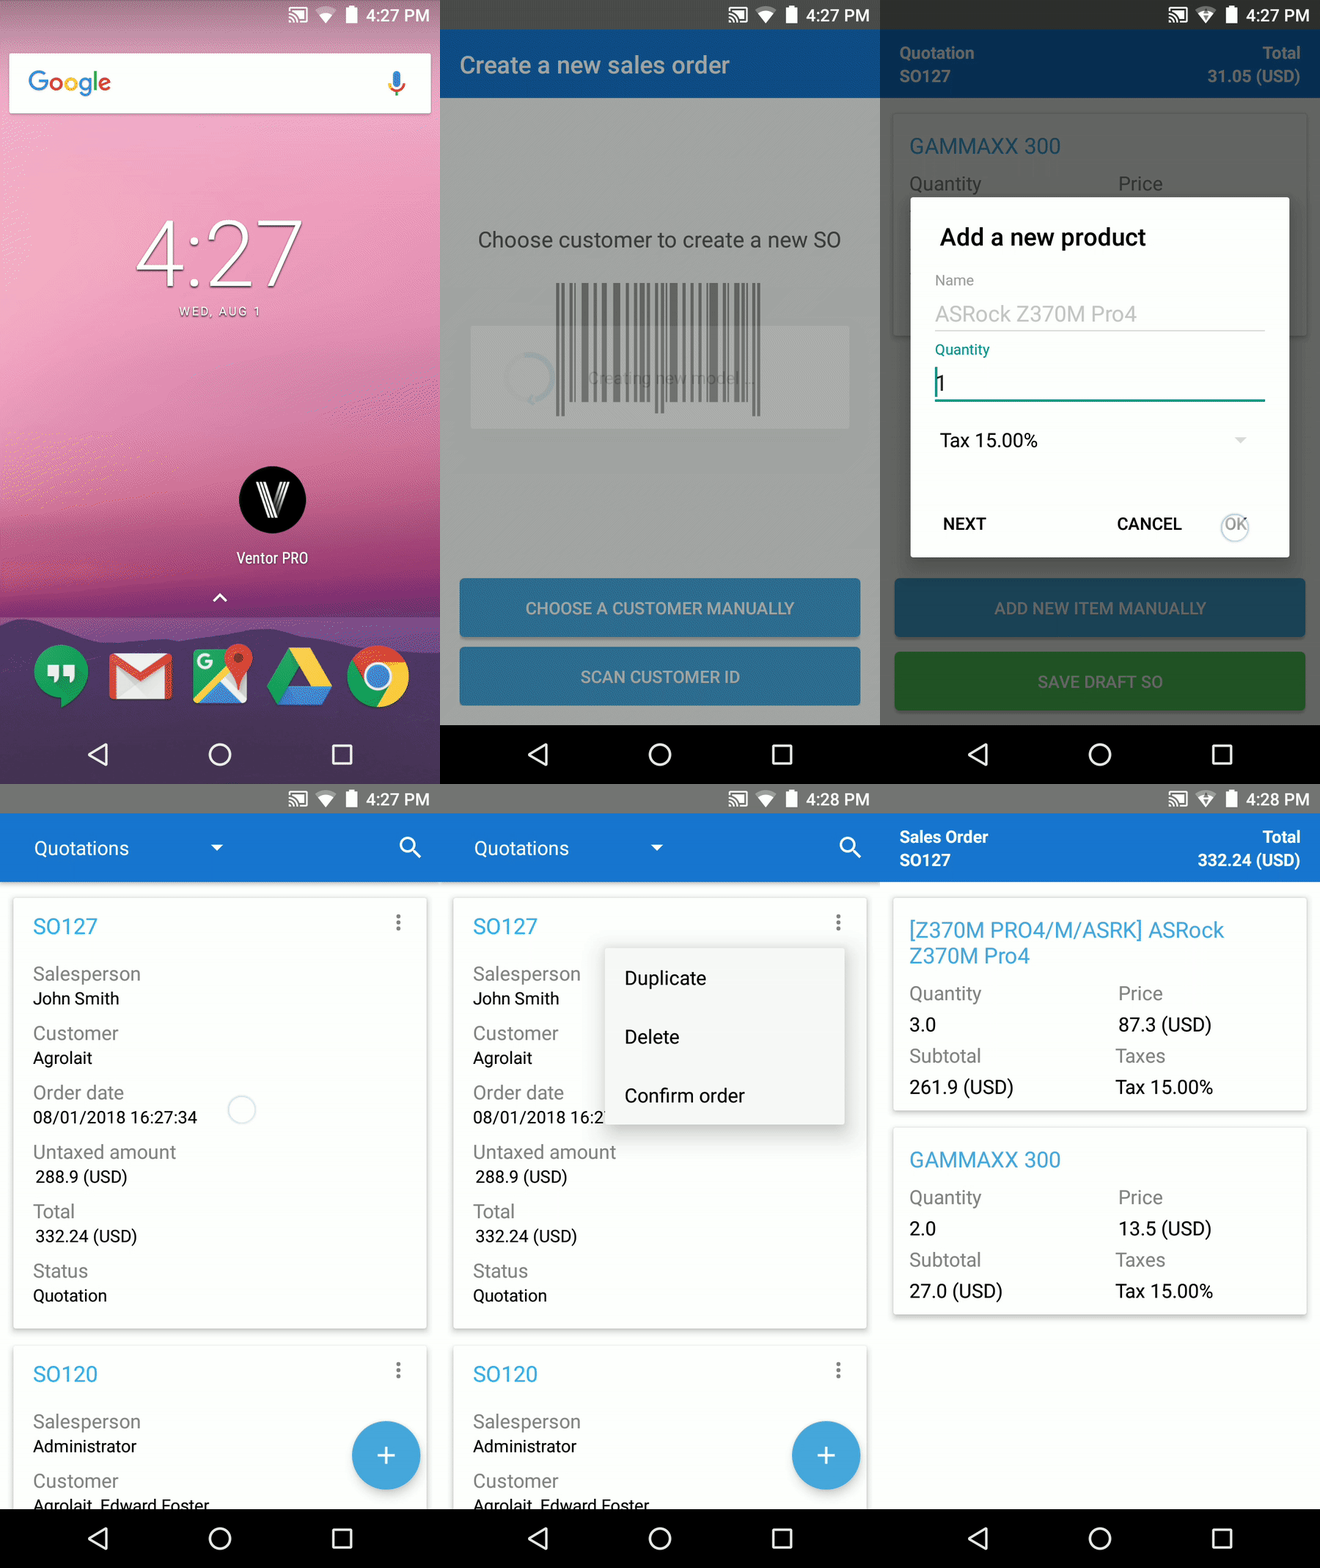
2. He opens the Ventor app, logs into the system and clicks “Create Sales Order” on the main screen and “+” to create a SO;


3. On the next screen the user has to choose a customer. He can select it manually from the list or scan a customer id barcode;


4. Then, the user adds products to the SO by scanning product barcodes (in case of using a laser barcode scanner you simply need to click on the built-in hardware button to activate the laser scanner and scan the item);


Note, if you need to add a few items of the same product, firstly scan a barcode once and click “OK” on the screen above. Then you can scan the product again and the quantity is increased (see the screenshots below). Or can just use a keyboard.


5. The user adds all needed products and clicks “Save draft SO”. Now it is saved as a quotation and appears in the list of all quotations;


The quotation can also be found and edited in your Odoo ERP web version.

While it is still a quotation, the user can edit it via Ventor as on Odoo side.
6. Now a sales manager can confirm the quotation on the Odoo side, or our user can also confirm it via Ventor (if he has appropriate access rights);


7. After the order is confirmed, the system creates transfers and warehouse workers can manage them via “Warehouse operations” in the Ventor app.


Conclusion
Now you can simplify your sales workflow in Odoo with the Ventor app and get rid of paperwork. It became possible to create sales orders on the go, which speeds up goods movement in your warehouse.
If you still have questions about creating SO and PO in Odoo, please feel free to leave your comments below.
Try Ventor For Free With Your Odoo Instance
Follow our twitter account and subscribe to our newsletter to make sure you don’t miss updates.
Photo by Zebra Technologies
